You want people to find a home, contact your agents, or send a rental request from their phones. You may be starting with an idea, or you may already have a property website that needs a mobile app. Either way, the first version needs a clear job and listing data you have the right to use.
With Bilt, you describe that app, check the native iOS and Android version in a live preview, and ask for changes through conversation. You make the product decisions and test the results. Bilt builds the app and guides you through publishing it.
What building a real estate app involves
A real estate app has to connect what someone sees with the listings and actions behind it. The shape changes for buyers, renters, agents, property managers, and investors.
The product has these layers:
- Market: the intended user, property category, and way the app makes money
- Inventory: listing records, availability, and property media
- Discovery: search, filters, and location
- Action: saved properties, direct inquiries, applications, or follow-ups
- Clients: native iOS and Android apps, plus any connection to an existing web product
Investment apps add property calculations to that foundation. Their results need to reflect both the listing and the assumptions each user enters.
Photos and virtual tours help someone evaluate a property.
First-time builds often stall when accounts, property records, search, and saved items stop behaving like one journey. A saved home that never appears on screen can break the experience even when the save itself worked.
1. Define users and the build route
Start by naming one primary user, the job they open the app to do, and the problem blocking that job. Then choose the route that matches what already exists.
- New idea: describe the intended result in plain English, starting with what someone should be able to do.
- Unfinished app: identify the working screens, the broken journey, and the point where progress stopped.
- Existing web product: name the web flow that should become native, along with any mobile-specific behavior it needs.
Turn that starting point into a compact brief:
- Primary user: buyer, renter, agent, property manager, or investor
- Core job: the result they want from one visit
- Current problem: what makes that job slow, confusing, or incomplete
- Outside inputs: property feeds, website content, or services the journey depends on
- Listing source: choose your own listings, a brokerage’s MLS feed, or a portal feed. An MLS (Multiple Listing Service) holds regional property listings in the US, and only licensed brokers who actively list property can join. If you need MLS data and you’re not a broker, name the broker who will sponsor your feed before designing screens.
For example, a buyer’s brief might say: “Help first-time buyers find homes within their budget and contact the listing agent. Use listings from our brokerage feed and let buyers save homes they want to revisit.” That gives the first version a user, a job, and a source of property data.
Use supporting material to make the starting point concrete:
- Brand assets: gather the logo, app icon, and color preferences that should guide the first version.
- Existing product: identify the web screens and working flows that should carry into the native app.
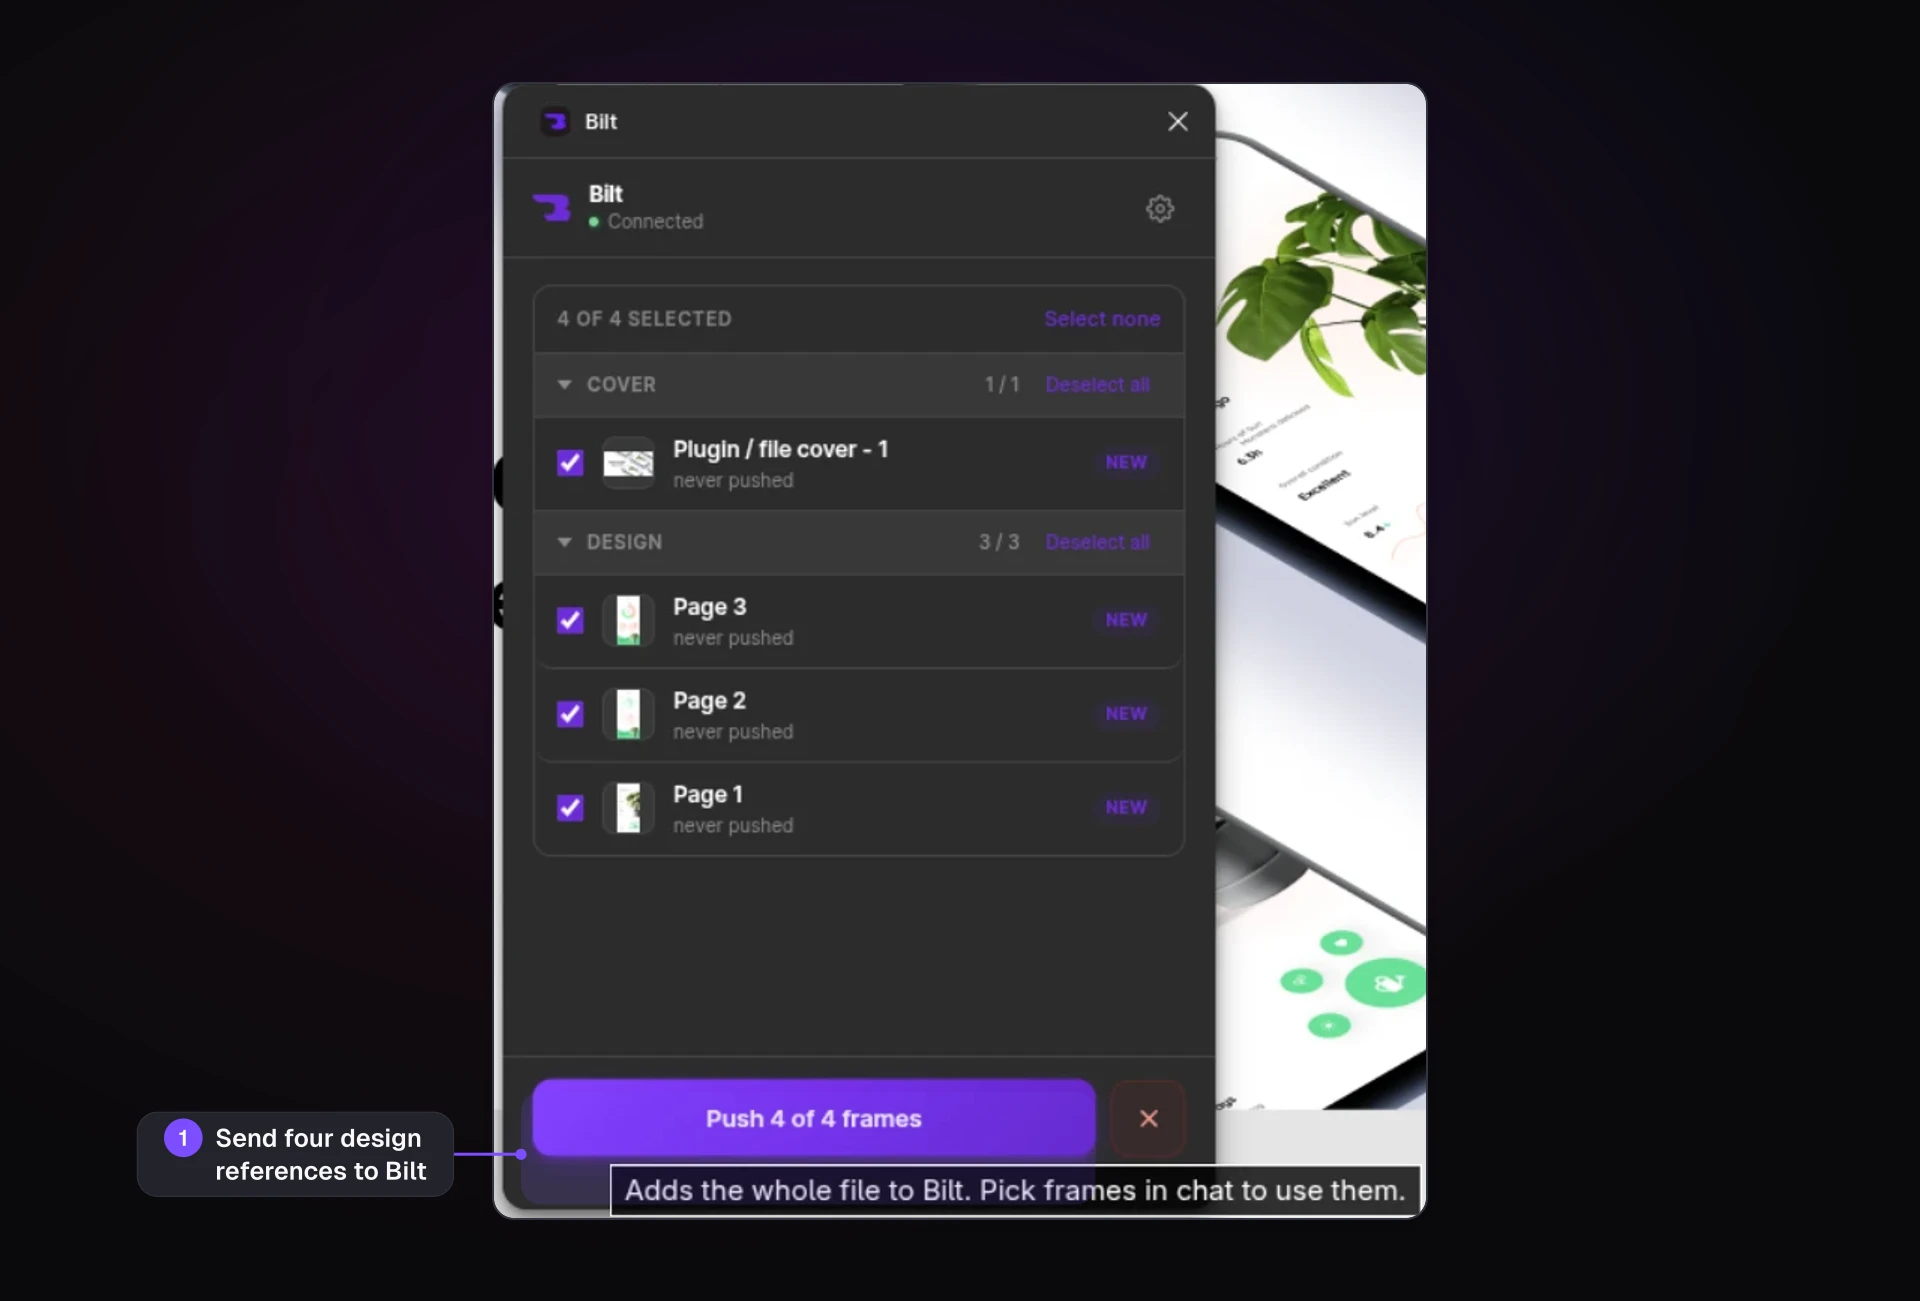
- Source access: prepare a GitHub account if you plan to work with exported React Native code later.
- Images: gather property photos and brand images you have permission to use.
- Website: keep the existing product’s URL with your brief.
- Figma: keep any Figma designs with the brief as a visual reference.
The brief is a working decision record. It keeps the app's purpose next to the information the first version needs.
2. Define the MVP and journeys
Your MVP, or minimum viable product, is the smallest first version that lets the primary user finish the job named in the brief. It should prove one complete journey from opening the app to a useful result.
That path changes with the product:
- Listing: search → property details → save → contact agent
- Rental: browse → rental details → start an application
- Agent CRM: open lead → record follow-up → update status
- Property management: open request → assign work → mark resolved
- Investment: review property → enter assumptions → save comparison
For a listing app, turn the chosen path into five screens:
- Search: enter a location and the filters needed for the first use case.
- Results: compare matching properties and open one listing.
- Property details: review the information needed to decide whether to save or inquire.
- Saved properties: confirm the selected home appears and can be reopened.
- Contact: send an inquiry and show that it was received.
Record four decisions for each screen:
- what the user sees
- the action they can take
- the property or customer information required
- the state that confirms the step worked
Keep secondary experiences outside this first path unless the core job depends on them:
- map-based discovery, unless your users choose homes by area first, in which case the map is the search screen
- virtual tours
- mortgage calculators
Planning is complete once every screen has one purpose and the path has a clear endpoint. Someone new to the app should be able to follow the journey and tell when it worked.
3. Plan property data and compliance
Start with a record map that shows what the app knows, where each record comes from, and who may change it. Set these rules before connecting a listing feed or adding AI.
Define four record groups:
- Listings: source ID, address, status, price or rent, media rights, attribution, and last update time.
- People: account identity, role, contact preferences, consent history, and any verification status the product requires.
- Relationships: who owns, represents, manages, saves, or inquires about each property.
- Activity: inquiries, viewing requests, applications, offers, maintenance events, and the audit trail for material changes.
Choose storage by how the records are used:
- On-device storage suits drafts, cached listings, and offline work that can wait to sync.
- Server storage suits shared records, cross-device updates, permissions, and a single current version for every user.
Before using a broker CRM, which tracks customer relationships, or an MLS feed, document the source and your display rights. Referral work alone does not qualify a broker for MLS participation under the National Association of Realtors’ (NAR) MLS participation rules. Feed vendors such as Spark and IDX Broker also need each MLS’s approval before delivering its listings.
Turn every applicable display rule into an acceptance check. Confirm required brokerage attribution, agent details, IDX branding, notices, media rights, and refresh timing with the feed provider and qualified local counsel.
NAR’s IDX policy covers mobile apps. IDX (Internet Data Exchange) governs how participants display other brokers’ listings. Ask for your MLS’s own IDX rules along with the feed, because it can add requirements to this baseline:
- Refresh listings at least every 12 hours. A nightly sync is not enough.
- Show the listing firm and its email or phone prominently on every listing.
- Leave other brokers’ descriptions and photos unchanged, including when using AI.
- Hide a listing or its address when the seller opts out of internet display. Use
InternetEntireListingDisplayYNandInternetAddressDisplayYN, fields standardized by RESO, the Real Estate Standards Organization. - Give people a way to report incorrect listing data.
Your MLS can also forbid seller and occupant names and contact details, showing instructions and security notes. Drop those fields when importing the feed so they never reach the app.
Outside the US, the data path changes. The UK has no MLS, so listings come agent by agent. UK listings must show material information such as council tax band, tenure, utilities, broadband and flood risk.
For UK and EU users, record consent before sending saved-search alerts or agent follow-ups. Legitimate interests often cannot replace consent for electronic marketing.
Add a compliance checklist for each jurisdiction:
- Privacy: use FTC privacy and security guidance as a starting point, then define why each personal field is collected, retained, accessed, or deleted.
- Security: classify sensitive records, require encryption in transit and at rest, and record who viewed or changed them.
- Fair housing: review AI-written descriptions, search filters, recommendations, chatbot answers and lead routing against the Fair Housing Act, including demographic proxies, which can indirectly stand in for protected characteristics. Its advertising rule bans words, photos or symbols that signal a preference by race, color, religion, sex, disability, familial status or national origin. It also covers choosing where ads run so that some groups never see certain homes. The Justice Department’s settlement with Meta over skewed housing-ad delivery shows why you must check an algorithm’s actual results as well as its intended behavior.
- Access: separate authentication, which proves identity, from authorization, which controls each listing, lead, document, or workflow.
Finish with a role map for seekers, listers, managers, vendors, and administrators. For every record, mark who can read, create, edit, approve, export, or delete it.
4. Choose the business model
Choose one primary payer and a fee tied to the value that payer receives. The choice should be clear before paid extras, advertising, or transaction services enter the plan.
Use this five-part worksheet:
- Market structure: Decide whether the app is a one-sided operating tool or a two-sided marketplace connecting property seekers with listers.
- Primary payer: Name the consumer, agent, landlord, owner, or advertiser responsible for the first dependable revenue stream.
- Fee type: Choose a subscription, listing fee, lead package, referral fee, transaction fee, or sponsored placement.
- Charging unit: Define whether billing follows an account, property, active listing, qualified lead, or completed deal.
- Commercial rules: Write down trials, cancellations, refunds, failed payments, fee changes, and who handles disputes.
Interview the payer and the supply-side user separately because they may value opposite outcomes. A seeker may want broad inventory while a lister may pay for qualified responses and faster follow-up.
Then model contribution per charging unit:
- Revenue collected from the account, listing, lead, property, or completed deal.
- Platform usage associated with keeping that unit active, including listing-feed fees per MLS and map search requests.
- Payment, app-store, support, review, and fulfillment costs attributable to it.
- Refunds, credits, or partner shares that reduce retained revenue.
Set a maximum platform cost per active listing or lead, then test the model at low and higher usage. This exposes plans that appear profitable until searches, media, messages, or AI requests increase.
Referral and commission models need brokerage and jurisdiction review before entering the product plan. If you plan to earn fees by sending users to lenders, title companies or other closing services, check RESPA Section 8. RESPA, the Real Estate Settlement Procedures Act, bans fees for referring that business on most home loans.
Don’t plan a buyer-agent commission field from the MLS. MLSs have carried no offers of buyer-broker compensation since August 17, 2024.
Fractional ownership or tokenized interests, which divide property ownership into shares or digital tokens, create a separate regulated product that needs specialist legal advice.
5. Plan property-management operations
If the app will manage properties, plan each operational event with a requester, accountable owner, target time, completion evidence, and escalation path. This turns property management into workflows the app can support from day one.
Use this responsibility map before deciding which screens to build:
| Workflow | Starts with | Accountable owner | Complete when |
|---|---|---|---|
| Inspection | Schedule and property checklist | Manager or inspector | Findings have evidence, owners, and due dates |
| Maintenance | Ticket with issue, media, and access details | Manager until vendor acceptance | Repair evidence and cost are recorded, then the requester is updated |
| Rent and fees | Charge schedule or balance change | Finance lead or manager | Payment status matches the accounting record |
| Owner decision | Capex request or vacancy event | Owner, with manager follow-up | Approval or rejection is recorded with the next action |
Set service rules that match the portfolio and staffing model:
- Inspections: define cadence by property type, plus who closes each punch-list item.
- Maintenance: separate emergency and routine requests, with acknowledgment and resolution targets for each.
- Vendor dispatch: state who assigns work, approves a quote, grants access, and accepts completion evidence.
- Escalation: name the backup owner when a deadline passes or a safety issue appears.
Decide which system owns the books before showing balances in the app. The app may present current status while an existing accounting product remains the source for the general ledger and reconciliation.
Document the records that must stay aligned:
- Rent schedules, receipts, credits, and approved fees.
- Security-deposit handling and local late-fee rules.
- Vendor bills and owner-approved capital spending.
- Owner statements and property-level balances.
Give each participant a focused workspace:
- Tenants: view lease documents and balances, make payments, and submit maintenance requests with access details.
- Managers: triage requests, assign work, and monitor inspections, balances, approvals and exceptions.
- Owners: review statements and vacancy status, and approve capital work within agreed limits.
- Vendors: accept assignments, schedule access, and submit quotes, updates, invoices and completion evidence.
6. Convert an existing web app
If you already have a working web listing product, use that product as the starting point for mobile.
Bilt’s Web-to-App feature converts an existing web app into native iOS and Android apps, with the web app continuing to drive the mobile version.
Common starting points include:
- Lovable and Replit web apps
- V0 projects
- Next.js and React products
After the conversion, check what still needs mobile decisions:
- Compare the web and mobile versions to find missing screens and flows that still need mobile-specific decisions.
- Make the mobile version useful on a phone. Apple asks apps to go beyond a repackaged website, so consider saved-search alerts, a map that opens on the user’s location, or camera upload for landlords.
You can export the full React Native project and keep the readable source code. Keeping it in a repository you own means you decide who maintains the app as it grows, whether that is you or a developer you hire.
Before moving the exported app outside Bilt, list every backend, payment service, and API it uses. Confirm who owns each account and credential so the React Native project can keep working independently.
7. Generate the native first cut
Start the native first cut with one clear prompt in Bilt AI Chat. Describe who uses the app and what they should be able to do.
Video: Bilt demo turning a natural-language app description into a live mobile app preview
Then follow a short generation flow:
- Type your brief into Bilt.
- Bilt generates the app from your description.
- Inspect the live preview as screens and navigation appear, then continue prompting from what is already working.
The React Native app compiles into iOS and Android binaries, the installable files distributed through the stores. A WebView wrapper instead displays a website inside an app.
The generated foundation can include:
- Native screens and navigation
- Core application logic
- Backend integrations named in the prompt
If people will search by their current location, include the permission request in the first build. Ask for location when they choose nearby properties, and let them type a place if they decline.
8. Build the data architecture
With the record and permission decisions made, connect the app to a backend that can hold shared listing, profile, and inquiry data.
Use this architecture checklist before the app reads live property data:
- Tables: create records for listings, profiles, saved properties, and inquiries.
- Accounts: choose how buyers, agents, managers, and vendors sign in.
- Access: apply the role map from planning to control who can read or change each record.
- Files: store property photos with clear access rules, file limits and accepted formats. MLS photos arrive at the size the MLS provides, so design listing cards that still look right with smaller images while following the unchanged-photo rule above.
- Server work: keep listing synchronization and private API credentials outside the mobile app.
Use separate staging and production databases. Test records and new access rules should not touch live listing data.
Current MLS feeds use the RESO Web API, the interface your backend uses to request listing data. RESO no longer supports the older RETS standard. Pull changed listings using the standard RESO field ModificationTimestamp within the required refresh interval, and refetch photos only when PhotosChangeTimestamp changes.
Feeds usually include Latitude and Longitude, the coordinates needed to place listings on a map. That means you rarely need geocoding, which converts an address into coordinates.
Enforce the data license in code too. Prevent bulk export and set cache lifetimes, the time stored copies remain usable, to match your MLS agreement.
9. Refine the real estate workflows
Refine one real estate workflow at a time with a focused prompt, then retest the result. Name the exact change and protect working behavior. Add the relevant edge states before you rebuild.
Use the same prompt shape for every change:
- Screen and action: Name the exact screen and what the person does.
- Current behavior: State what happens now, including the point where the flow breaks.
- Desired behavior: Describe the result you expect after the change.
- Keep: Protect the parts of the flow that already work.
- States: Define what appears while data loads or when no listings match. Add error and permission outcomes where they apply.
Example prompt: “On the listing results screen, Save changes the icon, but the property disappears after refresh. Persist the save without changing the card or filters. Define loading and empty states, then handle errors and signed-out users.”
Map prompt: “On the map screen, dragging stutters on Android when many listings are in view. Cluster nearby pins when the map is zoomed out, and keep the list view and filters unchanged.”
Conversation history helps later requests follow earlier design decisions. Still, ask for one flow per message because listing feeds can fail around authentication timeouts or schema changes that a broad prompt misses.
After each rebuild, repeat the exact action and test one edge state before moving on. One change per prompt keeps each problem easy to trace.
10. Test with real users
Put the first cut on physical iOS and Android phones. Browser simulators help between device passes, not in place of them.
Even with a small test group, recruit people who resemble the intended audience, such as buyers or property managers. Give them a task and watch where they hesitate without coaching them through it.
Use this testing sequence:
- Check the browser preview. Tap through the flow in Bilt's streamed iOS simulator and cloud Android emulator to catch obvious layout problems.
- Open it on a phone. With Bilt's QR testing, you can try your app on an iOS or Android phone.
- Give one end-to-end task. Ask the tester to complete the core journey you chose, without telling them which buttons to tap.
- Record the failure precisely. Note the device and exact action alongside what happened, then turn that observation into the refinement prompt.
- Rebuild and repeat. Have the same tester retry the same flow before you change another part of the app.
If the browser and phone behave differently, use the phone result as the bug report. Test the map with a realistic number of listing pins on a mid-range Android phone and an iPhone. Custom map markers in React Native are a known source of dropped frames, which make movement stutter, and crashes.
Then deny location access and check that people can still search by typing a place.
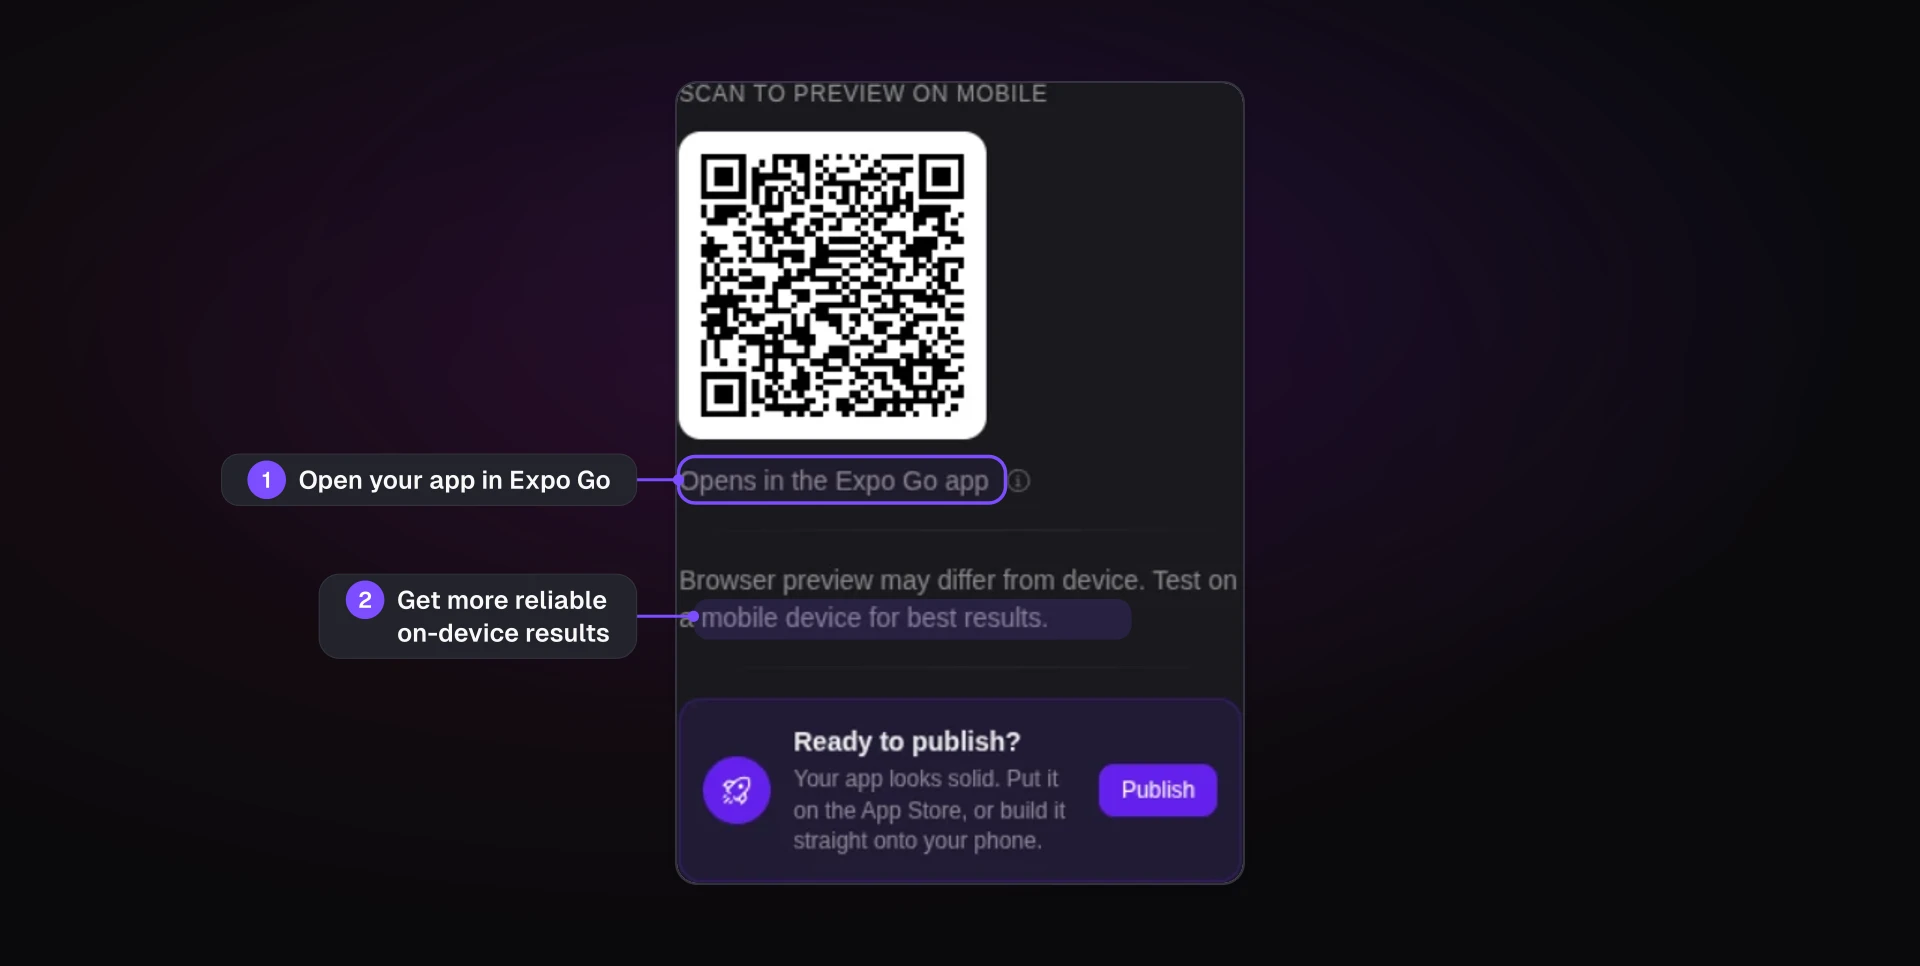
Once the core flow holds up, share incremental builds through TestFlight, Apple’s beta-testing service, or Google Play beta testing with the same audience. Stabilize login and inquiry flows before adding more complexity.
For personal Google Play developer accounts created after November 13, 2023, use a closed test, a release available only to invited testers. At least 12 testers must remain opted in for 14 continuous days before you can apply for production access.
11. Add payments when needed
Add payments only when the business model requires money to move inside the app. A lead-generation app can launch without checkout. Paid digital access uses store purchases, and peer transfers need marketplace payment rails.
Match the payment path to what the user is buying:
| App model | Example | Payment path |
|---|---|---|
| Lead generation | Saved searches and inquiry forms | No payment at launch |
| Paid digital access | Pro listings or agent tools | Apple In-App Purchase on iOS and Google Play Billing on Android |
| Peer transfer | Rent or a deposit | A marketplace payment processor, subject to specialist review |
For paid digital access, create the products in App Store Connect and Google Play Console. Connect each verified purchase or restored subscription to the access that account should receive.
For services paid for in the app and received in the real world, such as a showing or an inspection, Apple says you must not use in-app purchase. Take those payments by card instead.
For paid digital access, apps on the US App Store may also link to a web checkout.
Peer transfers
For peer transfers, define the payer and recipient before connecting a processor. Specify when funds release and how refunds work, then get specialist advice on identity, escrow, payout, and money-transmission rules.
Test the payment states without live charges:
- Use mock billing in previews to test successful and failed purchases.
- Verify purchase and restore flows in a native or TestFlight build because Expo Go cannot load the in-app purchase module.
- Check that subscription access updates after renewal or cancellation.
- Reconcile delayed or retried events before granting access twice.
Live iOS purchase testing also needs the store-side account details in place:
- Bundle ID and App Store app record
- App Store Connect API key
- Completed tax and banking setup
12. Prepare and publish the release
Bilt handles the build, code signing and submission for the App Store and Google Play. Code signing identifies the developer behind the installable app. You provide your own developer accounts and the required store information.
An existing web app can remain available in the browser without an Apple or Google developer account. That web release is separate from publishing the native app through Bilt.
If the web app supports PWA installation, people can add it to their home screen. Browser distribution alone creates neither an official store listing nor access to native in-app purchases.
Release checklist
- You choose the stores. Prepare an iOS build for the App Store, an Android build for Google Play, or both.
- You open the publishing accounts. The Apple Developer Program costs $99/year, while Google Play charges $25 one time.
- You create the store records. In App Store Connect, set the bundle ID and SKU, then confirm the public app name.
- Use Bilt’s publishing workflow. Connect the required App Store Connect details, prepare the iOS build, and follow the submission steps shown for the project.
- Prepare the Android release. Add the Android build in Google Play Console and use internal testing before requesting public distribution.
- You add account deletion. Buyers, agents, landlords and tenants who can sign up must be able to delete their account inside the app, under Apple’s account deletion rule.
- You finish the store submission. Add listing copy, screenshots, privacy answers and support details. In reviewer notes, explain plainly what the app does and who it’s for. Provide a demo login for each role, such as buyer and agent, connected to live listings.
- You review the production build. Check generated code and dependencies, keep credentials outside the codebase, and confirm the production configuration matches the release environment.
- You submit the uploaded build. Select it inside Apple's or Google's console, answer the remaining policy questions, and send it for review.
Apple and Google still review the app and can reject a release for incomplete disclosures, policy issues or defects in the submitted app.
13. Measure and improve the app
Measure the app with analytics and crash reporting from launch, then improve one weak or broken flow at a time.
Track four event groups from the first release:
- Search activity: Record submitted searches and filter use.
- Listing engagement: Track listing opens and saved properties.
- Buyer intent: Measure inquiry and tour-request starts against completions.
- Reliability: Group crashes by app version and affected screen.
Use a compact improvement loop:
- Detect: Look for crash spikes after a release and repeated reports of broken listing or inquiry flows.
- Prioritize: Treat reliability failures as release blockers, then choose one conversion flow to improve.
- Set the measure: Use your current search-to-inquiry or tour-request completion rate as the baseline and define the change you expect.
- Change and verify: Describe the update in Bilt, inspect the output, and confirm the affected behavior before release.
- Release and compare: Upload a new build, submit it for another store review, and compare the same events with the baseline.
A new store-distributed binary needs another review, while a backend-only change may not need a new mobile build. Store-listing-only changes can often be managed separately, though review rules vary by field and store.
When usage grows past the beta group, recheck the systems that have to keep up:
- whether every listing refreshed within the required interval, and whether sold or withdrawn homes left the app
- search speed when many people query at once
- whether inquiries still go through when traffic is high
These checks show whether the next fix belongs in the app flow or the listings feed behind it.
Budget and team requirements
Custom development requires dedicated product, engineering, and testing work. A native AI builder can reduce upfront staffing, though store fees and operational ownership remain.
The main budget and team differences are:
| Route | Timeline | Known starting costs | Team requirement |
|---|---|---|---|
| Custom Zillow-like MVP | Depends on scope, property-data access, and release requirements | Agency or developer work, data access, maintenance, support, and marketing | Dedicated product, engineering, and testing work |
| Bilt native-builder route | Depends on scope, property-data access, and release requirements | Bilt usage, publishing accounts, property-data or external service costs | Owner-led build, with a developer joining if needed |
Include listing feeds and map searches in your running budget:
| Cost | Published price | Notes |
|---|---|---|
| Bilt | Permanent free tier, Professional €25/mo | €19/mo billed yearly |
| Spark listing feed | $50/month per MLS | Plus the MLS’s own license fee |
| Trestle listing feed | $100–$175/month per connection | Technology-provider rate, plus MLS fee |
| Google Maps SDK (iOS, Android) | Free, no monthly cap | Native map display only |
| Google Place Details Essentials | $5 per 1,000 after 10,000 free | Monthly free tier |
| Google Autocomplete Requests | $2.83 per 1,000 after 10,000 free | Per keystroke without session tokens |
New Bilt subscribers get 40% off their first month on any monthly paid plan. Professional costs €15 for the first month, then €25/mo. The discount applies once per account and excludes annual billing.
Check Spark’s FAQ, Trestle’s data pricing and Google’s Maps pricing before committing. The Google Maps SDK displays the native map. Place Details Essentials returns information about a place, while Autocomplete Requests supplies suggestions as someone types.
Count location searches each month rather than users. Session tokens group the keystrokes from one search together, making those keystrokes free and billing the search as one Place Details call. Without them, every keystroke bills as an Autocomplete request.
At 20,000 searches a month, session tokens would leave roughly 10,000 billable Place Details calls after the free allowance. Without them, eight keystrokes per search would add about 160,000 Autocomplete requests on top.
Building a property-data pipeline adds integration and maintenance work to either route:
- Internal pipeline: plan for feed integration and ongoing maintenance, with a dedicated data team if the sources are complex enough to require one.
- Existing listings API: Integration can reuse an existing backend team, but onboarding time varies by provider and agreement.
The lighter route fits when you already have a reliable listings source and can own ongoing operations. You keep responsibility for release accounts and post-launch maintenance without taking on a full custom build.
Choose a native build path
Once you have a listing source and a clear first-version brief, bring them to Bilt. Describe what a buyer, renter, or agent should be able to complete, then check the generated native app in the preview. Your brief gives you a way to judge whether the screens and property data work together before you prepare the release.
Start building free with that first property journey. You can refine the app through conversation as you test what people need to find a home or contact your team.
FAQs
Can I build a real estate app for free?
A fully launched real estate app is not free. Apple and Google publishing accounts, live MLS data, and any external services can add costs even when you build the first version yourself.
Apple’s $99 yearly fee and Google Play’s $25 one-time fee total $124 in the first year if you publish to both stores.
Can AI build my entire real estate app on its own?
No. You still need to secure listing rights, review legal compliance, configure any payments, and own the store accounts. AI cannot grant licenses or accept legal responsibility.
Do I need a real estate license to launch a property sale app?
Building the app itself needs no license. Brokerage activity, commission collection, deal negotiation, and some MLS or IDX access may require a licensed broker or other local authorization.
How do I get MLS listing data for my app?
Arrange the broker sponsorship described in your brief. Then apply to each MLS you need, directly or through a feed vendor such as Spark or Trestle, sign its data license, and build to its IDX display rules. Budget for the vendor and MLS license fees listed above.
Can I scrape Zillow instead?
No. The photos and descriptions belong to the agents and photographers who made them, and a public app needs a licensed feed to show other brokers’ listings. While prototyping screens, use sample listings you write yourself.
How long does it take to build a real estate app?
Real-estate build time depends on property-data access, workflow scope, and testing. Bilt’s stated benchmark is hours or days from first prompt to App Store submission.
MLS approval can add weeks, depending on the provider, market, agreement and applicant status. Start the broker and feed paperwork on day one, alongside the build.
If Google Play’s closed test requirement applies to your account, allow time for the testing period described above before applying for production access.