A workout plan can become an app someone opens at the gym, follows between sets, and uses to record a session. Building it yourself means deciding how those screens should work, preparing the exercise content, and getting the app ready for people to download.
Bilt creates native iOS and Android apps from your descriptions. You check each version in a live preview and ask for changes in conversation, without writing code. You decide what goes into the first release, and you test it with real workouts before it ships.
What makes fitness apps different?
They have to keep a specific group coming back, and they have to deal with why those people quit.
Look at the moment a routine breaks down. The app should reduce setup and make the next workout match where they are. The continue action should be obvious.
Logging is useful when the record helps someone continue and see that they are improving. A crowded feature list cannot rescue a poor fit or progress that is hard to see.
- Starting point: A generic tracker opens on a blank dashboard or setup form. A useful fitness app opens on today’s workout with a clear start action.
- Fit: A generic tracker gives everyone one flow. A useful fitness app shapes content and difficulty around a defined audience.
- Logging: A generic tracker records activity. A useful fitness app captures enough detail to resume and compare workouts.
- Progress: A generic tracker displays accumulated data. A useful fitness app connects completed workouts to visible change.
- Drop-off response: A generic tracker adds broad reminders. A useful fitness app reduces setup, clarifies the next step, and makes progress easier to see.
Write down why your audience stops before choosing features. Those answers should shape the workout and progress experience.
Fitness app cost and timeline drivers
Feature scope, health integrations, compliance work, and content production set both the cost and the calendar.
A static exercise library sits at the low end. Streamed video and a routine builder take you into the next scope tier.
Each step up in scope adds a new kind of work:
| Build scope | What drives the effort | What to plan separately |
|---|---|---|
| Static exercise library | Exercise content, images, and simple navigation | Exercise copy and media rights |
| Video playback and routine builder | Streaming, offline downloads, and saved routines | Video hosting and CDN bandwidth |
| Feature-heavy custom fitness app | Subscriptions, wearables, coaching, and analytics | Developer time, compliance review, and maintenance |
| Feature-scoped app builder | How many screens and data types the first loop needs | Store accounts, video delivery, and data services |
The largest additions are easy to miss in an early screen estimate:
- Subscription backend: Custom receipt validation, cancellations, grace periods, and entitlement syncing add real engineering work.
- Video delivery: HD exercise footage needs HLS or DASH transcoding plus ongoing CDN bandwidth charged by data transferred.
- Health and wearable data: Each vendor uses its own data model, so schema mismatches can force rework late in the build.
- Compliance: Health data is special-category data under the GDPR. If the app stores it for people in the EU, plan for explicit consent, a privacy policy that names each data type, and a review before launch.
- Store accounts: Apple charges $99 per year, while Google Play charges $25 once.
Plan from the longest dependency. Set separate dates for the shippable build, store-ready listing and privacy work, first submission, and post-review fixes.
1. Define the workout loop
Define one complete workout loop before asking Bilt to build. It should take a specific user from opening the app to finishing a workout and seeing the result recorded.
Write down the audience, the result you want, and the friction that usually stops them. That keeps the workout loop focused.
Your brief needs these decisions:
- Audience: Name one group and the context that shapes their training.
- Goal: State what the user should accomplish in the first session.
- Friction: Choose the main barrier the first version must reduce.
- Workout loop: Describe the route from opening the app through workout completion and progress.
- Screens and navigation: Name each screen in that route and how the user moves between them.
- Data and integrations: State what must be saved or fetched, and label anything temporary as sample data.
- Visual direction: Describe the type, contrast, imagery, and interaction style in concrete terms.
- Acceptance checks: Define what must work before the first version counts as complete.
Here is a complete example you can adapt:
Build a native iOS and Android fitness app for adults returning to strength training after a long break. Help them complete an appropriate workout and recognize consistent effort.
Keep setup short and make the next action clear. Use plain language throughout, with recent progress visible without a dense dashboard.
Workout loop
- Open the Today screen and see today’s workout.
- Open Exercise details and start the Active Workout.
- Record set results, pause if needed, and resume the Active Workout.
- Finish the workout and save the completed session.
- Open Completion and see the new result reflected once.
Screens and navigation: Use Today as the starting screen, with account settings accessible from there. Open Exercise and Active Workout from Today, then show Completion after the saved session.
Data: Store each completed session and its set-level results, plus optional notes. Use clearly labeled sample workout and progress data until live content or integrations are connected.
Visual direction: Use readable type and large tap targets, with calm contrast that remains clear in a gym. Keep the primary action visually consistent across the workout flow.
Acceptance checks
- A new user can reach the first workout without connecting an external service.
- The active session survives pausing and resuming, then saves once when finished.
- Recorded results remain after the app closes and reopens.
- Empty, loading, and denied-permission states explain the next action.
A personal trainer’s subscription fitness tracker for women over 50 began with a similarly narrow brief. It was shippable after about 11 prompts over two hours.
2. Map data, permissions, and compliance
Start by listing every workout, health, and account field you need. Choose on-device or synced storage, then map permissions and consent before the first build.
The relationships matter as much as the fields. A set result should point to one workout session, and that session should belong to one account.
Start with the records needed by the workout loop:
| Record | Minimum fields | Relationship | Storage starting point |
|---|---|---|---|
| Account | User ID, sign-in method, units, timezone | Owns personal records and consent | Server for sign-in and sync, device for local preferences |
| Workout session | Session ID, workout ID, start time, end time, status | Belongs to one account | Save locally first, then sync if accounts are enabled |
| Set result | Session ID, exercise ID, set number, reps, load | Child of one workout session | Store with its session and queue offline changes |
| Body metric | Metric type, value, unit, timestamp, source | Belongs to one account | Encrypted device storage or an access-controlled server |
| Progress photo | File location, timestamp, caption, consent state | Belongs to one account | Device only or encrypted object storage |
| Integration consent | Provider, permission state, data types, last sync | Belongs to one account | Secure server metadata plus the device permission state |
Use one ownership chain for training data: account → workout session → set result. Body metrics and progress photos belong to the account. Integration consent needs its own record and access rules.
For every row, make five decisions:
- Is this data required for the workout loop or optional?
- Who can create, read, update, and delete it?
- Does it stay on the device, sync to a server, or use both?
- How long should it be retained?
- How can the user export or delete it?
Storage should follow the product behavior:
- On-device first: Use this when the app works on one phone and privacy or immediate response matters more than cross-device access.
- Synced server: Use this when people sign in on another device or when coaches and account owners need shared access.
- Hybrid: Save workouts locally during unreliable connections, assign each session a unique ID, and queue one server update when connectivity returns.
Request access when the user reaches the feature that needs it, with a plain explanation of the purpose:
- Health or wearable data: Name the exact data types the app will read or write.
- Notifications: Explain which workout reminder the user is choosing to receive.
- Photos: Ask separately before storing progress images, and define where they are kept.
- Location: Request it only for a route or nearby feature that depends on location.
The workout loop should still work when an optional permission is denied. Add permission changes, data deletion, and revoked integrations to the acceptance tests.
For an iOS app using HealthKit, follow Apple’s health-data privacy rules:
- Explain the use: Tell users how the app uses their HealthKit data and provide a privacy policy.
- Keep it out of advertising: Do not use HealthKit data to target ads or sell it to data brokers.
- Control sharing: Share HealthKit data only with explicit permission and only with a third party providing a health or fitness service.
- Keep it out of iCloud: Do not store personal health information from HealthKit in iCloud.
Turn the final map into security requirements:
- Use expiring sessions and a server-side way to revoke access.
- Validate and sanitize every value sent to an API.
- Apply row-level access rules so one account cannot read another account’s records.
- Require multi-factor authentication for administrative access to personal data.
Put these controls in the build brief and test plan so you or a developer can verify them before launch.
3. Plan the exercise content library
Build one reusable exercise record, then let every program point to those records by ID. This keeps workouts pulling the same exercise records as the library grows.
Use these fields for each move:
- Identity: A unique ID and display name.
- Classification: Primary and secondary muscles, equipment, and difficulty.
- Prescription: Duration or rep scheme, plus form cues.
- Media: A video URL or asset ID, with a fallback image URL.
- Coaching: Goal tags, injury flags, and coach notes.
Choose one source for each asset: an in-house shoot, licensed stock, or a coach upload. Keep the same media fields whichever route you use.
Programs should compose exercise records instead of copying their text. An ordered slot holds the exercise ID, prescription, rest period, and any approved substitutions.
exercise: { id, name, muscles[], equipment[], difficulty, prescription, form_cues[], video_url, fallback_image_url, tags[] }
program_day: { id, week, day, slots: [{ exercise_id, sets, reps_or_duration, rest, alternate_ids[] }] }
set_result: { workout_session_id, exercise_id, set_number, reps, load, completed_at }
Save this model in the build brief so later prompts use the same names and relationships. Each set result points to a workout session and an exercise, so progress is saved without copying exercise content.
4. Generate the first native build
Give Bilt the workout loop and content model as one build brief. It plans the work in chat, writes the app, rebuilds it, and updates the live preview.
First prompt
Build a native iOS and Android fitness app around a Today → Exercise → Active Workout → Completion loop.
Use the exercise, program_day, and set_result records above. Keep this first build focused on the workout loop.
Chat shows Bilt planning the requested build and creating it incrementally. You can follow the work without switching to a separate code editor.
Once the first build is ready, the preview opens beside the conversation. You can inspect the screens while the same build cycle continues.
Bilt generates a React Native codebase for iOS and Android rather than wrapping a website. The preview lets you check the workout loop before expanding the scope.
Keep the first build to four visible states:
- Today: Load the current program day and its ordered exercise slots.
- Exercise: Read the selected record's prescription, form cues, and media.
- Active workout: Move through each slot while preserving approved substitutions.
- Completion: Record the finished session and advance the program sequence.
Treat the first working preview as a build milestone, not a testing result. Confirm the workout loop later on physical phones in real workout conditions.
5. Refine the workout loop
Describe screen, navigation, and onboarding changes, then check each rebuild in the live preview.
Keep each follow-up prompt narrow enough to judge in one preview pass. A single visible outcome makes it easier to keep the change or revise it.
Use the same loop each time:
- Describe the exact change. Name the screen, the current behavior, and the behavior you want.
- Anchor it to the model. Refer to the relevant exercise field, program slot, or completion state.
- Watch the rebuild. Check the refreshed preview as soon as the change appears.
- Run the loop again. Move from Today through completion and check that the new behavior holds.
Bilt uses chat rather than a drag-and-drop canvas. Conversation history carries earlier decisions forward, while the saved build brief keeps field names and workout rules explicit.
Each preview pass should answer four questions:
- Can someone tell what to do next on every screen?
- Does a substitution preserve the slot's order and prescription?
- Does completing an exercise update the program day correctly?
- Are form cues and media easy to reach from the active workout?
If one check fails, write the next prompt around that failure alone. Small build cycles make it easier to see which change affected the workout loop.
6. Connect accounts and workout data
Enable a backend, add user authentication, store workout logs and profiles with per-user access rules, then attach file storage for photos and videos.
Video: Bilt cloud-services demo showing controls for database, authentication, and file storage
Separate authentication from authorization
Use authentication to identify the person, then authorize every read and write against that user's ID. A successful login must never expose another user's workouts, goals, or progress media.
Set access rules at both collection and record level:
- Public: Limit this to shared exercise content that contains no personal progress data.
- Private per user: Scope workout sessions, goals, measurements, and media to the owner ID from the authenticated session.
- Custom: Add explicit coach or administrator access only where the product requires it.
Lock the workout data model before connecting screens
Use the account → workout session → set result chain defined in the data map. Then store an owner ID and timestamps on every user-owned record.
If an external backend holds the data, define the GET and POST calls, authentication headers, and response fields. Map each field to the correct screen and signed-in owner.
Trace a saved workout from write to reload
Treat saving and reloading as one flow. A success message means little until the signed-in user can retrieve the new session.
- Validate the owner ID and required workout fields before writing.
- Confirm the backend returned a record ID before showing the save as complete.
- Reload with a query scoped to the current user's owner ID.
- Give empty, loading, and error states separate UI so a failed query does not look like an empty history.
7. Add brand and native features
Apply logos, colors, and native modules such as reminders, camera, GPS, and push so the workout app looks branded and uses real device hardware.
Apply the brand from one source set
Apply the same logo, color values, typography, and spacing rules across every native screen. In Bilt, you can upload your logo, icons, and images.
Prepare these inputs before refining the interface:
- A PNG or SVG logo prepared for the app interface.
- Exact hex values for primary and supporting colors.
- The font choices and type scale used across workout screens.
- Approved Figma frames when the layout already exists.
Bilt’s team also exports Figma designs to Bilt. After exporting, check that the screens match the spacing, fonts, and colors you approved.
YouTube: Bilt Figma plugin tutorial showing design-frame export for a native iPhone and Android app
Add only the native features required by the loop
Add a native module only after its trigger, stored data, and permission state are clear. For a fitness app, that usually means choosing from this checklist:
- Camera: Capture a progress photo and save it to the signed-in user's record.
- GPS: Record a route only while the user has started an activity that needs location.
- Push notifications: Schedule a workout reminder with a clear way to change or disable it.
- Permission fallback: Explain what still works when camera, location, or notification access is denied.
With Bilt, describe each feature and permission state in a follow-up prompt. The generated React Native source can also be exported when a developer needs to extend a native module.
Choose the right starting path for an existing product
Use the source that already contains the strongest part of the fitness product:
| You already have | Starting path | Define separately |
|---|---|---|
| A fitness website | Use Bilt’s Web-to-App feature to turn the web app into native iOS and Android apps | Native navigation, mobile authentication, and device permissions |
| Approved Figma screens | Import the frames as the visual starting point | Data behavior and native modules |
| A written specification | Describe the workout route and each screen in conversation | Brand assets and workout fields |
When the website and mobile app must share live workout data, connect the native app to the same backend through explicit endpoints. Define request authorization and field mapping rather than assuming Web-to-App conversion also configures ongoing data sync.
8. Connect health and wearable data
Connect one health-data source at a time, map only the records the workout loop needs, and test permission, sync, and disconnect states on real devices.
Connect one primary health store first
Start with HealthKit for an iOS-first release or Health Connect for an Android-first release. Add the Google Health API for cloud or Fitbit data, or a wearable-specific SDK later, after one source syncs reliably.
The first integration path depends on the release platform:
| Release path | Primary store | Map first |
|---|---|---|
| iOS first | HealthKit | HKWorkout and only the required HKQuantityType records |
| Android first | Health Connect | The ActiveCaloriesBurned and HeartRate records needed by the workout loop |
| Device-specific later | The wearable's SDK or API | Only records the primary store cannot supply |
Keep imported values in fields that preserve their origin:
- Source name and source record ID.
- Measurement time and time zone.
- Original unit and normalized value.
- Sync status and last successful sync time.
Wire permissions, mapping, and offline behavior
Request the narrowest permission set that supports the feature visible to the user. Reading heart rate does not require write access to unrelated health categories.
Use this implementation checklist:
- Declare the purpose. For HealthKit, add
NSHealthShareUsageDescriptionfor reads andNSHealthUpdateUsageDescriptionfor writes. - Request specific records. For React Native Health Connect, initialize the client, request only required record permissions, then read a defined time range.
- Map the response. Convert every source field into the workout schema, including its unit, time zone, and source record ID.
- Define offline behavior. Queue user-entered workouts locally, show the last health sync time, and deduplicate imported records after reconnecting.
For a wearable service with a REST API, define its GET and POST actions, authentication headers, query parameters, and request bodies. Add explicit rules for field mapping, authorization, token refresh, and errors.
Protect health credentials and user records
Keep API keys on the server and store each user's wearable token in secure storage. Never place secrets in client-visible configuration, logs, or ordinary workout rows.
Before enabling a health endpoint:
- Session checks: Verify the JWT signature and expiry on the server.
- Authorization: Scope every sample query to the authenticated owner's ID.
- Input controls: Validate record types, time ranges, and values before storing them.
- Abuse controls: Throttle repeated requests and reject calls for unsupported records.
Give users a disconnect action that revokes wearable access, removes stored tokens, and stops scheduled sync jobs.
9. Track whether people come back
Start by logging workout start, completion, and skip events. Then measure next-day return, another workout within seven days, and active weeks over 30 days.
Log only the events needed to see whether someone planned, began, and completed a workout. Use names like these, then adapt the properties to your program:
session_scheduled: workout ID and planned start time.workout_started: workout ID and start source.set_completed: workout ID, exercise ID, and set number.workout_finished: workout ID and elapsed duration.workout_abandoned: workout ID and last completed step.
Add workout type to all five events. Record equipment only when it helps explain how that workout was completed.
Measure return from a completed first workout. Install counts cannot show whether the workout loop worked.
- Next day: Check whether the user returns after completing the first workout.
- Within seven days: Check whether the user starts another active workout.
- Across 30 days: Track the number of weeks in which the user is active.
Add these measures after login and storage are stable. Confirm them during beta before building custom dashboards or a second event taxonomy.
A streak should advance only when workout_finished fires. Opening the app or starting a session should leave it unchanged.
Trigger reminders from a missed scheduled session after the user's usual workout time, while respecting their chosen quiet hours.
Set the reminder delay from what this audience expects and from how they already train. Review the pattern of missed sessions before you tighten or relax the delay.
Leave paywall funnels, social leaderboards, and detailed wearable-sync errors until field tests confirm that the five core events arrive once, in order, from physical devices.
Otherwise, extra analytics can hide a broken session sequence instead of explaining retention.
10. Test in real workout conditions
Run the workout loop on physical phones with target users. Gym lighting, sweat, pockets, and background audio expose issues a desk preview never shows.
Run this checklist on physical iOS and Android devices:
- Complete the workout loop from start to finish with the phone in hand or nearby.
- Background and reopen the app during an active session.
- Lock and unlock the screen during a timer or rest period.
- Switch network connections and recover from a brief loss of service.
- Abandon midway, reopen, and verify saved progress and analytics events.
Share the build early with even a few people from the target audience. Their feedback on a real phone surfaces problems you no longer notice because you already work around them.
Scan the QR code for phone testing in Bilt’s preview panel to open the current build on an iOS or Android phone.
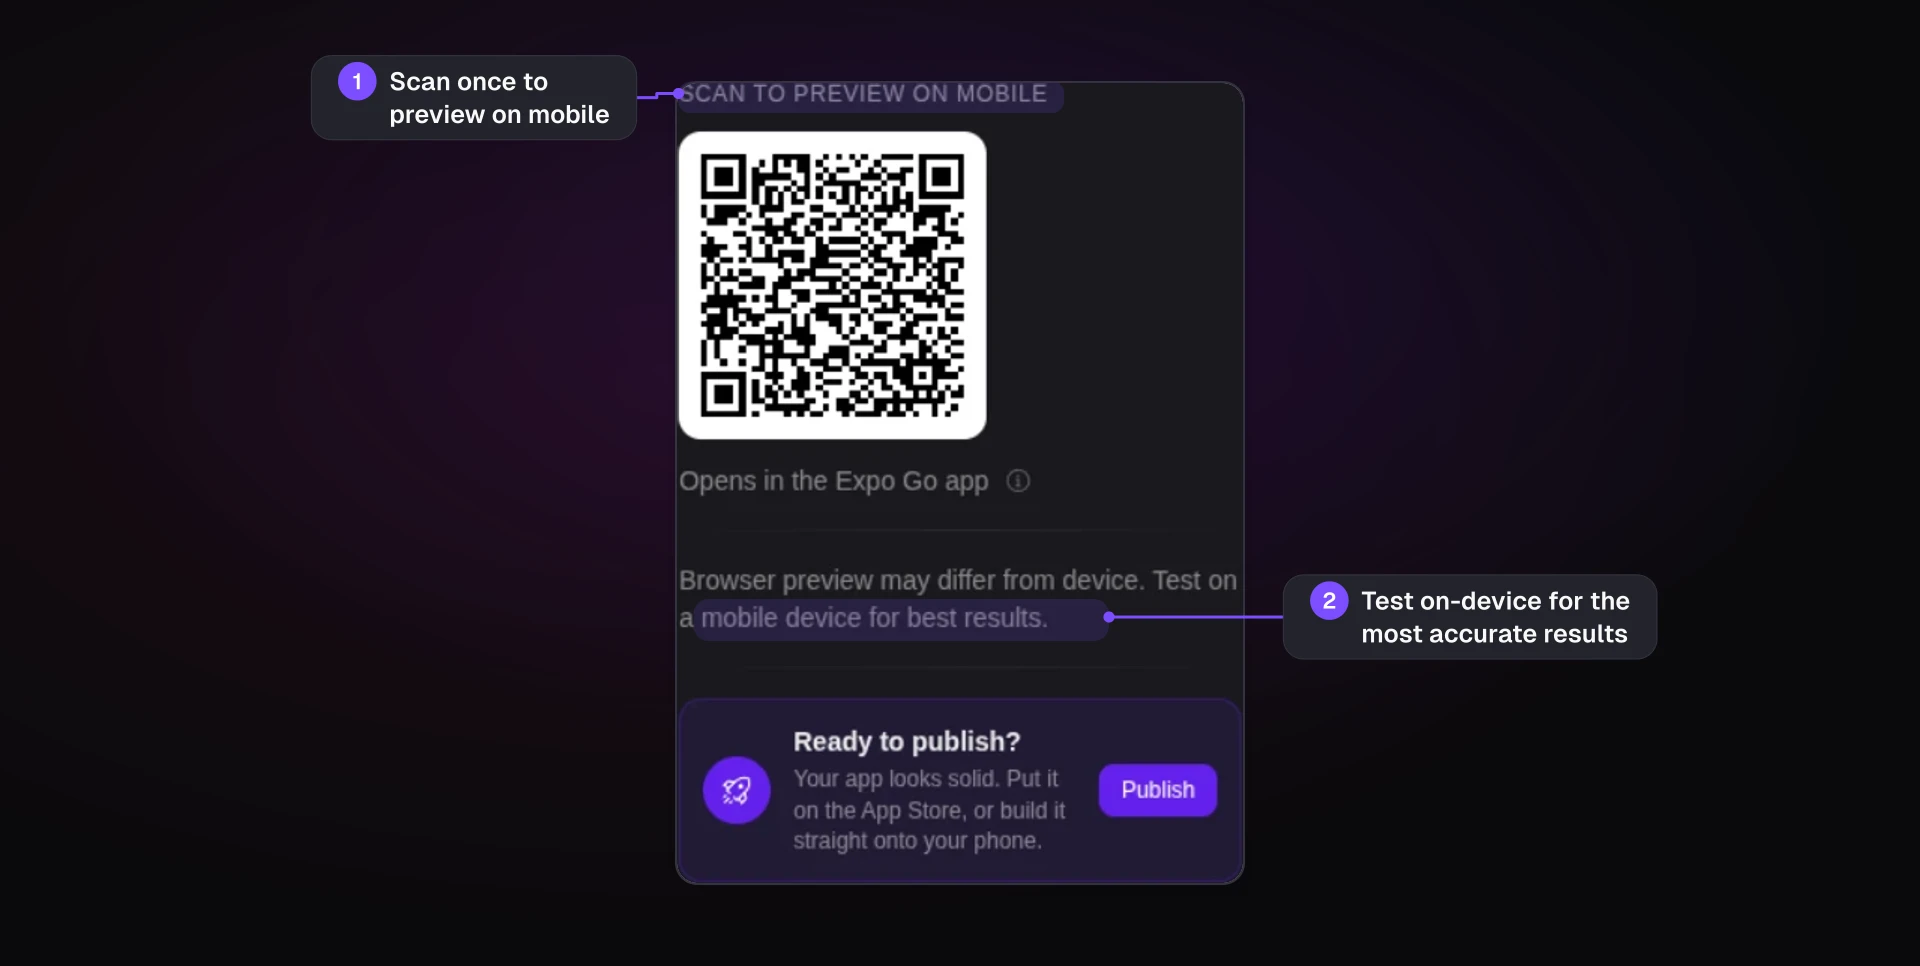
For iPhone features unavailable in the preview environment, test a development or TestFlight build that includes the required native modules. You can generate that build locally on a Mac or through a cloud build service.
Browser simulators are useful for checking layout and the workout loop before reserving time for a gym test:
- Bilt streams an interactive iOS simulator without requiring a Mac.
- Its cloud Android emulator checks Android layouts without a local SDK.
Use live previews for teammate review, then repeat every accepted change on a physical device.
Send testers a shareable Bilt preview link for feedback. Give every tester the same workout task so their feedback is easier to compare.
Ask where they hesitated, lost progress, or saw behavior that differed from the preview.
11. Add subscriptions and access
Create App Store and Play products and verify receipts on a server. Unlock programs only when that entitlement is active, and include restore and retry.
Add paid access only after physical-device tests show the workout loop starts, saves progress, and finishes reliably.
A sensible first gate puts premium programs or live classes behind a subscription while leaving account setup and a basic workout available for evaluation. Adjust that boundary to what your audience expects before paying.
Authentication answers who the user is. Authorization decides whether that signed-in user may open paid content.
Keep entitlement records on the server with row-level rules, then use this purchase-state flow:
- Authenticate the user and load the current entitlement.
- Start the store purchase while access remains in its existing state.
- Verify the purchase on the server.
- Write the active entitlement to the server-side record.
- Fetch that record and authorize the paid content.
- Refresh the same record after a restore, cancellation, or expiry.
The app should never grant access from a client-side success screen alone.
Test purchase states with sandbox or mock billing before accepting money:
- Successful purchase: Verification activates the entitlement and unlocks the intended content.
- Pending or failed purchase: Access stays unchanged, and retrying does not create a duplicate entitlement.
- Restore on another device: The same signed-in account receives the server-side entitlement.
- Cancellation or expiry: A refresh updates access according to the stored entitlement state.
- Sign out and back in: The app loads access for the correct account.
Apple's StoreKit IAP module requires a native development or TestFlight build. In-simulator web previews can test only the mocked purchase path.
Keep billing behind a provider interface so Apple and Google adapters can change without rewriting the workout gate.
Plan pricing around the stores’ 15% to 30% share. Bilt Payments uses Apple’s and Google’s own in-app purchases and takes no extra share on top. Confirm any other payment-provider fees before setting the subscription price shown to customers.
12. Publish and launch
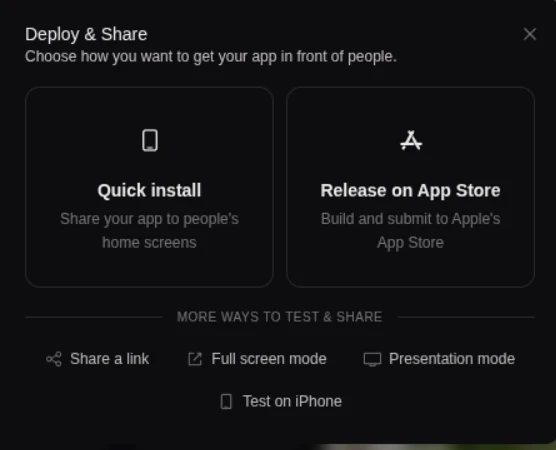
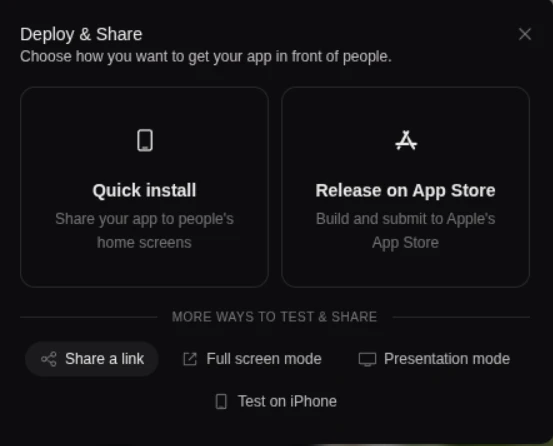
Share a preview first. Then enroll in Apple and Google programs, connect signing, upload a signed build, finish listing and privacy fields, and submit for review.
You can use Bilt for automated deployment to App Store Connect and Google Play Console. Before you submit, you’ll still need store accounts and completed listing details.
Store launch adds four ownership handoffs:
- You connect the store account. For Apple, enroll in the $99-per-year Developer Program, create the App Store Connect record, and connect your account for publishing.
- Follow Bilt’s iOS publishing workflow. Work through certificates, provisioning, signing, the cloud build, and the upload to App Store Connect.
- You finish the Apple listing. Add privacy answers, policy and support URLs, account deletion, ATT details when applicable, and reviewer credentials. Then select the build and submit it for review.
- Apple processes the build. Wait for processing in App Store Connect before selecting the build for testing or submission. Release approval stays with Apple.
Google Play starts with a signed .aab from Bilt. The first release may require you to upload app-release.aab manually in Play Console.
Bilt automates deployment to Google Play Console. Keep staging and production databases separate so store-bound tests do not touch live user data.
Use this release checklist before either submission:
- Share the preview and test the full workout loop on a phone.
- Confirm that store records and build identifiers match.
- Complete listing assets, privacy disclosures, support details, and reviewer access.
- Test sign-in, account deletion, paid access, and unexpected workout inputs.
- Upload the first Play
.aabmanually if Play Console requires it, then verify later internal-testing uploads. - Submit the production build in the store console and handle review feedback there.
13. Maintain and improve the app
Post-launch work is a loop of shipping new builds, watching crash and rating signals, and changing the workout from what people actually report.
Every update needs a new build upload and another store review pass before release.
- Watch live signals. Track crash-rate spikes, rating drops, and repeated complaints about broken workout flows.
- Triage the problem. Set team thresholds for a hotfix, then prioritize failures that block sign-in, a workout, or paid access.
- Make a focused change. Describe the screen or workout-logic change in Bilt. Each chat request starts a new build cycle and updates the live preview.
- Test the candidate build. Use staging data, test on a real phone, and run an automated dependency scan. Add human code review for AI-generated updates before release.
- Release and watch again. Upload the new build, complete the store review pass, and check the same live signals after rollout.
If maintaining the app takes more than you can do in the builder, export the full React Native source so a developer can change the app or add to it. When you hand over the app, include:
- the current source, release branch, and build instructions
- environment variables, API documentation, and staging-to-production boundaries
- store access, signing access, and the existing app records
- open incidents, monitoring details, and a named maintenance owner
Source export gives the developer the application code. The handoff should also cover dependencies and service credentials because external services do not move with the code automatically.
Features to add after retention
After repeat workouts become stable, use the core analytics events to see where people drop off. Then decide whether attribution and lifecycle messages support the workout loop.
Use completed workouts and repeat sessions as the gate. If those signals are still unstable, fix the workout loop before adding these systems:
- Workout analytics: Use the dashboard to find where the workout loop fails rather than rewarding app opens.
- Attribution: Add channel tracking when organic workout completion is stable. Then judge campaigns by completed workouts and returning users, not installs alone.
- Lifecycle messages: Use in-app messages or CRM automation to recover a missed workout and handle plan renewal. Keep first-session guidance inside onboarding so messages support an established habit.
Build and publish with Bilt
Start building free by describing your first workout screen in Bilt.
Free to start · No credit card.
FAQs
Do I need to know how to code to build a fitness app?
You don't need to know how to code to build a fitness app with Bilt. Describe what the app should do, and Bilt creates a native app for iOS and Android.
Custom code becomes relevant for real-time on-device pose estimation, proprietary Bluetooth protocols, or high-frequency motion-sensor processing. Those need specialist mobile engineering.
How long does it take to build a fitness app?
It depends on scope. A static exercise library is a much smaller job than an app with streamed video, subscriptions, and wearable data.
With Bilt, a personal trainer’s subscription fitness tracker was shippable after about 11 prompts over two hours. Store review, exercise content, subscriptions, and real-world testing add time after that.
Can I connect wearables like Fitbit or Apple Watch?
Yes. Custom fitness apps connect Fitbit, Apple Watch, Garmin, Whoop, and Oura through HealthKit, Health Connect, vendor APIs, or unified middleware.
For wearable data, use an on-device hub such as Apple HealthKit or Google Health Connect, a direct OAuth API from the device maker, or middleware such as Terra, Vital, or ROOK to normalize multiple devices.
Can I launch on iPhone and Android at the same time?
Yes. Same-day iOS and Android launch is possible if you hold both store releases until both reviews finish.
After approval, use App Store Connect’s manual release option to hold the iOS version as Pending Developer Release. For later Google Play updates, Managed Publishing can hold approved changes until you publish them.