What would make an attendee open an event app before arriving, then keep using it once doors open? Finding a ticket, saving sessions, and checking room changes give the app a clear job. The event date also sets a deadline: the app needs to be tested, published, and available to download before people need it.
This walkthrough uses Bilt to turn descriptions into a native iOS and Android app you can refine through conversation. You’ll work through attendee screens, ticketing connections, real-phone testing, and on-site rehearsals, then prepare the store submission. Along the way, you’ll see which services need configuration and how to keep the source code for future events.
1. Define the event-app brief
Write a focused brief that covers the five decisions below. Use that brief as the first prompt, not as a specification written later.
A useful brief should fit on one screen. Write one sentence or bullet for each decision:
- Audience: Name who will use the app and what role they have at the event.
- Event outcome: State what the app should help the organizer accomplish.
- Attendee problem: Identify the moment that currently causes confusion or delay.
- Core journey: Describe the first task an attendee must complete from start to finish.
- Dependencies: Record the information and outside service that journey needs, such as an RSVP status or calendar access.
Choose the starting point that matches what you already have:
- New idea: Generate a custom app from the brief.
- Existing Bilt project: Open the project and continue refining the current build through chat.
- Existing web app: Convert a working web product into a mobile version.
For the custom React Native track in this guide, choose New idea.
In Bilt's dashboard composer, the first message turns those decisions into a build request. Describe the intended user and the first successful journey.
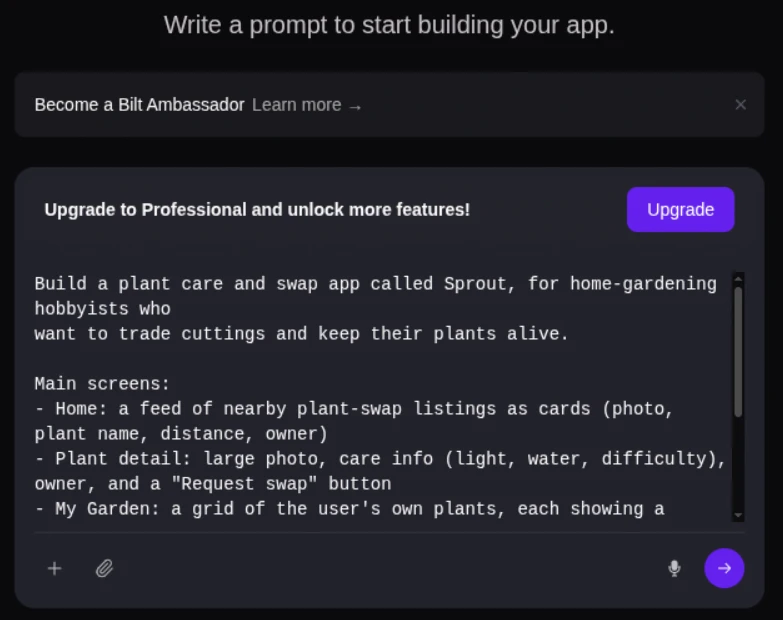
You can also attach a visual reference or website that should influence the initial build.
Example prompt: Build a native event app for attendees at a one-day business conference. Start with an event home screen and guest access.
The first journey should let an attendee confirm an RSVP and then see the saved status.
This brief is lighter than a traditional specification. It gives Bilt enough context to create something you can inspect. Later prompts can cover the decisions that only become clear in the preview.
The two approaches differ in when decisions are made:
- Traditional specification: Defines requirements before implementation begins.
- First-prompt brief: Defines the first attendee journey, then leaves later decisions for preview-based prompts.
2. Generate the first native app
Describe the event app in one prompt, then watch a live preview. Bilt writes the native UI, navigation, and backend-connected logic incrementally.
Video: Bilt demo turning a natural-language app request into a native mobile app with live preview
Treat the first generation as a working baseline for inspection. Use this sequence:
- Submit the focused brief from the previous step.
- Follow the build progress in chat while Bilt creates the initial app.
- Open the live preview and complete the first attendee journey.
- Write down mismatches between the brief and what the preview does.
The preview is where you identify the next screen or behavior to change.
On the custom track, Bilt incrementally writes React Native for the interface and app logic. The same project targets iOS and Android, with native modules instead of a WebView-only wrapper.
Before writing another prompt, make one inspection pass:
- Confirm that the intended opening screen appears.
- Follow the main navigation without skipping ahead.
- Complete the first attendee action from start to finish.
- Record each missing screen or unexpected behavior as a separate change.
Keep this pass narrow. A short list of observed changes produces a clearer next prompt than another full description of the app.
3. Build the core workflows
Add one attendee job at a time. Name the screen, what it should do versus what it does now, and what must stay the same. Check the result before you add the next job.
Build the first attendee path in order:
- Guest access: Let the attendee enter the event using the access method defined in the brief.
- Event details: Show the information needed to decide whether to attend.
- RSVP: Let the attendee set or update their response.
- Confirmation: Keep the saved status visible when they return to the event screen.
Each follow-up message should change one screen or behavior. Bilt places chat beside a live phone preview, so you can inspect the rebuilt app before writing the next prompt.
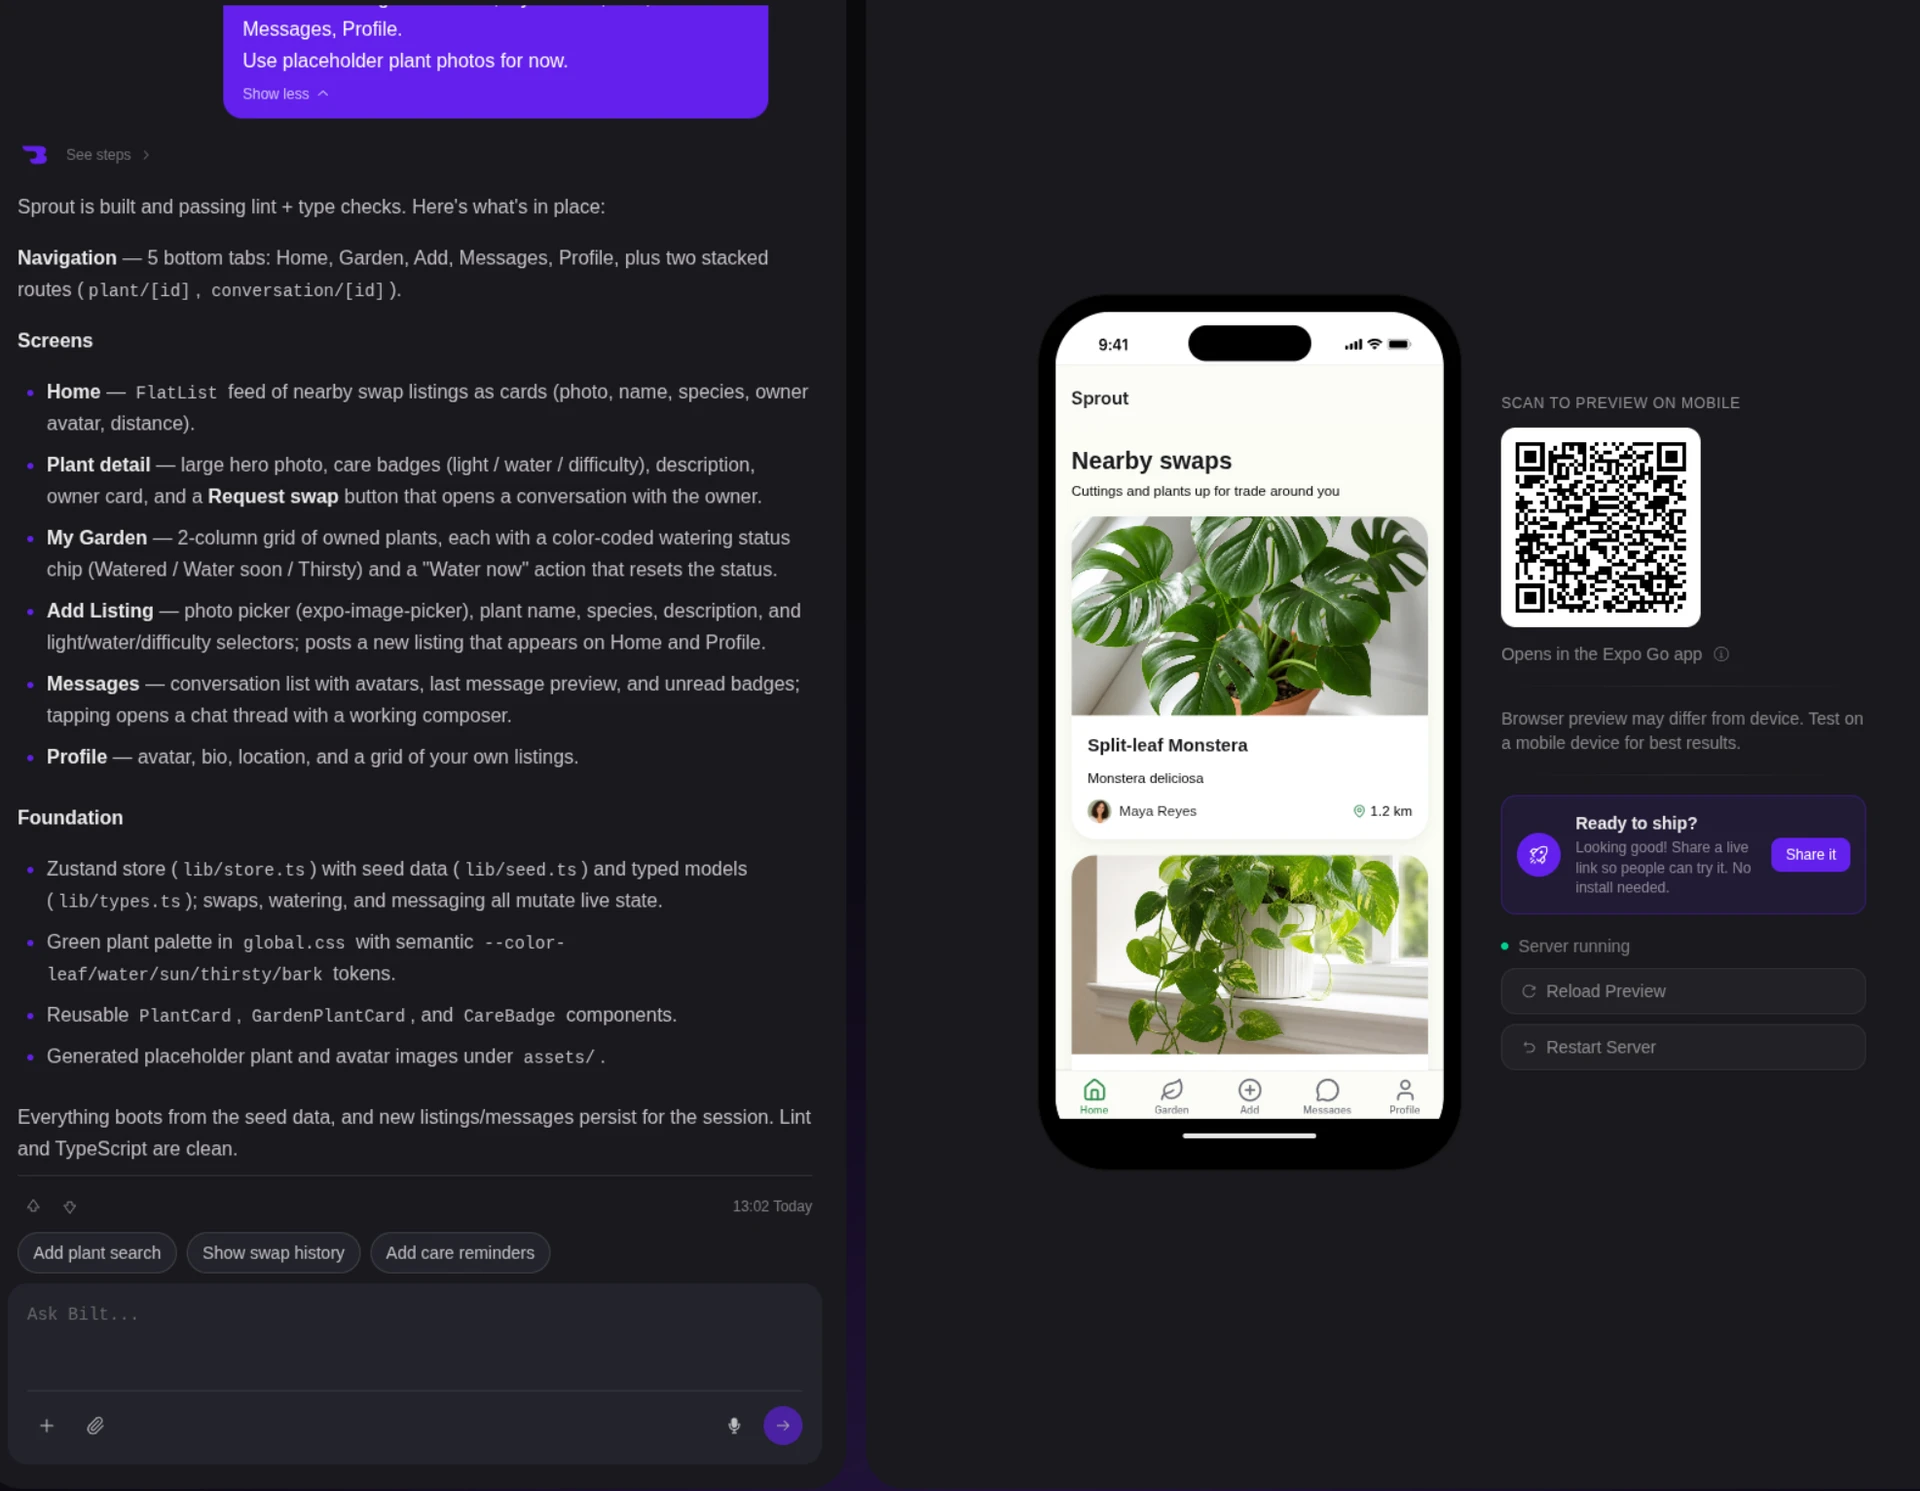
Use a prompt that makes the acceptance criteria visible:
On the event details screen, let invited attendees set or update their RSVP. Show the saved status on the same screen.
Keep the current navigation and visual style. Add clear loading and error states.
That prompt gives Bilt four useful boundaries:
- the screen where the change belongs
- the behavior the attendee needs
- the existing elements that should stay unchanged
- the states that still need a clear response
After each rebuild:
- Complete the journey yourself in the live preview.
- Share the build with representative attendees and ask them to complete the RSVP without coaching.
- Repeat the same path on real iOS and Android devices you plan to support.
Stop adding jobs when the core path is ready for a clean test:
- An invited attendee can reach the correct event.
- The RSVP status updates and remains visible.
- Loading and error states tell the attendee what to do.
- Representative attendees can finish the path without help.
Once these checks pass, the app has a testable core. Keep additional jobs out of this loop until each one has its own prompt and acceptance criteria.
4. Add advanced engagement features
Treat engagement features as an optional module, not a prerequisite for launch. Add them only after the core event app and its safeguards work reliably.
- Start with live interaction.
- Add polls and Q&A to session screens, where the topic and audience are already clear.
- Run votes and question status through Supabase Realtime or Firebase Realtime Database.
- Target alerts by track, saved session, or room. Use broad notifications only for event-wide changes.
- Add private networking. Keep one-to-one chat inside the app so attendees can connect without exposing phone numbers or email addresses. Include blocking, reporting, notification controls, and a clear retention rule before opening messaging.
- Introduce meetings and recommendations. Let attendees request time slots, then suggest contacts or sessions from profile fields they agreed to share, such as role, industry, and topic interests. Explain why each suggestion appears and let people edit those inputs.
- Test gamification and social activity last. Tie points to useful actions such as completing a profile, answering session feedback, or joining a poll. QR challenges need camera permission, while leaderboards and social feeds need moderation plus an opt-out.
Each release should have one purpose and a fallback. If realtime voting drops, the session still needs to run; if recommendations are sparse, attendees still need search and filters.
5. Design accessible event navigation
Design schedules, agendas, and floor maps so attendees can find their way in a few taps. Keep the contrast high and make every path work with a screen reader.
Test complete routes with VoiceOver on iOS and TalkBack on Android, from finding a session to reading its room directions. Repeat the test at mobile and desktop widths with larger text and zoom enabled.
Check these paths before polishing the visual design:
- Schedule: Give each session a descriptive title, start time, room, status, and clear save action.
- Personal agenda: Announce saved or removed states to screen readers, and keep changes synced across devices.
- Session details: Use a logical focus order, labeled controls, readable text scaling, and touch targets with enough spacing.
- Maps: Pair every interactive floor map with searchable room names, landmarks, and written directions. Never make color the only route cue.
- Changes: Put cancellations or room moves on the affected session, then send a targeted alert to people who saved it.
- Responsive access: Keep navigation usable at desktop and mobile widths, including zoomed layouts and larger text settings.
Apply the approved event identity after navigation works
Bilt can use imported Figma designs as a starting point. The team has exported Figma designs into Bilt and turned a Figma Make barbershop design into an app ready for people to use.
Use the event owner's approved assets:
- Attach a supported image file up to 3.75 MB, or upload the supplied logo and approved hex colors.
- Apply the same identity to schedules, agendas, maps, and app-store assets.
- Release branding: Use a custom domain for the published web app, and carry the approved identity into the native store listings.
6. Structure the event data
Model sessions, speakers, attendees, and partners as related records. Then decide how a configured API or external backend will bring in data from a spreadsheet, CRM, or SQL source.
A room change should be written once and appear everywhere that session is used. Stable IDs and join records keep each screen tied to the same session.
The app still needs to refresh or sync saved agendas and recommendations, and to send room-change alerts.
| Record | Core fields | Relationship |
|---|---|---|
| Event | event_id, name, timezone, start, end | Has venues and sessions |
| Venue and room | venue_id, room_id, name, directions, accessibility notes | A room belongs to a venue; sessions reference room_id |
| Session | session_id, event_id, title, start, end, status | Connects to rooms, speakers, saved agendas, polls, and feedback |
| Speaker | speaker_id, name, bio, organization | Connects to sessions through a session_speaker join |
| Attendee profile | user_id, display fields, interests, consent settings | Connects to saved sessions, meetings, messages, and recommendations |
| Saved agenda | user_id, session_id, saved time | Join record between an attendee and a session |
| Engagement record | activity_id, user_id, session_id, type, created time | Stores poll, Q&A, feedback, or challenge activity |
Keep the server database as the source of truth when people use more than one device. Cache the schedule, saved agenda, and map data on-device for faster loading and planned offline access.
For calendar export, include:
- a stable external UID
- start and end times
- the event timezone
- the session title and location
- reminder settings
These fields map into VEVENT output and help prevent timezone or duplicate-calendar errors.
To avoid double entry, require every imported record to have an external_id, name one system as its owner, and use updated_at for conflict checks. If the source exposes an API, a configured connector can map its calls, headers, and JSON fields.
Test the binding, not only the database.
- Create a session.
- Assign its room and speaker.
- Save it to a test attendee profile.
- Confirm that every linked screen renders the same values.
A flat table repeats speaker and room data across session rows, so program corrections can become inconsistent. Missing foreign keys or mismatched UI field names can also leave saved lists blank.
7. Build ticketing and check-in
If the event sells tickets or uses app-based entry, handle each sale as a transaction. Let check-in accept only tickets the server recognizes as paid, complimentary, or otherwise valid for that event.
Bilt can generate native attendee and staff screens. You still need to configure and test the event’s backend and payment flow.
Registration and ticket sales checklist
- Create each ticket type and assign its price.
- Set the capacity cap and sales window.
- Define access entitlements and refund rules.
- Give every order a state such as held, paid, failed, refunded, or void.
- Reserve inventory with a short expiry while checkout is open, then release it after abandonment or failed payment.
- Require each inventory update to finish as one transaction so two buyers cannot claim the final ticket.
- Collect payment through Stripe PaymentSheet, which handles card collection and tokenization without sending raw card details to your backend.
- Confirm payment through a server-side processor webhook before issuing the ticket code.
The purchase flow should stay deterministic:
Purchase request → temporary inventory hold → payment collection → server confirmation → signed ticket code
When a ticket hold expires, reconcile its payment status before releasing inventory. A late payment confirmation must recheck remaining seats in one transaction before issuing a ticket. If those seats are gone, refund the payment.
A refund or void changes the ticket status so the next validation rejects it.
QR or barcode check-in flow
Scan code → resolve ticket on the server → verify event and access → write check-in once → return accepted, duplicate, or rejected
Use an opaque, signed ticket identifier instead of putting attendee details inside the code. The check-in write should be atomic and unique to that ticket.
If offline entry is required, encrypt a limited event ticket cache and queue signed check-in records. Mark offline scans as provisional until synchronization resolves duplicates or invalid tickets.
Calculate live attendance from confirmed check-in writes, grouped the way your event needs to see them. Offline scans should appear separately until they reach the server.
This keeps the app's screens straightforward while making payment, inventory, and entry decisions authoritative on the server.
8. Connect services and safeguards
Protect connected services with roles, encryption, session tokens, input sanitization, and authorization. These controls stop attendees from reaching other accounts and keep integration keys out of the app.
List the server-side actions each role may perform. Treat the app client as an interface, not the authority for sensitive data.
Bilt can generate the app and export its React Native code. You still need to configure data access and external providers for your event.
Services and storage checklist
- Integration credentials: Keep provider keys and secrets on the server rather than storing them in the mobile app.
- On-device storage: Keep only the data needed for speed or approved offline use, encrypt it, and set a deletion rule.
- Server permissions: Enforce record access in the database or server layer for every attendee, exhibitor, and staff role.
- Offline writes: Validate queued changes again on the server before committing them.
Authentication proves who is making a request. Authorization checks whether that identity may read or change the requested record.
Apply that distinction throughout the app:
- Give attendees access only to their own profile, tickets, and permitted event content.
- Scope exhibitor accounts to their sponsor's placements and leads.
- Require stronger sign-in, including MFA, for privileged staff accounts.
- Enforce permissions in the database or server layer, not only by hiding buttons.
Protected API flow
Request → verify session token → authorize action and record → validate input → run server-side operation → write audit event → return minimum required data
- Keep payment and integration keys on the server. Encrypt sensitive data in transit and at rest.
- Throttle endpoints that create cost or change event state.
- Validate field types and lengths before writing data. Sanitize text and inspect uploaded files.
- Restrict web-facing endpoints to approved origins.
A public table or broadly scoped token can expose attendee data. A secret embedded in the mobile bundle creates another route.
Review these boundaries whenever you add an integration.
9. Build sponsor ROI workflows
If sponsors need reporting, connect each paid placement to measurable events and sponsor-owned leads. Define permissions and metrics before the first campaign runs.
Bilt can generate the app screens for sponsor workflows. You still need to decide what you will measure and configure the CRM or reporting connection.
Create sponsor placement inventory
Possible placements include:
- Banners within the agenda or floor map.
- Premium sponsor and exhibitor directory listings.
- Sponsored push messages sent only to opted-in attendees.
- Digital booths or sponsored session-track branding.
Create a sponsor and campaign record before assigning placements. Give each placement its own ID and screen location.
Store the active period with its creative asset and destination.
Count an impression only when a placement meets a visibility rule you can check. Record a tap only when the attendee activates the placement, then deduplicate events using a stable attendee or device identifier.
Run exhibitor lead capture
Badge or QR scan → permission check → attendee lookup → consent-aware capture → qualification → encrypted offline queue if needed → sync and deduplicate → sponsor export
Use these controls around the flow:
- Access: Bind every lead to one sponsor and limit exhibitor accounts to that sponsor's records.
- Consent: Export only attendee fields permitted for sponsor sharing, with the consent status stored beside the lead.
- Qualification: Use sponsor-defined tags and a free-text note instead of hard-coding one sales model.
- Offline behavior: Encrypt queued leads, prevent repeated scans from creating duplicates, and show synchronization status.
- Destination: Send approved records to a CSV export or configured CRM after successful synchronization.
Build the sponsor report
Report only events the app actually records, with a definition for each metric:
- Placement impressions, unique viewers, taps, and click-through rate.
- Sponsor-profile views and approved content downloads.
- Booth check-ins and meetings recorded through the app.
- Leads captured, qualified leads, duplicates removed, and failed synchronization attempts.
- Lead-source placement, capture time, consent status, and follow-up owner.
Include the campaign ID and reporting period so sponsors can reconcile the report with their own systems. Keep personally identifiable information in a permission-controlled export rather than a broadly shared dashboard.
Financial ROI needs sponsor-supplied campaign cost and downstream revenue or pipeline data. Without those inputs, label the report as engagement and lead performance rather than claiming a return.
10. Test real event conditions
Run agenda, check-in, maps, and offline paths on a streamed iOS simulator, a cloud Android emulator, and a physical phone before the venue fills.
Start in Bilt’s browser preview to clear obvious navigation and layout problems before involving testers. You can click, scroll, and move between screens without local setup.
Use the preview by platform:
- iOS: Switch to the cloud-streamed iOS simulator to inspect the native layout without configuring Xcode, then test the build on a physical iPhone.
- Android: Open the cloud Android emulator and repeat the same paths rather than assuming both platforms behave alike.
- Both: Record each issue with the screen, action, and expected result so the fix can be replayed.
Browser preview is the fast first pass. It does not replace testing the app in someone’s hand.
Next, open the current build on physical iOS and Android devices.
Use this pass to confirm the basics:
- The app opens at the expected starting screen.
- Text and controls remain usable on each phone.
- Rotation does not break the active screen.
- Backgrounding and reopening preserve the attendee’s place.
- Weak connectivity produces a recoverable state.
Expo Go does not cover every native capability. Move release-specific behavior to a development build or platform beta:
- push notifications
- deep links
- custom native modules
If check-in or maps use camera or location access, include permission denial and recovery in that native-build pass.
Once the core flows pass on devices, share a Bilt preview link with event owners, venue contacts, and content reviewers. Recipients can interact with the browser preview without creating an account.
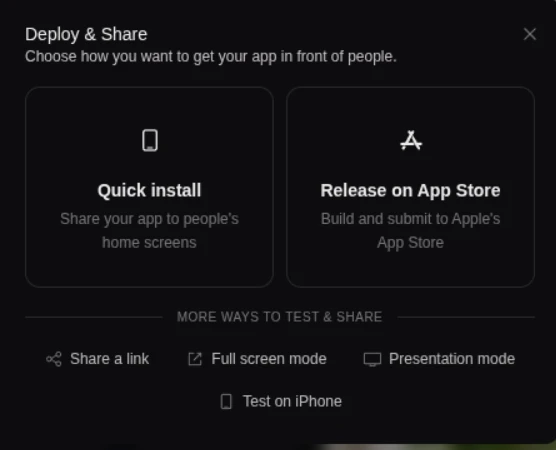
Manage each link from Deploy & Share → Share a link:
- Choose a seven-day expiry for a review round or keep the link active until you revoke it.
Give every reviewer a defined task and ask for the same feedback fields:
- device and operating system
- flow attempted
- expected result
- actual result and supporting screenshot
After sign-in and saved data are stable, move the release candidate through TestFlight or Google Play’s beta track. Keep preview links for review, but use beta builds for release-specific behavior.
Finish this stage with a rehearsal against staging, using separate data from production. Match production service settings closely enough to expose missing configuration before the event.
Use this readiness gate:
- Keep test accounts and sample attendee records out of production.
- Run the release candidate against the services it will call on event day.
- Rehearse the campaign open, agenda refresh, and arrival period as three separate loads.
- Exercise integration timeouts, expired authentication, and rate-limit responses.
- Name the owner and fallback for every failure that blocks an attendee or staff member.
Start from the registration forecast and arrival pattern, then add load until response or sync begins to degrade. Promote the build only after the team understands that boundary and its fallback.
11. Load content and drive adoption
Load final agenda, speaker, and sponsor content, then preview it as attendees will see it. Prepare the download campaigns so they are ready when the app is published.
Load the content attendees need to decide where to go and what to do next:
- Agenda: Session titles, times, room assignments, and any capacity or access notes the attendee needs.
- Speakers: Approved names, roles, bios, headshots, and links.
- Venue: Room names, floor maps, accessibility information, and help points.
- Sponsors: Approved names, logos, descriptions, links, and placement level.
Then set the first screen around the next useful action, such as opening today’s agenda or finding a room. Add registration status and attendee conversation areas after their access rules and empty states are ready.
Keep the event unpublished while content owners complete an acceptance pass. Preview with the same attendee roles that will see each schedule, message, or restricted area.
Review in this order:
- Use the browser preview to check names, links, times, and missing content.
- Use physical phones to catch clipped text, awkward image crops, and hard-to-tap controls.
- Ask each content owner to approve their area in one shared issue list.
- Mark the approved build and content set as ready for release.
Treat content approval as a controlled handoff to the release stage. Further edits should follow the agreed change process rather than restart open-ended content work.
After publication, ask attendees to install the app in the registration confirmation, when their attention is already on the event. Name one useful action the app already supports, such as opening the venue map.
Repeat the prompt where it fits the attendee journey:
- Reminder email: Link directly to the correct store and explain what becomes useful before arrival.
- SMS: Use only where attendees have consented, with one short reason to install.
- Partner or speaker lists: Supply approved copy and the same destination link.
- On-site signage: Pair the QR code with a readable fallback URL and brief install help.
Set the install target from confirmed registrations and each channel’s reach rather than borrowing a benchmark. Track the steps your analytics can verify:
- destination visits
- store-page taps
- installs or first opens
- sign-ins
- first useful in-app action
Freeze routine content before reminder messages begin. This keeps an attendee from receiving one room or time in an email and finding another in the app without explanation.
Use two content states:
- Frozen by default: Speaker and sponsor profiles plus planned room and session details.
- Live by exception: Operational changes and attendee alerts approved through the event-day update path.
Record who approved each exception and when. Keep the previous value available for rollback.
With the full content set loaded in staging, rehearse:
- first launch after installation
- agenda browsing and search
- floor-map access
- image-heavy speaker and sponsor pages
12. Prepare on-site operations
Give every live task an owner and a fallback. Before doors open, rehearse check-in, support, badges, maps, and offline procedures with the current app version.
The on-site runbook should fit on one staff sheet, with linked detail available for the people handling exceptions.
Include:
- Event basics: The approved venue map and door times.
- Ownership: The role responsible for each live workflow.
- Escalation: The first contact and escalation path for each system.
- Fallbacks: The offline check-in sequence and manual lookup method.
- Schedule control: The approved editor and message path for changes.
- Equipment: Device assignments and the charged-replacement handoff.
Before doors open, refresh the attendee manifest and maps on every staff device. During an outage, the fallback must tell staff how to record work and identify updates waiting to sync.
After service returns, one owner checks queued activity and resolves duplicates. If the app cannot queue work offline, use a controlled manual log for later reconciliation.
Plan staff QR check-in from the arrival pattern, entrance layout, and how many people you scanned in rehearsal. Place greeters before the scan point so attendees reach the correct lane with the app or code ready.
Use three lane purposes:
- Fast-pass scanning: Attendees with a ready, readable code.
- Assisted check-in: Attendees who need help finding or displaying their code.
- Exceptions and walk-ups: Record fixes, manual lookup, and badge reprints away from the scanning flow.
Choose scanner capacity after a timed rehearsal, then add coverage where a queue forms. Keep on-demand badge printing ready, with a documented connection fallback and a manual badge option.
Preload the approved floor map on every staff device before positions are assigned. Add a visible version label so outdated copies can be removed quickly.
Mark what staff need to direct someone without searching:
- entrances and check-in points
- session rooms and sponsor areas
- help desks and accessibility routes
- venue-approved safety points
Walk the main attendee routes with the map open. Correct any label that does not match the signs or room names people will see on site.
Run the dry rehearsal as an event shift, using the same device types, staff accounts, and accessories planned for the venue.
- Confirm every device has the approved app and content version.
- Sign in with staff roles and verify each role reaches only its assigned controls.
- Refresh the attendee manifest and floor maps before disconnecting the network.
- Scan valid, duplicate, and unreadable sample codes.
- Complete assisted lookup and a badge reprint through the planned station.
- Work through the offline procedure and mark every pending update.
- Restore connectivity, verify sync, and reconcile duplicates.
- Publish a schedule change and confirm the approved attendee message appears.
- Walk the wayfinding and support escalation paths with the staff who will use them.
- Test the charging plan and charged-replacement handoff.
- Record every go-live blocker with an owner, decision, and deadline.
End with a go or hold decision for each workflow. The unresolved list becomes the final work plan, not an informal set of venue-day surprises.
13. Publish before the event
Publishing before the event gives attendees a way to download the app before they arrive, either as a public web install or a native app that’s been through store review.
1. Publish the web version
The web version is the quickest way to share the app publicly if attendees need browser access or you’re still waiting for Apple and Google to review the native releases.
If you own the workspace, open Deploy & Share, choose Publish to web, and share the public HTTPS web.bilt.me URL.
- Attendees can open or install the app from their browser without an Apple or Google developer account.
- A custom domain is optional. Connect it with the required CNAME and TXT records.
iOS release: Connect the required Apple credentials, then use Bilt’s publishing workflow to prepare the app for App Store Connect.
As the owner, you handle the Apple membership, app record, store listing, build selection, and review steps. Apple says 90% of submissions are reviewed in under 24 hours, but leave room for fixes and resubmission.
Android release: Use Bilt’s publishing workflow to prepare the Android release for Play Console.
As the owner, you handle Play registration, testing setup, the store listing, and production release.
Here’s what Bilt handles for each way of publishing, and what you handle as the owner.
| Path | What goes live | Bilt handles | Store owner handles |
|---|---|---|---|
| Web | Public HTTPS web.bilt.me URL, with an optional custom domain | Provides web publishing controls in Deploy & Share | Shares the URL; attendees need no developer account |
| iOS | A native build prepared for App Store Connect and TestFlight | Guides the build through the publishing workflow after credentials are connected | Apple membership, app record, listing, build selection, and review actions |
| Android | An Android release prepared for Play Console testing | Guides the build through the publishing workflow | Play registration, testing setup, listing, and production release |
14. Measure and improve
After the event, review installs, session engagement, and attendee feedback, then ship a focused update before the next run.
Compare the signals the app already records:
- Adoption: Destination visits, store-page taps, installs or first opens, sign-ins, and the first useful in-app action.
- Event use: Agenda activity, session engagement, check-in outcomes, and the paths attendees abandoned.
- Sponsor performance: Recorded placement interactions, approved lead metrics, and synchronization failures.
- Feedback: Attendee comments, support issues, and staff notes from the on-site runbook.
Group the findings by attendee impact and urgency. Choose the smallest update that resolves the highest-priority problem, test it against the same workflow, and carry the result into the next event brief.
Build and ship an owned native app
Bring your event-app brief into Bilt and describe what attendees need to do. Bilt turns it into a React Native app for iOS and Android, with a live browser preview.
Click through the schedule and check-in flow, then tell us what to change. Keep refining the app through conversation before you export the React Native source and prepare it for store submission.
Describe what the first version of your event app should do. Start building free.
FAQs
Do I need coding skills to build an event app?
No. You can build an event app with a no-code or AI builder without writing code.
You still need to define who can access each part of the app, check how attendee data moves, and test unexpected inputs. A developer can help later if custom integrations or exported code need deeper work.
How much does it cost to build an event app?
Event app costs depend on the build route, integrations, hosting, ticketing, store accounts, and event-day support.
Store accounts add $99 per year for the Apple Developer Program and $25 once for Google Play. Your builder plan, hosting, ticket payments, and on-site support depend on the app's setup.
How long does it take to build an event app?
There is no fixed build time for an event app. The schedule depends on scope, integrations, testing, content approval, and store review.
Plan backward from the event date and leave time to test each screen, integration, and content update.
Are there free event apps or tools?
Yes. You can use a free RSVP tool or self-hosted open-source software.
Luma's free plan includes unlimited events and guests, event pages, reminders, and QR check-in. Paid tickets carry a 5% Luma platform fee plus Stripe's typically 2.9% + $0.30 processing fee.