Someone opens your delivery app, orders from a local merchant, and expects to know when it will arrive. To make that feel simple, the merchant needs the order, a courier needs the pickup, and the customer needs to see what happens next.
This guide takes that idea through a working app and a local pilot, where you can test complete deliveries before opening the service more widely. You'll decide where the service can work and what happens to each order.
You decide the delivery rules and what the local pilot needs to prove. In Bilt, you can start building free by describing the first order flow, then refine the native iOS and Android app as you test it.
What creating a delivery app involves
Creating a delivery app means giving the customer, merchant, courier, and operator their own view of the same order. Behind those screens, an order record keeps each view in step from checkout to handoff.
Before drafting screens, decide what people can order and who will carry it. Those choices determine which roles and delivery rules the app needs.
Your opening scope should settle five questions:
- Order: What can someone request for delivery?
- Participants: Who requests, prepares, carries, and oversees each order? Decide early who carries it: the merchant’s own staff, couriers you recruit, or an on-demand courier network. That choice shapes dispatch, pay, and insurance later.
- Service area: Where can pickup and drop-off happen?
- Delivery promise: What should customers and merchants be able to rely on?
- Validation: What evidence must exist before the first version is scoped?
1. Validate the model and density
Confirm paying customers, willing merchants, and available couriers in one geography before you lock the first version.
Treat the first service area as one connected market. Evidence from each side only counts when it overlaps in the same area and during the same ordering hours.
Build one validation sheet for the first service area:
- Customer demand: Record the intended customer and delivery job inside that exact area.
- Merchant supply: Confirm which merchants can fulfill pilot orders and when they can participate.
- Courier availability: Check who can cover the same area during the ordering periods you plan to test.
- Geographic concentration: Plot likely demand and confirmed supply on one map, then compare them with courier coverage.
- Unit economics: Write down the commission merchants will accept, the customer fee, and what a courier needs to earn per hour. Estimate orders per hour in that area and check whether the revenue covers delivery and payment costs.
- Insurance: Confirm cover for couriers and cargo before the pilot. Ask an insurer which general liability, commercial auto, cargo, and workers’ compensation cover your courier model requires.
Set a pass-or-fail rule before collecting evidence, then judge the area against it. A signed merchant commitment or customer order request carries more weight than general interest.
If the overlap is thin, narrow the first area or simplify the delivery promise and validate again. Extra features cannot create route density.
Lock the first version only after the evidence lines up. Record the exact service area and delivery promise it will support.
2. Map actors and order states
Name the customer, merchant, courier, and operator, then map ownership from placement through delivery.
Specific role names prevent gaps in ownership. Give each participant a clear responsibility:
- Customer: Places the order and receives the delivery.
- Merchant: Accepts the order and prepares it for pickup.
- Courier: Accepts the delivery task, collects the order, and completes the drop-off.
- Operator: Oversees exceptions when an order cannot follow the normal path.
Use the customer’s actual type and service area in the brief. Be just as specific about merchants and couriers, based on what you confirmed in step 1.
Then write the normal order path in the order those states happen:
- Placed: The customer submits the order and delivery details.
- Accepted: The merchant confirms it can fulfill the order.
- Preparing: The merchant gets the order ready for collection.
- Assigned: A courier accepts responsibility for the delivery.
- Picked up: The courier confirms collection from the merchant.
- In transit: The customer sees the current status while the courier travels to the destination.
- Delivered: The courier records completion, and the order moves to settlement.
For each state, record:
- who owns it
- what that person needs to know
- which action advances the order
- what happens when the state cannot be completed: an unavailable item at Accepted, no courier accepting at Assigned, a second drop from the same pickup at In transit (both customers need live progress, not only the first), or the wrong door at Delivered
Turn that map into a focused brief:
- Named users: Describe the verified customer group, participating merchants, and available couriers.
- Delivery goal: State the promise, such as fair pricing or trustworthy fulfillment.
- Customer flow: Follow the order from request through delivery confirmation.
- Courier flow: Follow fulfillment from assignment through pickup and completion.
- Service boundary: Name the validated area and what the first version leaves outside its scope.
The brief is focused when every state has an owner and both flows describe the same order. Feature decisions can wait until that map is clear.
3. Generate and preview the build
Your brief gives a builder like Bilt what it needs to generate the first customer ordering flow as a native iOS and Android app. Click through it while the build appears, before adding every role.
For the first request, focus on the order path you mapped in step 2, from choosing an item to placing an order. Dispatch and the other roles can follow once that path makes sense.
The live preview refreshes during generation. You can click, scroll, and move between screens before starting a separate refinement pass.
The customer flow comes first. Then describe what the merchant sees when an order arrives, how a courier accepts the job, and when an operator steps in. Bilt's scoping guide recommends one screen or feature per message.
The live preview runs the generated React Native app code rather than linked mock screens. It can reveal a broken order flow, though phone-specific behavior still needs device testing.
Courier tracking is one such behavior. Expo Go, the phone preview app, cannot run background location. Test it in a development or release build instead.
While the first version generates, inspect:
- Whether each actor reaches the right starting screen
- Whether buttons and forms trigger the intended behavior
- Whether backend-connected screens read and write the expected records
- Whether loading, empty, and error states have somewhere clear to appear
4. Refine the four interfaces
Refine each role’s screens one scoped change at a time. Include the non-ideal states each screen has to handle.
| Interface | Primary job | Refine in this pass | Failure it must handle |
|---|---|---|---|
| Customer | Place and review an order | Catalog browsing, options, basket, address, and order status | Address correction after checkout |
| Merchant | Manage and prepare the order | Catalog availability, order acceptance, and preparation status | Item unavailable or order rejected |
| Courier | Complete assigned delivery work | Assigned-order view, pickup confirmation, and completion status | Lost signal or two drops from one pickup |
| Operator | Oversee users and order records | User access, merchant records, order lookup, and exception review | Reassigning a courier mid-order |
5. Build the order backend
An order needs one reliable record that changes as the merchant and courier act on it. Set up the backend that holds that record before you add dispatch, tracking, or payments.
The backend handles sign-in (authentication), stores orders in PostgreSQL, accepts file uploads such as delivery photos, and runs order changes in server-side functions. Keep private keys and the authoritative order record there, away from screens on customers' phones.
- Order records: Keep users, merchants, couriers, orders, state changes, proof files, and payment references tied to the same order.
- Role access: Let each interface read or change only the records its role needs. Reserve exception actions for the operator.
- Server actions: Put order acceptance, assignment, status changes, checkout results, settlement updates, and dispute handling in server-side functions. Payment webhooks and payouts land there, and each card dispute costs $15 on Stripe, so give disputes a defined flow.
- Verification: Confirm every screen reads and writes the expected record before dispatch, tracking, payments, and safeguards build on it.
- Bilt Cloud: A builder like Bilt can host the backend through Bilt Cloud. Its PostgreSQL tables can be browsed and edited, email, Apple, and Google sign-in are available, and storage buckets hold proof-of-delivery photos. Server functions handle order actions, with per-run logs to check when something goes wrong.
6. Implement dispatch and routing
Decide who can take an order, how they receive the offer, and what happens if nobody accepts it. Add multi-stop routing only if a courier will carry more than one delivery at a time.
How should couriers get assigned to orders?
Dispatch should turn a ready order into a courier offer using your rules for availability and estimated arrival. Choose between automatic assignment and a manual or hybrid workflow.
Dispatch decision flow
- Confirm that the order has reached the state that makes it ready for dispatch.
- Filter for couriers who are available and permitted to serve both addresses.
- Rank eligible couriers by route ETA, then apply any priorities your business has chosen.
- Send the offer to one courier at a time or to a selected group, according to your policy.
- Set how long an offer remains open, then route unanswered or declined offers to the next candidate or manual dispatch.
- When a courier accepts, lock the assignment and give them the stop sequence.
Which maps and service-area rules do you need?
Draw the area you can serve, then use road routes to estimate whether a courier can reach pickup and delivery within your promise. Set these rules before accepting orders:
- Delivery polygons: Draw the areas where customers can place orders.
- Pickup coverage: Decide which merchant and courier locations can serve each polygon.
- Route calculations: Use Google Routes to calculate road distance and ETA instead of straight-line distance.
- Geofence triggers: Start assignment only when the order and courier meet your chosen zone conditions.
Map calls cost money once you pass the free tiers, and how often you refresh the ETA matters most. Google bills traffic-aware route requests at 5,000 free a month, then $10 per 1,000. Refresh a traffic-aware ETA every 30 seconds on a 20-minute trip and you make 40 requests per order, about $350 a month at 1,000 orders. Refreshing only when the order status changes makes fewer requests, so test how often people need an updated ETA before choosing the interval.
- Address search: Use session tokens to group a customer's address suggestions and selection under Google's session-based pricing rules.
- Budget guard: Set quotas and billing alerts on the API key before the pilot, so a leaked key or a runaway loop cannot run up the bill.
- Mapbox: The Directions and Optimization APIs include 100,000 free requests a month, then $2 per 1,000 on Mapbox’s pricing.
How do you optimize multi-stop routes?
Multi-stop routing begins after a courier accepts an order. Send the eligible stops and the constraints your operation enforces to the optimizer.
- Group the accepted stops assigned to that courier.
- Apply real constraints, such as vehicle capacity or promised delivery windows.
- Return an ordered stop list based on travel time.
- Open that sequence in turn-by-turn navigation.
- Recalculate when dispatch changes the courier's stop list.
Mapbox Optimization v2 supports multi-vehicle routes with capacity and time-window constraints through an early-access beta, so confirm access for your account.
A simpler operation can start by ordering stops for one courier at a time.
7. Add tracking and communications
Tie location and status events to the active order. Check that every role sees the same progress.
How do you attach live GPS to the order path?
Tracking should attach location updates to the active order and stop sharing at the point you choose. Decide whether sharing begins at acceptance or pickup, then ends at completion or another final state.
Use this tracking checklist:
- Request device location permission for the courier role.
- Give each location event identifiers for the courier and order, plus its timestamp and coordinates.
- Store the latest valid update for the customer map and ETA calculation.
- Keep courier tracking running when the app is in the background or the screen is locked. On iOS, that needs
Alwayslocation permission and thelocationbackground mode. On Android 11 and later, the courier must allow location all the time in Settings, because the permission dialog no longer offers it. Keep customer tracking in the foreground: Google Play treats customer delivery tracking as a foreground feature. - Stop updates when the order reaches your chosen endpoint.
- Choose how often the courier app sends a location fix. Test an interval of 10–15 seconds while moving, then check the map and battery use over a full shift.
- Show the operator when a courier’s location goes stale. Updates stop if the courier force-quits the app, and some Expo versions freeze background tracking after an app update until the app restarts.
Order events should come from the state map you created in step 2. For each transition, complete this checklist:
- Event: Name the state change and attach the order reference.
- Source: Record whether the merchant, courier, customer, or system caused it.
- Recipients: Choose which actors need the update.
- In-app change: Define the status, ETA, map, or next action each recipient sees.
- Off-app channel: Choose push, SMS, or email only where the event needs it.
- Message: Include enough order context for the recipient to understand what changed.
Choose each communications tool by where the update needs to appear:
- Open screens: Use WebSockets or Server-Sent Events.
- App alerts: Use push notifications for off-app updates.
- Other channels: Use Twilio for SMS or SendGrid for email. A US text on Twilio’s pricing costs just over one cent, carrier fees included. Route calls and texts through proxy numbers so customers and couriers never see each other’s personal numbers.
Why does native code matter for tracking communications?
A native app can request location from the phone and send push alerts when it isn't open. A builder like Bilt generates the React Native app, but you still need courier permissions, order-linked location events, and rules for who receives each alert.
Process order events and send outbound messages from server-side logic, using the provider required for each channel. Keep provider credentials there, away from the app installed on customers' and couriers' phones.
8. Configure payments and settlements
Decide when a customer pays, what happens if a charge fails, and when the merchant and courier get paid. Then check that every charge updates the order and payment record correctly.
Checkout should accept the methods that fit your customers and operations. Choose the supported set before wiring a payment provider:
- Cards: Credit and debit card payments through the provider's checkout components.
- Device wallets: Apple Pay or Google Pay where your provider and market support them.
- PayPal: Add it when it matches customer demand and your provider setup.
- Cash on delivery: Use it only if your operation has a way to collect and reconcile cash.
Use a provider suited to marketplace charges for order checkout, and keep payment logic on the server. Apple’s App Review Guideline 3.1.3(e) requires apps that sell physical goods to take payment through Apple Pay or card entry, not in-app purchase, so Apple takes no commission on delivery orders.
How should in-app charges stay tokenized?
Keep raw card details out of the app. Use the provider's SDK or hosted checkout to tokenize payment details, then pass the returned reference into the charge workflow.
Tokenized charge path
- The app presents the provider's payment interface.
- The provider returns a token or payment-method reference.
- Server-side payment logic submits that reference with the order and calculated amount.
- The provider result updates the order and settlement ledger.
For a multi-vendor marketplace, Stripe Connect's Separate Charges and Transfers can take one platform charge and create independent transfers to connected accounts. This fits orders that pay both a merchant and courier.
Budget for the fees before you set the delivery fee. In the US, Stripe charges 2.9% + $0.30 per card payment, so a $30 order costs $1.17 in card fees. If you set your own pricing on Stripe Connect, each connected account you pay in a month costs $2, plus 0.25% + $0.25 per payout.
How do you split money among the merchant and courier?
Decide how much of each order goes to the merchant, courier, and your service before setting up payouts. Save those amounts with the order so a refund or dispute can be traced later.
Payment-to-settlement flow
- Calculate the checkout total and preserve each component separately.
- Create the customer charge through the payment provider.
- Record the merchant, courier, and platform balances using your chosen allocation rules.
- Assign any tip to the recipient defined by your policy.
- When the chosen settlement event occurs, create the connected-account transfers.
- Record each transfer result and the remaining platform balance.
Before implementation, define recipient allocations and tip ownership. Then choose the event that makes each balance payable.
Delivery fees need a rule the app can calculate before checkout and the settlement ledger can reuse. Common structures include:
- Flat fee: Set one amount and specify which service areas it covers.
- Distance-based fee: Define the route-distance bands and the amount attached to each band.
- Order-size rule: Decide which basket threshold changes or removes the delivery fee.
Whichever rule you choose, calculate it before payment authorization and store it separately from the basket subtotal. The same value should feed the customer receipt and settlement ledger.
9. Add operational safeguards
Before anyone places a pilot order, check that the app can recover from interruptions and that each person can access only the orders they need.
Use these checks to describe what the build must do on a weak network and what record it should leave when an action fails.
- Resume photo or proof uploads after an interruption rather than starting them again.
- Queue pending order actions offline with unique request identifiers. On reconnection, have the server reject stale transitions and return the existing result for retries instead of creating duplicate orders.
- Verify the address before dispatch and require the intended handoff evidence before completion.
- Cache frequent reads and rate-limit requests so traffic bursts do not take the order API down.
Keep payment data and operational secrets out of the app code:
- Send checkout through a hosted, PCI-DSS-compliant processor over TLS so card data never reaches your server.
- Store API keys in a secrets manager and rotate any credential that appeared in code, logs, or a shared screen.
- Inspect authentication headers and data permissions for every third-party call to prevent data exposure and unpaid API use.
Have a technical reviewer verify these controls before pilot traffic:
- Use sign-in sessions that expire (JWTs) and restrict which websites may call the order API (CORS).
- Sanitize incoming values, throttle repeated requests, and put DDoS protection in front of public endpoints.
- Apply row-level security so customers, merchants, and couriers cannot read one another's private order records. Require multi-factor sign-in for operator accounts.
- Scan generated code for hardcoded credentials and deprecated dependencies before the pilot build is shared.
Define how failures become visible and who has authority before they happen:
- Use role-based access for refunds, courier reassignments, and disputed handoffs.
- Keep an audit trail of status changes, including who acted and when.
- Send error-monitoring alerts with the affected order and failed operation, then retain logs for diagnosis.
- Back up the order database automatically and test that a restore brings order history back.
Use this escalation prompt: “For a failed dispatch or payment webhook, who receives the alert, who may act, when is it escalated, and where is the decision recorded?”
10. Test complete delivery paths
Run every role through the full path on physical iOS and Android phones before you treat the build as launch-ready.
A successful browser preview checks the flow, but it does not verify every native capability or failure condition.
Start with Bilt’s QR-code testing to open the app on a physical iPhone or Android device.
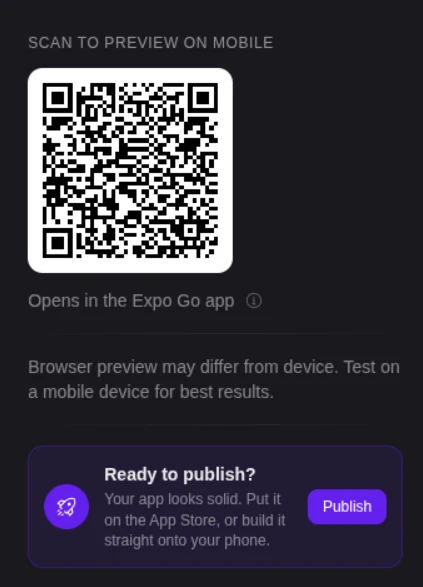
If your test route uses Expo Go, it can check touch behavior, layout, and network changes. Use a development build for background location and any other native module that Expo Go does not include.
Test the native release build on an iPhone and an Android phone too. QR-code previews alone do not verify every permission or background behavior in the version you’ll publish.
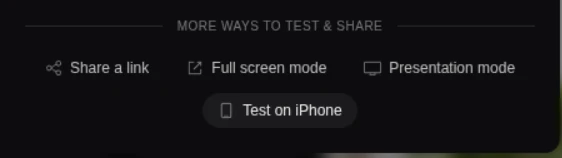
Run every test path under interruption, reconnection, and overlapping activity. A visible TypeError or Reload preview control is a failed test, even when the screen worked earlier.
Record each failure with the same questions:
- Who was acting, and on which device?
- Which build and order state were open?
- What was the network condition?
- What should have happened, and what happened instead?
- Which steps reproduce it, and who owns the retest?
Use the test table to pair each delivery path with a forced condition and a clear pass result.
| Path | Force this condition | Pass if |
|---|---|---|
| Customer order | Invalid address, lost connection, and app restart | The app shows a clear correction or resumes safely, and exactly one order exists. |
| Payment and webhook | Approval, decline, delayed callback, and retry | No charge is duplicated, no unpaid order is dispatched, and paid state recovers. |
| Merchant decision | Accept, reject, unavailable item, and device restart | The decision persists and every actor sees the same order state. |
| Dispatch and courier | Accept, timeout, reassignment, and weak network | One courier remains assigned, and queued updates send after reconnection. |
| Tracking and messages | Backgrounding, screen lock, app update mid-shift, force-quit, and delayed status updates | Every role returns to the same current state, or the operator sees that tracking stopped. |
| Two drops, one pickup | One courier carries two orders from the same merchant | Both customers see live progress, not only the first. |
| Address and handoff | Wrong address, missing evidence, and disputed completion | Invalid completion is blocked or routed to human escalation with its audit trail. |
| Complaint and refund | A complaint on a failed or completed order | An authorized person can act, and each change is logged. |
| Concurrent orders | Overlapping checkout, dispatch, and status changes | Data does not cross between orders, and the API continues responding. |
11. Run a dense local pilot
Put the working app in front of the intended local users. Collect feedback on real orders and fulfillment before expanding the service area or courier supply.
Run the pilot in one service area with intended customers, participating merchants, and couriers covering the same operating window. The goal is to complete the service, not review isolated screens.
Choose people whose normal activity overlaps locally. Use this participant prompt: “Which intended customers already order here, which merchants can fulfill during the pilot, and which couriers can cover the same area?”
Share a Bilt preview link so participants can try the app in their browser and give feedback without installing anything or creating a Bilt account. You can see whether the screens they'll use make sense to them.
- Give each participant one complete role task, then record where they stop, retry, or ask for help.
After revising from that feedback, rerun the step 10 tests on physical phones. Then complete pilot deliveries with local customers, merchants, and couriers using the tested native build.
On Google Play, a personal developer account created after 13 November 2023 must run a closed test with at least 12 testers opted in for 14 days in a row before it can publish to production. Your pilot can count if those participants opt in to the Play closed test and use its build. Record the courier app’s background-location video during the pilot too, because Google Play asks for one in the location permission declaration.
The pilot passes only when every answer is yes:
- Can a local customer place one order and recover from a network interruption without creating a duplicate?
- Can the merchant act on that order while every participant sees the same current state?
- Can a courier accept, reconnect, verify the address, and complete the handoff with the required evidence?
- Does payment status still match fulfillment after a delayed callback or retry?
- Can a complaint or refund reach an authorized person with a complete audit trail?
- Does monitoring expose the failure and route it through the defined escalation path?
- Did courier pay per hour and the merchant commission still work at pilot volume?
If any answer is no, record the failure, assign an owner, fix it, and rerun the full path. When every answer is yes, pass the tested build to the launch step.
12. Publish, acquire, and retain
After a successful local pilot, publish the store listings. Keep acquisition and retention focused on the same proven market.
Staged launch
Use this launch checklist:
- Lock the launch area and operating hours around the supply proven in your pilot.
- Prepare the app icon and store screenshots.
- Finish the store listing and support details. Complete the privacy policy and disclosures.
- Prepare the native release for the stores your pilot supports.
- Open access to the initial market before expanding your service area.
- Assign an owner to review order failures and customer feedback at a cadence that matches pilot order volume.
Bilt supports deployment to App Store Connect and Google Play Console. Apple and Google review the submitted app before approving publication.
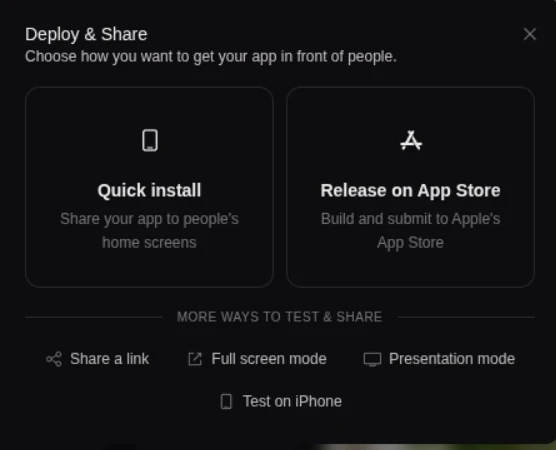
A browser preview does not create an App Store or Google Play listing. Publishing a native app requires a separate store submission.
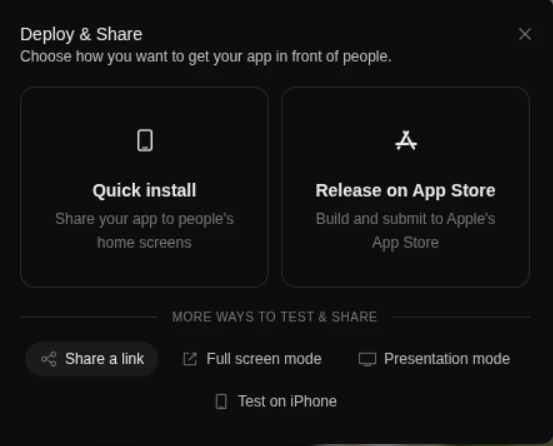
Native store handoff
Publishing on the App Store requires an Apple Developer account at $99/year. Publishing on Google Play requires a Google Play Developer account at $25 one-time.
Once developer accounts and store credentials are connected, Bilt can build, sign, and upload where the guided workflow supports it.
- Create each store record and its required app identifiers.
- Finish the public listing and upload its screenshots.
- Complete privacy disclosures and policy questions.
- Let customers, merchants, and couriers delete their accounts inside the app. Apple’s account deletion rule applies to any app that allows sign-up.
- Add support details and a working demo login for each role reviewers must see, with the backend switched on.
- Connect the required keys so Bilt can prepare and upload the build.
- For Android, complete the background-location declaration for the courier app, with its short video and an in-app disclosure shown before the permission prompt.
- Put the Android App Bundle (
.aab) on a Google Play closed testing track. The first release may need a manual upload in Play Console. Once publishing is ready, later builds can go to internal testing automatically. New personal accounts must meet the closed-test requirement before requesting production access. - Submit the finished listing and build for review inside the store’s tools. Apple and Google decide approval.
Local acquisition and retention loop
After publication, keep acquisition focused on the same dense area used for the pilot. This keeps marketing aligned with merchant and courier coverage.
Run this loop on a regular cadence that matches order volume:
- Acquire locally: Run geo-focused pages and promotions where you can fulfill orders. Give participating merchants trackable referral links for that zone.
- Convert: Send each campaign to a clear first-order path with the delivery area, fees, and expected window visible before checkout.
- Retain: Make the last order easy to repeat. Test loyalty rewards and targeted push messages against actual order behavior.
- Listen: Collect feedback after delivery, then group it by cancellation reasons, late orders, refunds, or support problems.
- Adjust: Fix the recurring operational or app issue, update the campaign, and compare the next review period with the previous one.
Keep one scorecard for the initial market:
- Acquisition: Track spend and completed first orders by source, then calculate local customer acquisition cost.
- Fulfillment: Watch completion, cancellation reasons, per-drop cost, and promised versus actual delivery windows.
- Retention: Measure reorder rate and reorder timing alongside loyalty participation and message opt-outs.
- Feedback: Turn repeated customer and courier complaints into a prioritized release queue.
Expand beyond the initial market only after its supply, delivery performance, and repeat demand are dependable.
Turn your delivery plan into a working app
A delivery app is ready for a wider launch when customers can place an order and the merchant, courier, and operator can carry it through a real handoff. Use the pilot results to fix what still fails before submitting the native build.
If you're ready to build that order flow, describe what a customer orders and how a merchant accepts it in Bilt. You can refine the native app as you test complete deliveries, then prepare it for store submission. Start building free and preview the first path.
FAQs
How do delivery apps make money?
Delivery apps usually make money from three groups of revenue:
- Orders: Customer delivery fees and merchant commissions.
- Recurring access: Customer or merchant subscriptions.
- Other services: Advertising and B2B fulfillment charges.
How much does it cost to create a delivery app?
A delivery app costs more than its builder subscription. Budget for store accounts and the tools that run orders, then check whether completed deliveries can cover courier pay. The starting costs include:
- Store accounts: $99 a year for Apple, and $25 once for Google Play.
- Bilt: a permanent free tier. Paid plans start at €15 for the first month of Professional on monthly billing, then €25/month, or €19/month billed annually.
The costs that grow with orders:
- Card fees: 2.9% + $0.30 per order on Stripe in the US, plus payout fees if you pay merchants and couriers through Connect.
- Maps: free up to each API’s monthly tier, then billed per request. How often you refresh the ETA matters most (see step 6).
- SMS: about one cent per text in the US.
- Couriers: usually the largest cost by far, so model pay per hour before you set fees.
What is the difference between a food delivery app and a general delivery app?
A food delivery app coordinates menus, item availability, preparation, pickup, and time-sensitive delivery.
A general delivery app moves parcels and other goods. It cares less about preparation time and more about item size, vehicle capacity, and proof of delivery.
Can I build a delivery app without coding?
Yes. You can create a delivery app without coding by describing what it should do. A builder like Bilt generates the app, so you don't have to write the code yourself.
Your time goes into defining and testing how each person moves an order, including payment, dispatch, and location updates.
Do restaurants need their own separate app?
A restaurant benefits from its own app when repeat ordering, loyalty, and control over how customers order justify asking them to install it.
Mobile web can suit occasional ordering, while a native app makes more sense when repeat ordering and loyalty give customers a reason to keep it installed.