
Publishing to the App Store is not one upload button. It is Apple checking your account, signed build, store listing, privacy answers, and reviewer access before the app can go live.
For non-technical founders, this is often where the last 5% gets painful. The app may work on a phone, but App Store Connect still needs clean records, matching build details, and answers Apple can verify.
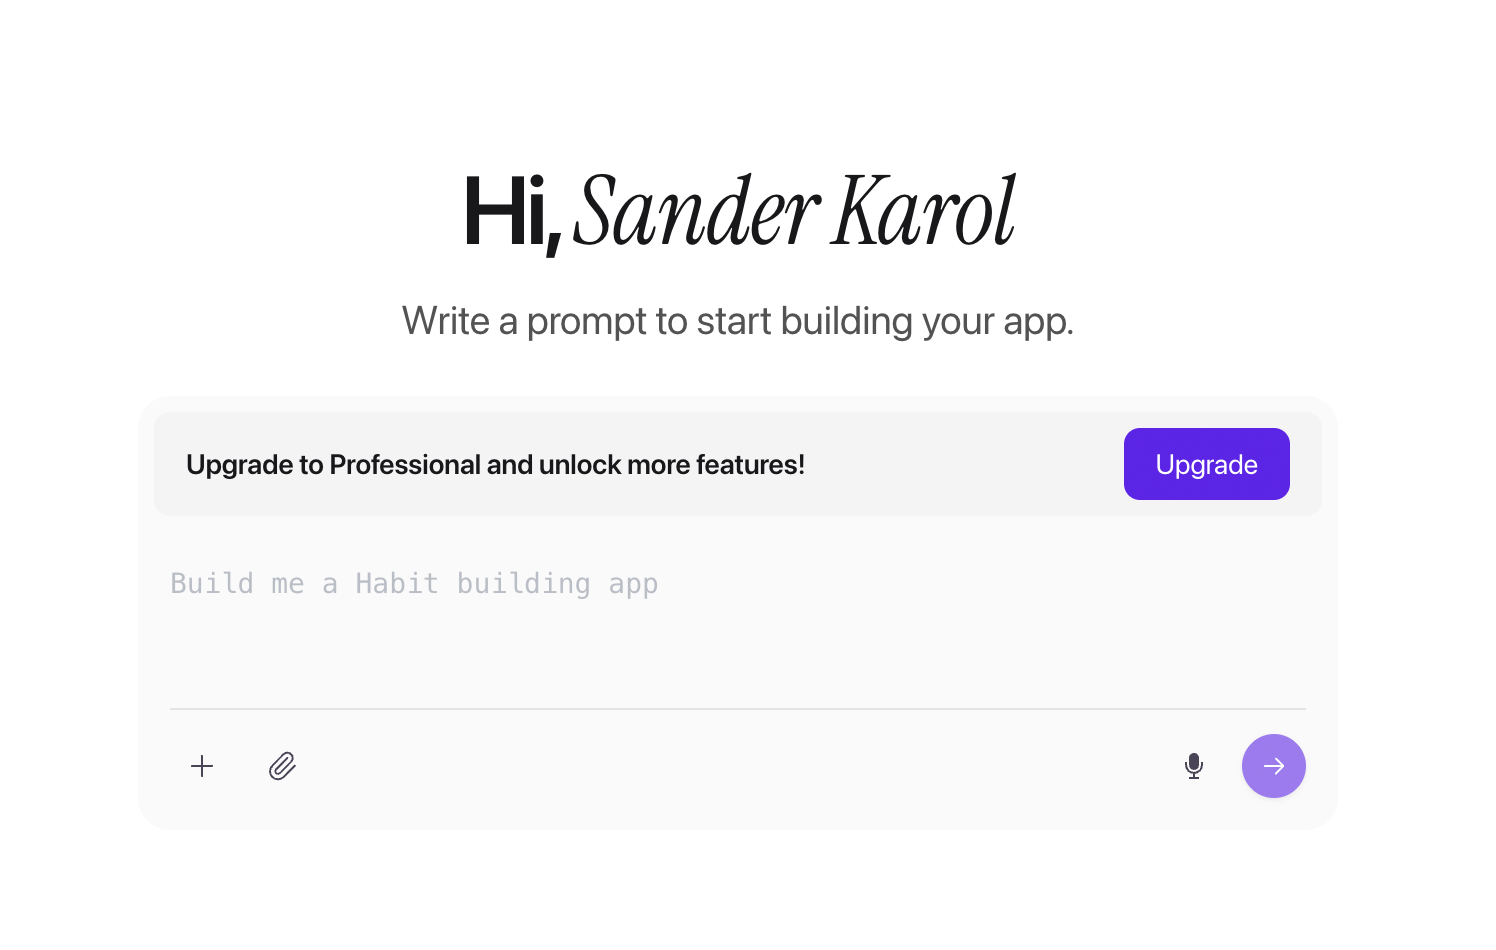
With Bilt, you describe the app, refine it in plain English, and get a real native iOS and Android build without opening Xcode. It handles the build, signing, and App Store Connect upload; every Apple account decision stays with you.
Bilt product demo — describe an app, get a native app in live preview
One Bilt user reached a shippable build in about two hours after 11 prompts. Apple approval still depends on review, but the build-and-submission path is much faster when signing and upload work are handled for you.
TL;DR and launch-day checklist
Use this checklist on submission day. The 13-step walkthrough below covers each item in detail.
- Access: Confirm Apple Developer account access and App Store Connect permissions.
- Build: Prepare a signed iOS build, or use Bilt's App Store Connect upload path so you do not have to manage Xcode signing yourself.
- Listing: Check store assets and privacy answers before choosing pricing and availability.
- Review: Run TestFlight, submit for App Review, and monitor review messages.
- Release: Publish after approval and watch post-launch issues.
- Android: Use Android App Bundle (AAB) format for Google Play; Bilt generates the signed
.aab. The first release may require a manual upload in Play Console, and once publishing is ready, Bilt sends later builds to Google Play's internal testing track.
What you need before publishing
Before you submit, gather the pieces Apple will ask for. This saves you from getting stuck halfway through App Store Connect.
- Apple Developer Program membership: You need an active Apple Developer account, which Apple lists at $99/year.
- App Store Connect access: The Account Holder should keep control and invite collaborators through Users and Access instead of sharing the main Apple ID login.
- Working app build: The app should run on a real iPhone, not just in preview.
- Bundle ID and app record: The Bundle ID in App Store Connect must match the build you submit.
- Store assets: Prepare the app name, subtitle, description, screenshots, support URL, privacy policy URL, and reviewer notes.
- Compliance details: Know what data the app collects, which SDKs it uses, whether tracking applies, and whether login credentials are needed for review.
- Launch choices: Decide pricing, countries or regions, release timing, and whether you want a manual release after approval.
Publishing path overview
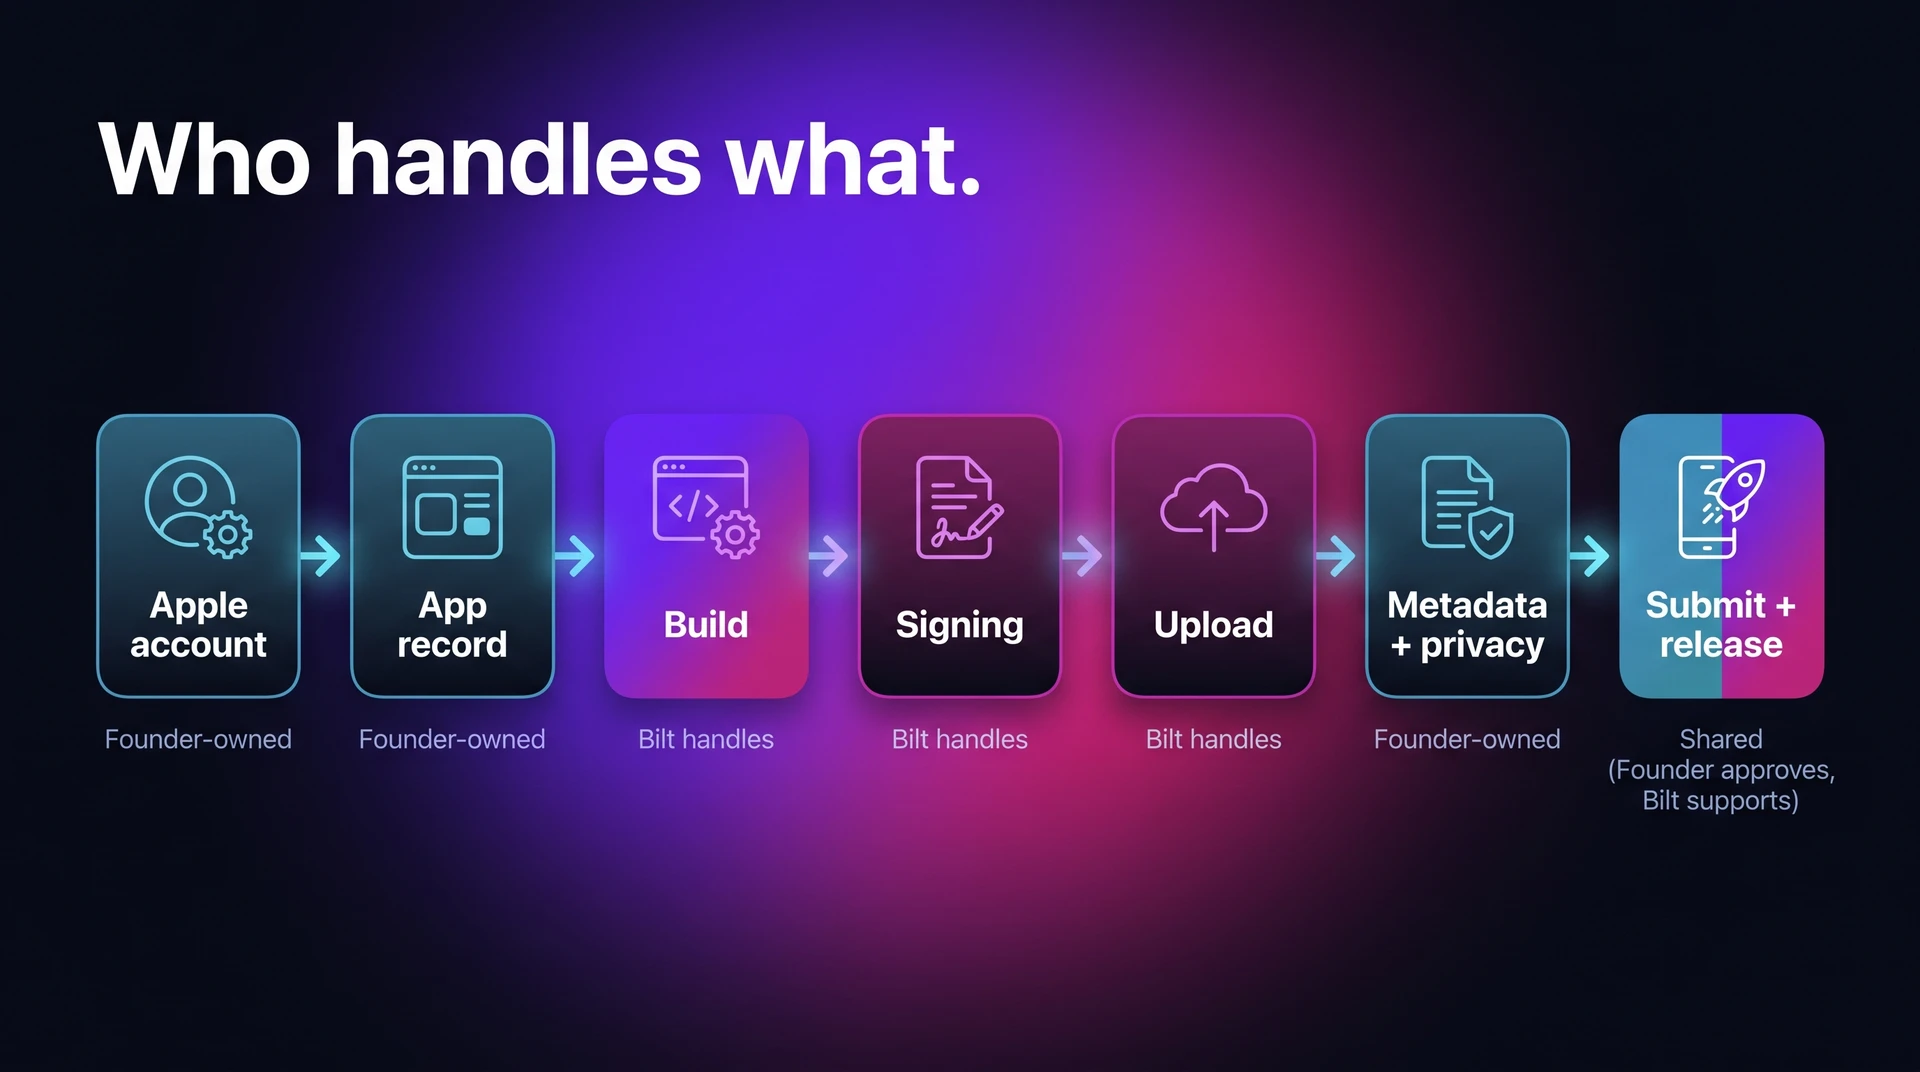
Apple publishing follows a fixed order, even when Bilt handles the technical work. The store still needs account access, app identity, a signed build, metadata, privacy answers, review submission, and final release settings.
Use one simple split throughout the process: the founder controls Apple account decisions, and Bilt handles the technical build, signing, upload, and submission support.
Google Play follows the same shape: build, listing, compliance, review, release. The Android specifics are at the end of this guide.
| Publishing task | Manual path | Bilt path |
|---|---|---|
| Build the app | Use Xcode, React Native, or a developer workflow | Describe the app and refine it in Bilt |
| Sign the build | Configure certificates and provisioning profiles | Bilt manages the signing workflow |
| Upload the build | Use Xcode Organizer or another upload tool | Bilt supports App Store Connect upload |
| Complete store details | Fill App Store Connect fields yourself | You approve the final fields; Bilt can draft the copy |
| Submit and respond to review | Submit and fix issues manually | Bilt uploads the build; you attach it to the version, click Add for Review, and click Submit to App Review in App Store Connect |
1. Set up App Store access
Before Bilt can publish anything, Apple needs a paid developer account and a trusted path into App Store Connect.
Enroll in the Apple Developer Program first. Submission work waits until the account is active.
Handle these Apple-side tasks before Bilt begins publishing work:
- Legal agreements: Accept new agreements as soon as Apple posts them; unresolved agreements can block submission.
- Tax and banking: Add paid-app and in-app purchase details early if the app will charge users.
- Team roles: Invite collaborators through App Store Connect Users and Access with the minimum role needed; avoid sharing the Account Holder login.
- Regional details: Confirm the business country, entity details, and default availability before you create the app record.
Create a Team Key under App Store Connect → Integrations → App Store Connect API. Set its role to Admin.
Bilt can walk you through the screens, but you choose which key gets shared and keep control of the Apple account.
Create the Team Key with the Admin role, then store the downloaded private key securely before moving to app identity:
Open Settings → Publish → App Store → Configure API key. Enter the Issuer ID and Key ID, upload the .p8 private key, and save.
| Setup area | Who controls it | Why it matters |
|---|---|---|
| Apple Developer enrollment | User through Apple | Required before App Store Connect submission work starts |
| Legal, tax, banking, region, team roles | User through Apple | Prevents account delays later in publishing |
| App Store Connect API key | User creates and shares | Lets Bilt access the publishing workflow with defined permissions |
| Certificates and provisioning profiles | Bilt | Choose Generate in Bilt to have Bilt create and manage the distribution certificate and provisioning profile, or upload existing signing assets |
2. Create app identity
This is a short App Store Connect form, but one field matters a lot later: Bundle ID.
The Bundle ID is the app's unique Apple identifier. It often looks like com.company.appname, and it must match the signed build Bilt generates.
Register the Bundle ID in the Apple Developer portal, then create the App Store Connect app using that Bundle ID. Configure the same Bundle ID and the app's numeric Apple ID in Bilt.
Fill in four fields, then move on:
- App name: The name used for the App Store Connect record and, later, the public listing.
- Platform: Choose iOS for an iPhone app.
- Bundle ID: Use the exact identifier Bilt will build against; a mismatch can break upload later.
- SKU: Pick a short internal code for tracking the app record. Users do not see it.
Stop there; Bilt handles distribution certificates and provisioning profiles later. With the record created, review-readiness work starts inside the app itself.
3. Prepare review-ready app
App Review starts with a functional product, not an upload. Apple's Guideline 4.2 on minimum functionality makes AI-built apps vulnerable when the build feels like a thin template or WebView.
Test the actions your App Store description promises, especially the first-run path and the main paid or content flow.
For a habit tracker, that means creating a habit, saving progress, and seeing it again after a restart. For a booking app, it means picking a time and landing on a real confirmation.
Bilt Cloud can provide the authentication and persistent PostgreSQL data behind saved progress, accounts, and booking records.
Run each flow from the first tap to a saved or visible result:
- Dead-end screens: Every tap target should lead to the expected screen.
- Blocked paths: Forms and permission prompts should let a normal user finish the task.
- Placeholder content: Reviewers need usable functionality, not "coming soon" screens or fake demo states.
- Permission purpose text: Camera, location, notification, and tracking prompts need clear purpose text before Apple sees them.
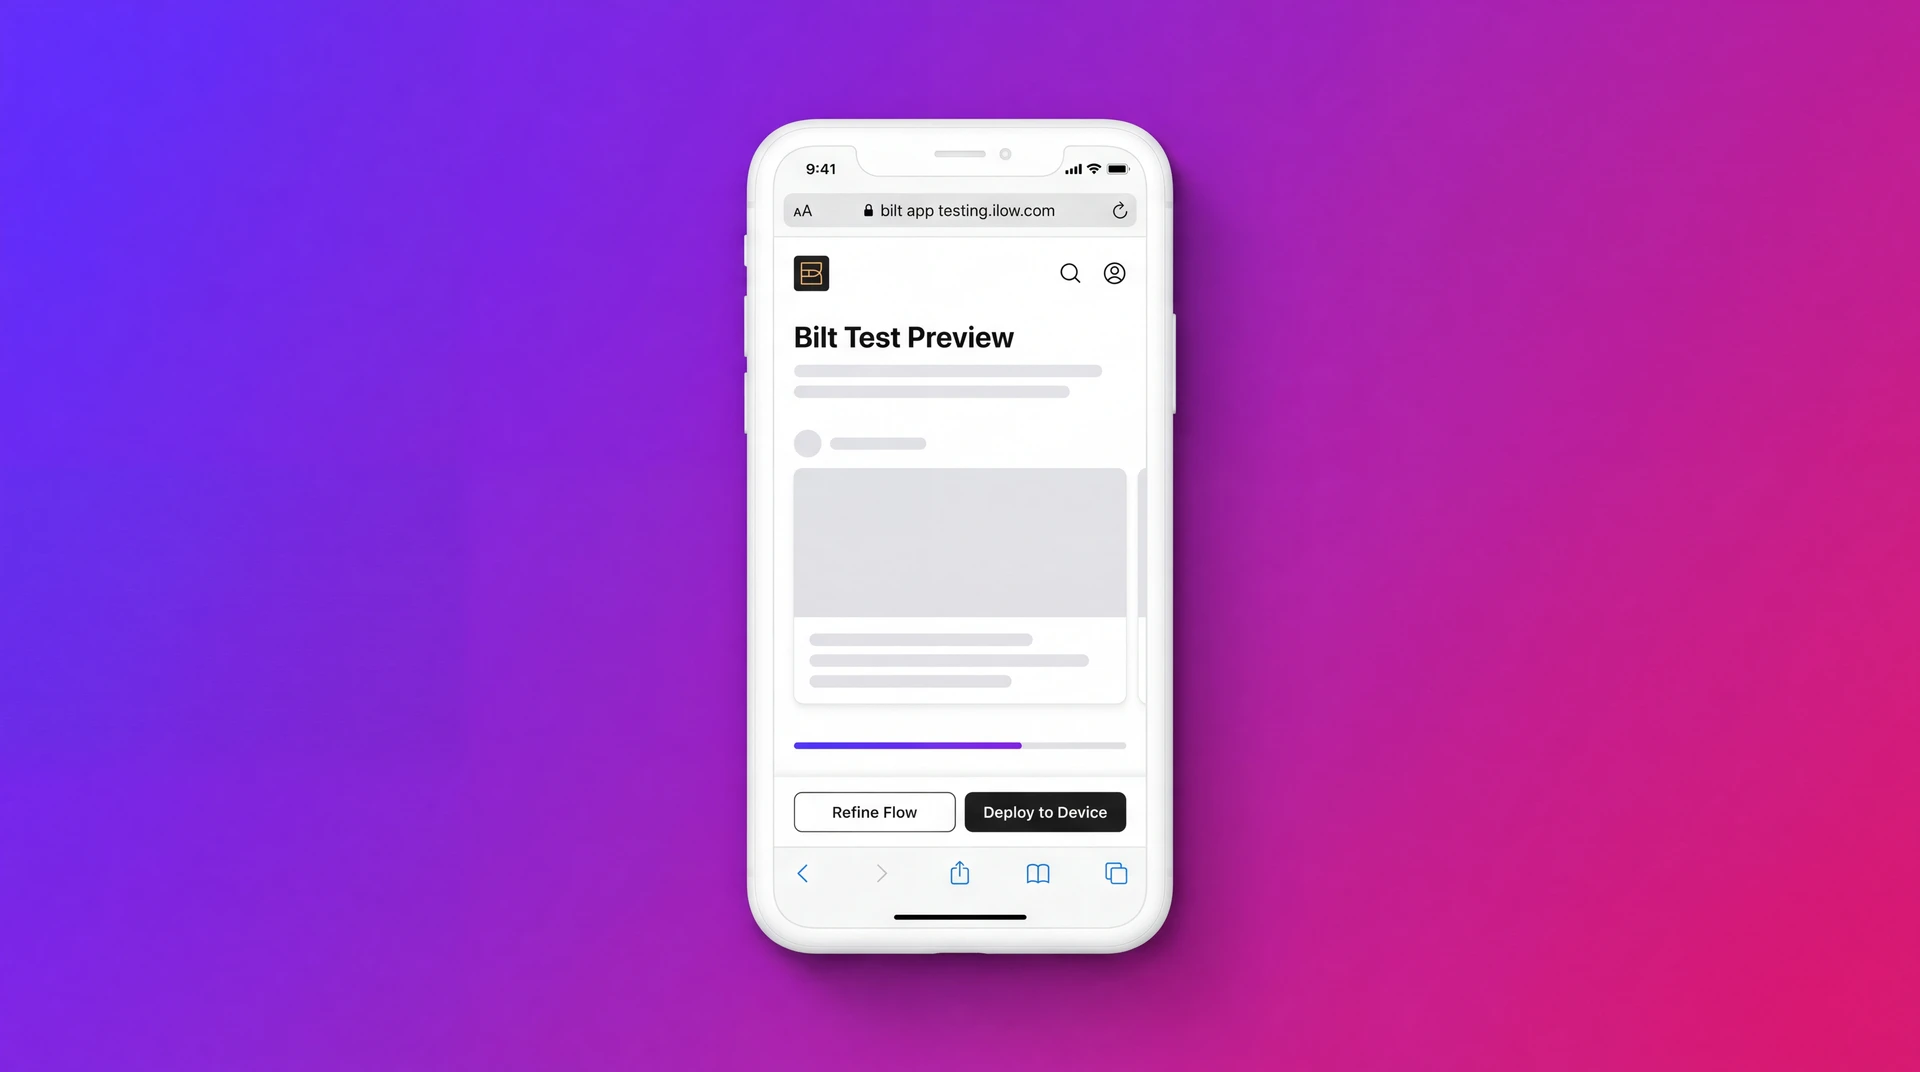
Use Bilt's browser-based iOS simulator during refinement. Then scan the QR code to open the app in Expo Go on a physical iPhone, so you catch problems that previews can hide.
For APIs that Expo Go cannot run, use Bilt's Test on iPhone option. It installs a real native build and requires a Mac with Xcode and a USB-connected iPhone.
For gated areas, create reviewer credentials before submission. Use this checklist as the final pass before App Review:
| Check | What to verify before submission |
|---|---|
| Core functionality | Primary user flows work end to end without dead screens or broken actions |
| Permissions and consent | Permission prompts use clear purpose text and data-sharing flows include required consent controls |
| Reviewer access | Login-gated or paid areas have working reviewer credentials and instructions |
| Bilt preview | The app has been checked in the streamed iOS simulator during refinement |
| Physical-device testing | Important flows have been tested on a real iPhone through QR code access |
Still choosing a build tool? Our comparison of AI mobile app builders weighs native output, device testing, and publishing support.
4. Write the App Store listing
Apple reviewers compare the listing against the build you submit. If a screenshot promises an unfinished feature, the listing can create the review issue.
Bilt can draft the description and help with keyword or screenshot direction. You still approve the final App Store Connect fields before saving.
Use Apple's app metadata reference as the source of truth for limits and required fields.
Work through the listing in this order:
- Name and subtitle: The name identifies the app. The subtitle can be up to 30 characters, so make the main use case clear quickly.
- Description: Explain what the app actually does today. Do not promise unfinished features.
- Keywords: Apple gives you 100 characters for keywords, so use focused terms instead of repeating the app name.
- Category: Choose one primary category and add a secondary category only when the app clearly fits both.
- Support and marketing URLs: Add a working support URL, plus a marketing URL if you have a landing page.
- Age rating: Answer the questions based on the actual build, then keep screenshots and copy consistent with that rating.
For screenshots, prepare up to 10 images per product page. The first 1-3 screenshots shape the search-result impression because users see them first.
Use current app screens, not mockups that promise features you have not built yet.
5. Configure privacy and compliance
Privacy answers stay yours, even in a Bilt launch. Only you know what the app collects and why, so nobody can fill these in for you.
Reviewers can compare privacy answers against app behavior, SDKs, consent prompts, and visible data flows.
Start with the public pages Apple expects:
- Privacy policy URL: Explain the data the app collects, why each data type is used, and how users can contact you.
- Support URL: Give users a working place for help, bug reports, and account support.
- Account deletion: If the app lets users create accounts, users must be able to initiate account deletion from within the app. A support-email-only route is not enough.
Then answer the questionnaires inside App Store Connect:
- App Privacy answers: Match the app, backend, and third-party SDK behavior, including data linked to users or used for tracking.
- Encryption and export compliance: Disclose standard HTTPS, custom cryptography, and any encryption built into the app or backend service.
- EU trader status: State whether you are acting as a trader under the EU Digital Services Act and provide required contact details when applicable.
- SDK privacy manifests: Review third-party SDKs and required-reason APIs; Apple began enforcing privacy manifest requirements for listed SDKs in 2024 through Apple Developer.
Check tracking and SDK behavior before submission:
- ATT prompt: Show it before tracking starts, when tracking applies.
- Firebase Analytics: Confirm which events and identifiers are collected.
- Meta SDK: Check whether tracking starts before consent.
- Google Mobile Ads: Confirm ad personalization and consent settings.
Finish with one manual consistency pass:
- App Privacy answers match app screens, backend logs, and SDK settings.
- Bilt Cloud Automations keep API keys and sensitive logic on the server, so they are never bundled into the mobile app.
- Consent controls are visible before data-sharing choices matter.
Once the answers match the build, use TestFlight to check whether the app behaves the way the disclosures claim.
- Test with TestFlight
The simulator is only a preview. TestFlight shows how the beta behaves on real iPhones and iPads after the build reaches App Store Connect.
Bilt uploads every App Store build to App Store Connect and adds a TestFlight button to the Build tab once Apple has processed it. Click TestFlight on the Build tab to manage testers.
Use the beta listing to tell testers exactly what to break:
- Beta description: Explain the app in plain language, including the main user action.
- Features to test: Name the two or three flows testers should hit first.
- Feedback email: Use an inbox you will check during the test window.
- Tester groups: Start with internal testers, then expand to external testers after the core flow survives a small group.
Run the core flows before visual polish:
- Create an account or log in.
- Complete the app's main action.
- Save data, force-close the app, reopen it, and confirm the saved data still appears.
- Test on at least two device sizes and more than one iOS version.
Apple's TestFlight limits shape how you plan the beta:
- Builds expire after 90 days.
- Apps can have up to 100 internal testers.
- Apps can have up to 10,000 external testers.
Plan for one extra gate on external testing. The first build added to an external tester group usually needs Beta App Review before testers can install it.
Watch for failures previews hide:
- Login sessions that reset after closing the app.
- Database writes that appear saved, then disappear after reinstall.
- Permission prompts that appear after the feature already failed.
- Slow first-run screens that make testers think the app froze.
Fix each failed flow, upload a new build, then run the same path again.
- Generate the signed build
Signing is where otherwise-finished apps can stall. The symptom is a build that fails before App Store Connect can attach it to the app.
In plain English, signing proves the app came from your Apple Developer account and is allowed to be distributed through the App Store.
In Bilt, signing starts after the Bundle ID and App Store Connect API access are connected. Those two inputs still belong to the account holder.
Open Settings → Publish → Build, select App Store, and click Start App Store build. Bilt builds, signs, and uploads the package.
You later select the processed build in App Store Connect.
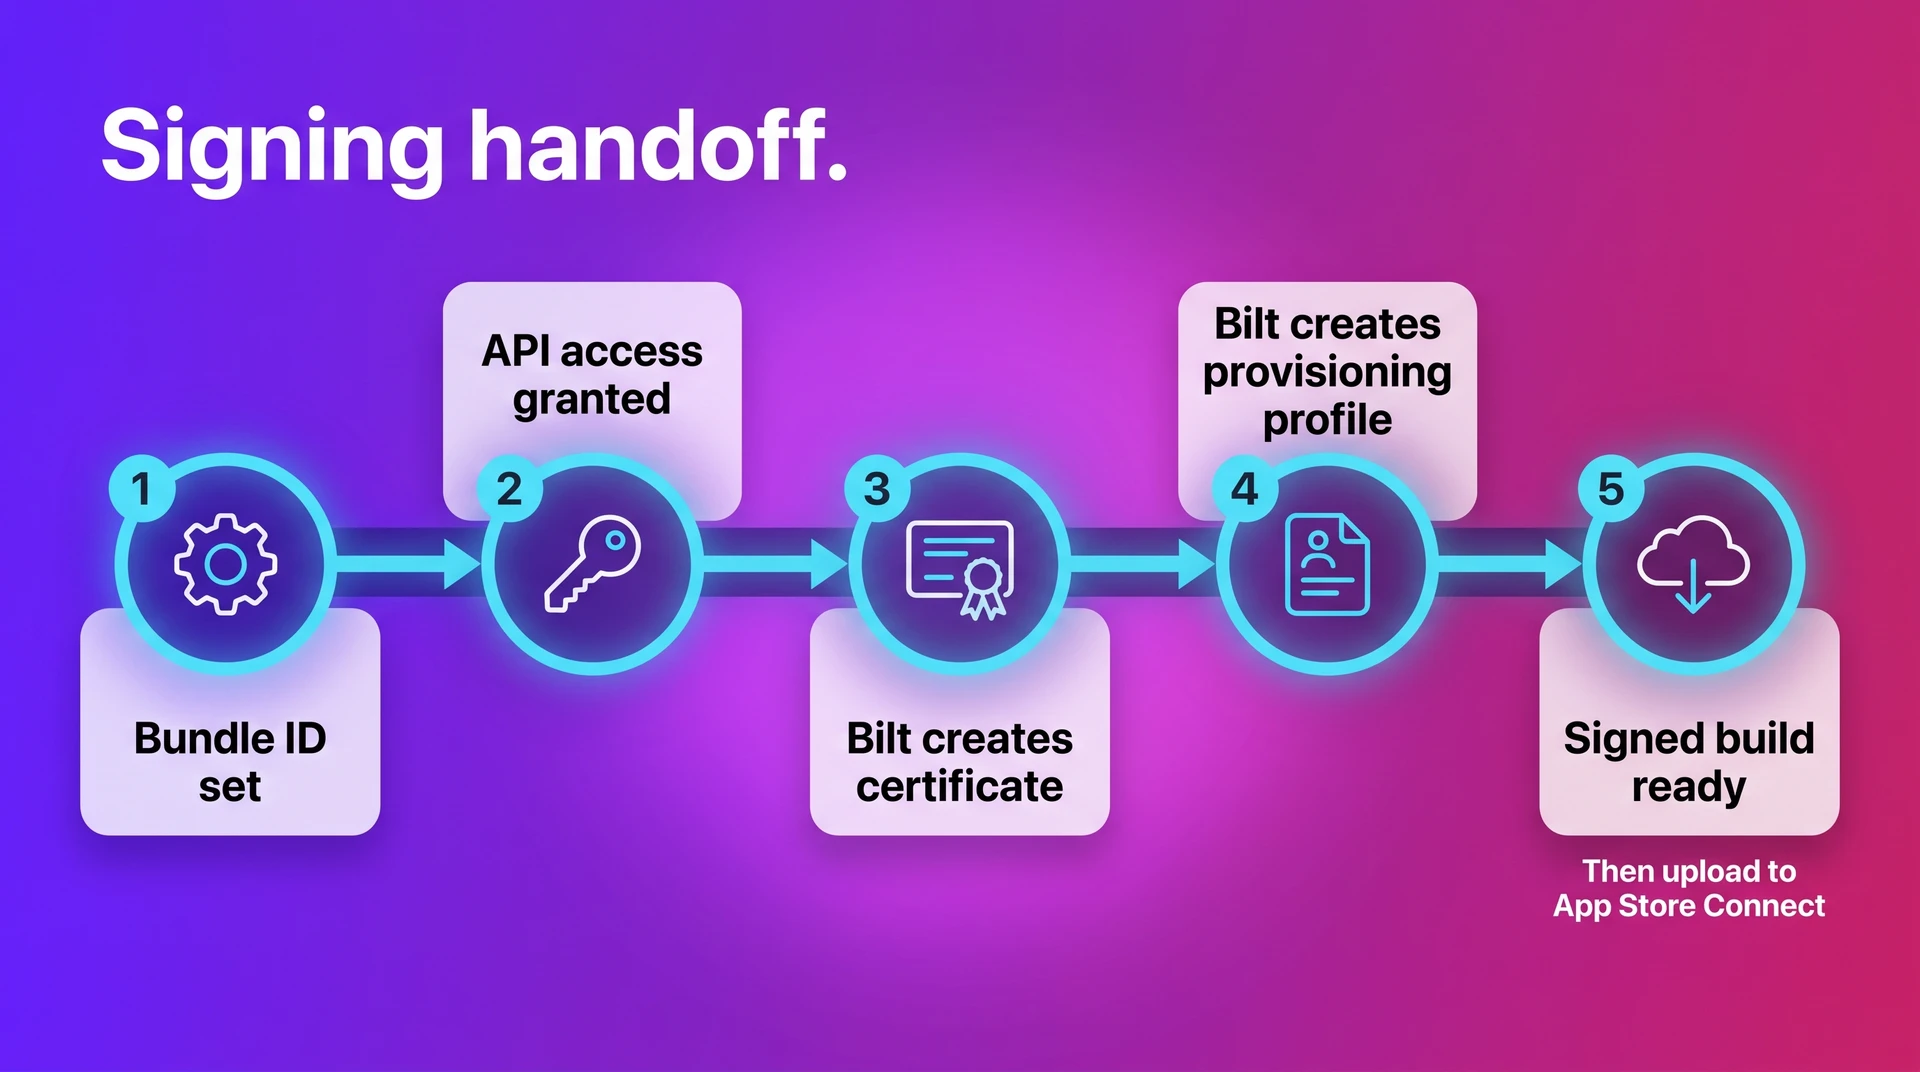
The failure pattern is usually inconsistency between these pieces:
- Distribution certificate: owned by the Apple developer team that is allowed to sign the app.
- Provisioning profile: ties the certificate to the exact bundle ID and App Store distribution path.
- Archive: the packaged release build; upload fails when archive signing points at the wrong team or bundle ID.
In the manual Xcode path, use Organizer errors as the clue:
- Missing profile: the app has no valid App Store provisioning profile.
- Invalid certificate: the certificate is expired, revoked, or owned by another team.
- Bundle identifier mismatch: the build uses a bundle ID that differs from App Store Connect.
Bilt takes Xcode signing off your checklist entirely. Here is the split:
| Path | Build step | Signing setup | What you manage manually |
|---|---|---|---|
| Manual Xcode path | Archive the project in Xcode | Configure signing certificates and provisioning profiles | Xcode toolchain, certificate creation, profile setup |
| Managed Bilt path | Build generation happens in the deployment workflow | Bilt creates and manages the certificate and provisioning profile | Bundle ID and App Store Connect API access |
Signing is also where tool choice shows up. Our roundup of vibe-coding tools for iOS covers which ones reach TestFlight and where developer-level setup starts.
- Upload and select the build
At this point, the packaged app file is ready. The common mistake is choosing an older uploaded build because App Store Connect still shows previous uploads.
On the manual path, the developer uploads the Xcode archive through Organizer, then waits for App Store Connect to process it.
On the Bilt path, the upload runs after App Store Connect API access is granted. You still choose the build tied to the release version.
Before selecting a build, check three things. The version is the public release label; the build number identifies the exact uploaded file.
- Build number: Choose the latest processed build, especially after a fix upload. Bilt checks the latest TestFlight build and automatically gives the next build its number; you still select the processed build to attach to the App Store version.
- Version match: Confirm the build belongs to the App Store version you are preparing.
- Processing status: Wait until App Store Connect finishes processing before submission.
The upload path changes, but the final build-selection decision inside App Store Connect is the same:
| Step | Manual App Store path | Managed path in this workflow |
|---|---|---|
| Get build into App Store Connect | Archive in Xcode and upload through Organizer or another upload tool | Technical upload runs through App Store Connect after access is granted |
| Choose build for version | Pick one uploaded build from the app’s available builds in App Store Connect | Select and attach Bilt's uploaded build on the version page in App Store Connect |
| Technical overhead | Requires direct work with Xcode and manual upload tooling | Avoids direct work in Xcode or manual store submission tools |
Confirm the selected build one last time before you submit.
9. Set pricing and availability
Pricing and availability are quick App Store Connect fields, but they still block submission when left unfinished.
Keep this step simple: decide whether the app is free or paid, choose the tax category, select countries or regions, and pick the release timing.
Apple requires the final pricing, tax, territory, and release fields inside your own account, so this is one step nobody can finish for you.
10. Submit for App Review
Submission is a handoff to Apple, so the goal is to remove every obvious reason a reviewer gets stuck.
Apple says 90% of submissions are reviewed in less than 24 hours, but incomplete submissions can take longer.
Before you submit, check these five items:
- Metadata: The app name, subtitle, description, screenshots, support URL, and category match the actual build.
- Privacy and legal answers: Privacy, encryption, advertising identifier, and content rights declarations are finished in App Store Connect.
- Reviewer access: Demo credentials work in a fresh install, and notes explain any gated flow.
- Selected build: The correct uploaded build is attached to the submission.
- Release settings: Pricing, territories, release timing, and phased rollout choices are set.
Bilt builds, signs, and uploads the package automatically; after Apple processes it, you select the build and complete the review submission in App Store Connect. Pricing, compliance, and reviewer notes still need a human pass.
| Checkpoint | Who must complete it | Why it matters before submission |
|---|---|---|
| Metadata | User | Incomplete listing details block submission readiness |
| Compliance answers | User | Apple review starts only after required declarations are complete |
| Reviewer credentials | User when login is required | Apple cannot test gated flows without working access |
| Submit selected build | User in App Store Connect, who attaches the build, adds it for review, and submits it to App Review | This is the action that starts App Review |
If Apple flags the build, treat the rejection as a repair queue, not a verdict on the whole product.
11. Fix App Review issues and resubmit
Rejections are frustrating because Apple's message is often short, literal, and tied to one guideline reference.
Start in Resolution Center. Read the exact guideline, check the screenshots Apple attached, and fix the named issue before changing anything else.
Use this order before you resubmit:
- Fix App Store Connect issues: Correct missing metadata, inaccurate screenshots, privacy details, demo credentials, or unclear review notes.
- Fix app build issues: Ship a new build for crashes, broken links, placeholder screens, missing consent controls, or flows Apple cannot complete.
- Fix product-level issues: Rework the app when Apple flags Guideline 4.2 Minimum Functionality, repeated similar apps, web clipping, or an incomplete core experience.
Guideline 4.2 is the rejection that hurts no-code and AI-built apps most. Apple is looking for native usefulness, not a thin wrapper around a website, template, or static content feed.
To navigate 4.2, add or clarify a core flow the reviewer can complete on-device: account creation, saved state, notifications, purchases, personalization, camera use, or another mobile-first interaction.
Reviewer access problems are usually faster. Add a working demo account, setup steps, and notes that point Apple to the feature they could not reach.
When a rejection mixes App Store Connect settings, reviewer notes, and app-level fixes, Bilt support can help by call or live chat.
| Issue type | Typical fix location | Who completes it |
|---|---|---|
| Missing metadata | App Store Connect | User |
| Missing reviewer credentials | App Store Connect | User |
| Missing consent controls | App build | You, with Bilt rebuilding the app |
| Incomplete app functionality | App build | You, with Bilt rebuilding the app |
Resubmit only after the fix matches Apple's guideline language. A vague appeal usually costs more time than a narrow repair.
12. Release and monitor
Approval is not the same as a clean launch. App Store availability can still take time after release, so schedule emails and ads around the live listing.
Manual release gives founders better control for a coordinated launch. Automatic release works when the exact hour does not matter.
Apple's phased release is mainly for app updates. It can roll an update out gradually over 7 days, which helps you catch problems before every user gets the new version.
Watch the first-day signals that show whether the app is stable:
- Crash reports in App Store Connect, Xcode Organizer, Firebase Crashlytics, or Sentry.
- Sign-up, onboarding, login, payments, notifications, and account recovery.
- Day-one retention, plus App Store reviews and support tickets for complaints that repeat.
Pause a rollout when one core flow breaks, especially sign-up, checkout, notifications, or account recovery.
Pick the release mode that fits your launch plan:
| Release choice | What it means | Timing detail |
|---|---|---|
| Automatic or immediate release | App goes live as soon as approval and release conditions are met | May still take up to 24 hours to appear on the App Store |
| Manual release | You choose when to make the approved app live | Useful when coordinating a specific launch date |
| Phased release | Update reaches users gradually instead of all at once | Rollout can span seven days |
13. Configure growth tools after the app is stable
Growth tools matter after the app is live, but launch day is a bad time to configure every App Store Connect feature at once.
These are manual App Store Connect choices around campaigns, analytics, and merchandising. They sit outside the automated build, signing, and upload workflow.
App Review submission remains your action in App Store Connect.
- Promo codes: Share limited access with testers, reviewers, partners, or early users, then track redemptions in App Store Connect.
- Custom product pages: Apple supports up to 35 custom product pages for different campaigns, audiences, or creative angles.
- In-App Events: Promote launches, feature drops, challenges, or recurring activities inside the App Store when the event has a real start and end date.
- Product page tests: Apple's product page optimization can compare up to 3 treatments and run tests for up to 90 days.
- Featuring nominations: Submit an editorial pitch when the app, update, or event has a specific story Apple can evaluate.
- ASO: Refine keywords, screenshots, subtitle, and description, then compare App Analytics impressions, product page views, and conversion rate.
Keep this stage lightweight. Choose one campaign lever, measure the result, and add the next tool only when the first data point is clean.
Track installs, product page conversion rate, campaign source, day-one retention, ratings, reviews, and support issues. Conversion rate shows whether the listing works; retention shows whether the app holds up.
| Tool | Primary use after launch | What to measure |
|---|---|---|
| Promo codes | Early access distribution before broad availability | Redemptions and retained users |
| Custom product pages | Audience-specific acquisition pages | Conversion rate by page and campaign |
| In-App Events | Merchandise time-bound activity in the App Store | Event-driven installs and re-engagement |
| Product page tests | Compare creative or messaging variants | Winning variant by conversion rate |
| Featuring nominations | Editorial visibility opportunity | Lift in impressions and installs |
| ASO | Improve search discovery and listing relevance | Keyword visibility and organic installs |
Do the boring measurement first. A clean launch with one readable metric beats five campaigns you cannot explain afterward.
Publishing to Google Play too?
For new Android apps, Google Play requires an Android App Bundle (AAB), not a raw APK upload. Bilt generates the Android build in the format Google Play expects.
You still manage Google Play Console decisions inside your developer account, from listing metadata to release approval.
Bilt builds the .aab and sends eligible releases to Google Play's internal testing track. The first release may still require a manual .aab upload in Play Console.
Publish your app without getting stuck in the last 5%
Publishing an app is a checklist, not a mystery. The hard parts are signing, upload, privacy answers, testing, and review fixes.
Those are also the parts that leave non-technical founders stuck after the app already looks done.
Bilt is built for that last mile. It generates the native build, handles signing, and gets it into App Store Connect, so the technical wall stops being the reason your app never ships.
You keep the Apple account, the listing, and the release date. Start building free and see how far your idea gets in an afternoon.
FAQ
Is it free to upload an app to the App Store?
Uploading an app requires Apple Developer Program membership, which Apple lists at $99/year. Apple does not charge a separate upload fee for each app submission.
Development, testing, design, and external tools are separate costs.
How long does App Review take?
Apple says 90% of submissions are reviewed in less than 24 hours. For launch planning, hold 24 to 48 hours before announcements.
First-time submissions can take longer because Apple checks the build and App Store Connect record together. Give yourself extra room near holidays or major iOS releases.
Can I charge for my app or add in-app purchases?
Yes. App Store Connect supports paid apps, one-time in-app purchases, and subscriptions.
Set the relevant product IDs, pricing, tax category, and purchase details in App Store Connect before selling.
Bilt Payments can create and sync subscription products, manage entitlements, and verify purchases server-side. Previews and development builds use mock billing; real StoreKit purchases require TestFlight or another native build.
Can I update my app after it's live?
Yes. A live App Store update goes through a new App Store Connect version and another App Review submission.
Each update needs an incremented version or build number. After approval, you can release it manually, automatically, or through a phased release for updates.
After an App Store update goes live, the previous live version cannot be restored with one click. Submit another update if you need to fix or roll back a change.
Do I need Xcode to publish an app to the App Store?
Not if you use Bilt's publishing path. Bilt handles the technical build, signing, and App Store Connect upload support, so you do not need to manage Xcode yourself.
Manual publishing still often involves Xcode, certificates, provisioning profiles, and upload tools.
Do I need TestFlight before submitting to App Review?
TestFlight is not strictly required for every submission, but it is one of the safest checks before Apple reviews the app.
Use it to catch login, database, payment, permission, and device-size issues before a reviewer finds them.
Can I publish an app to the App Store without coding?
Yes, but you still need the right publishing setup. Bilt can generate the native app, handle build, signing, and upload support, and guide the App Store submission path.
Use the non-coder app-building walkthrough to choose a build path, create the app, test it, and prepare for launch.
Why does Apple reject apps?
Apple commonly rejects apps for incomplete metadata, broken flows, missing reviewer access, inaccurate privacy answers, crashes, or not enough native functionality.
The fastest fix is usually narrow: read the guideline, fix the exact issue, and resubmit.
What is a Bundle ID?
A Bundle ID is the unique Apple identifier for your app, often in a format like com.company.appname.
It must match the signed build you upload. If the Bundle ID in the build and the App Store Connect record do not match, upload or submission can fail.
Can Bilt publish my app to both the App Store and Google Play?
Bilt helps you create real native iOS and Android apps and supports the publishing path for both stores.
You still control each developer account, listing details, privacy answers, compliance fields, pricing, and final release approval.