Starting a mobile app is not the hard part. Finishing one people can install is where most projects hit the wall.
If you are a non-technical founder, creator, or small business owner, code, agency costs, and months of development can make the first step feel expensive before anything exists.
In 2026, the fastest practical path for many first apps is AI no-code first: describe the app, generate a native build, refine the flow, test on real devices, and publish to the App Store or Google Play.
By the end, you will know the practical path from idea to published app, including a fitness tracker for personal trainers with subscription payments as the running example.
TL;DR
You do not need to start with wireframes, a codebase, and a handoff to developers. For many first apps, the modern path is to describe the product, generate the first native build, refine it, test it on devices, then publish.
Your first version should be narrow. A fitness tracker for personal trainers might start with client profiles, workout plans, progress tracking, and subscription payments, not every feature you imagine.
With Bilt, you describe the app in plain English and get a native iOS and Android build you can refine. The real work is still product judgment: choosing the right problem, testing on real phones, and shipping a reliable first version.
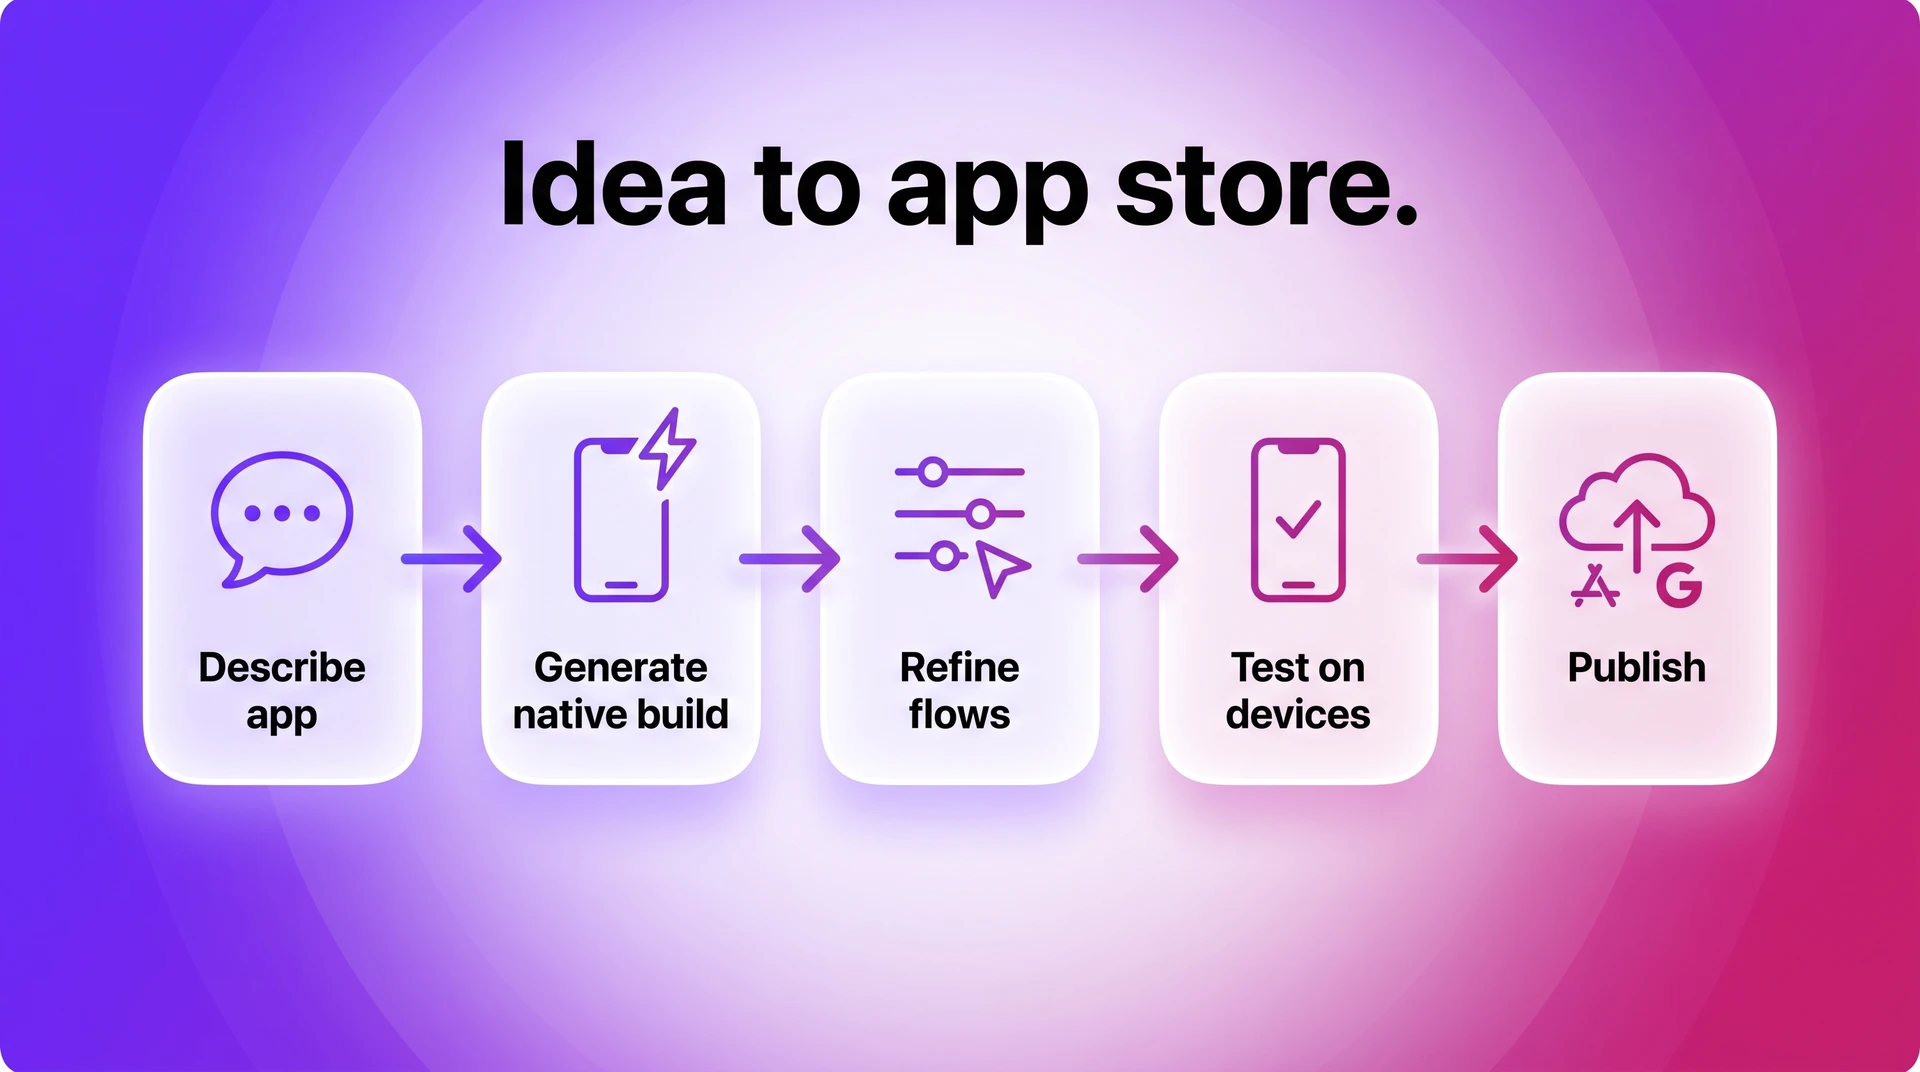
- Validate a real problem before building screens.
- Scope a focused MVP for one audience.
- Generate a native app, not just a mockup.
- Add core systems such as auth, data, and payments.
- Test on real devices before store submission.
- Publish, learn from users, and improve after launch.
| Stage | What happens |
|---|---|
| Plan | Validate problem and audience |
| Scope | Choose the first version |
| Build | Generate native iOS and Android |
| Complete | Add backend, payments, polish |
| Test | Use devices and beta feedback |
| Launch | Publish to app stores |
| Improve | Ship updates from user feedback |
Want to follow along with a real build? Start building free. Free to start · No credit card.
Choose your build path
Choose a build path based on budget, timeline, technical needs, and post-launch control. If AI fits, compare mobile app builders by native output, publishing support, code ownership, and pricing.
Native apps run on iOS and Android devices and can use phone features more naturally than a website wrapped in an app shell. That matters for performance, store review, and the way the app feels in someone's hand.
| Path | Best for | Tradeoff |
|---|---|---|
| Custom development | Complex apps with deep custom technical needs | Expensive, slow, and usually requires a team |
| Traditional no-code builders | Simple workflows, internal tools, and early tests | Can hit limits with native features, custom logic, and ownership |
| Web-to-app wrappers | Existing web apps that only need a basic app-store presence | May feel less native and can create review risk |
| Agencies or freelancers | Teams that want someone else to manage the build | Higher cost and less day-to-day control |
| AI-native builders like Bilt | Non-technical builders who want native iOS and Android apps fast | Still requires clear product decisions and real testing |
1. Validate the app plan
Validate the app plan before opening a builder. Your goal is to prove that a specific audience has a painful problem, and that a simple mobile app could solve it.
Start with UX research, not features:
- Problem: Write one sentence that names the problem the app solves, such as “personal trainers need a simple way to assign workouts and track client progress.”
- Audience: Define the first user group by behavior, not demographics alone. “Independent personal trainers with 5 to 30 active clients” is stronger than “fitness people.”
- Competitor reviews: Read 1-star and 2-star reviews for similar apps. Look for repeated complaints about missing workflows, confusing screens, pricing, or reliability.
- User interviews: Talk to 10 to 15 potential users before building. Ask what they use today, where it breaks, what they have tried, and what they would pay to avoid.
- Workflow evidence: Map the user’s current process from start to finish. The app should improve that workflow, not just digitize a vague idea.
A simple interview script is enough:
- What are you trying to get done?
- What do you use now?
- Where does that process slow down or fail?
- What have you already tried?
- What would make this worth paying for?
Do not ask, “Would you use my app?” People are generous with hypotheticals. Ask about real behavior, recent frustration, and money already spent.
For the trainer app example, useful validation might sound like this:
- Trainers already track workouts and progress notes in spreadsheets or messages.
- Clients forget assigned workouts often enough that reminders would help.
- Trainers use separate tools for payments, progress tracking, and communication.
- The same complaint shows up in interviews and competitor reviews.
Those are examples of evidence to look for, not numbers you need to hit exactly.
Use this build/no-build check before moving to the first scope:
| Validation element | What to confirm before building |
|---|---|
| Problem | One painful user problem appears repeatedly in interviews and reviews |
| Audience | A specific user group has the problem often enough to care |
| Evidence | Interviews, UX research, and competitor review patterns point in the same direction |
| Assumptions | The app can be useful without complex integrations in version one |
| Decision | Build only if the core workflow is clear, valuable, and testable |
2. Scope the first version
Scope the first version by turning a plain-English description into a native app. In an AI no-code workflow, that description replaces a manual backlog as the starting point.
The first scope should name the user, use case, core flows, and monetization assumption. It should also say what not to build yet.
Example first-version prompt:
Build a mobile fitness tracker for independent personal trainers. Trainers should create client profiles, assign workout plans, track completed sessions, and see basic progress notes. Clients should log workouts, mark exercises complete, and view their next session. Include subscription payments so trainers can charge clients monthly. Keep the first version simple, with account creation, trainer and client roles, workout plans, progress tracking, and subscription access.
That prompt is not a technical spec. It is a boundary for the AI builder, so the first build stays focused on the validated workflow.
| Include in version one | Cut for later | Why |
|---|---|---|
| Client profiles | Social feeds | Profiles support the core trainer-client workflow |
| Workout assignment | Wearable integrations | Assignments prove whether trainers will use the app |
| Workout completion tracking | Nutrition plans | Completion tracking validates the main habit loop |
| Basic progress notes | Advanced analytics | Notes are enough for early feedback |
| Subscription payments | Multiple payment models | One payment assumption is easier to test |
If a feature does not help the user complete the core workflow, cut it. The goal is not to describe the whole dream app, but to build the smallest version worth testing.
Use acceptance criteria to judge whether version one is ready to build:
- Trainer can create an account.
- Trainer can add a client.
- Trainer can assign a workout.
- Client can mark a workout complete.
- Trainer can review progress notes.
- Paid access includes the subscription features you promised.
If version one cannot pass those checks, the scope is still too fuzzy.
3. Design the user experience
When AI handles more of the app development workflow, UX design happens through prompting, review, and refinement instead of a long design handoff.
Start with the flows, then style the screens:
- The 2 or 3 actions that matter: Map the actions users must complete, such as sign up, create a client, assign a workout, and review progress.
- Brand inputs: Add logos, icons, colors, fonts, and reference screenshots before refining the interface.
- The few-taps rule: Keep important actions within a few taps. If a user needs to hunt for the main task, the structure is too deep.
- Screen consistency: Use the same button styles, labels, spacing, and navigation patterns across the app.
- Human review: Check every generated screen against the user workflow. AI can create screens quickly, but you still decide whether the flow makes sense.
Add a quick mobile usability check before you approve a screen:
- Text is readable on a small phone.
- Main buttons have enough contrast.
- Tap targets are easy to hit with a thumb.
- Error messages say what went wrong and what to do next.
- Labels make sense without someone explaining the app.
For example, a fitness trainer app should not open with a generic dashboard full of charts. The trainer’s first screen should make the next action obvious, such as adding a client or assigning today’s workout.
In Bilt, you can apply brand assets and visual rules while the app is being generated. That helps replace the old wireframe-to-development handoff with a tighter build-and-refine loop.
| Manual UX design step | AI-native UX step |
|---|---|
| Wireframes often come before development | Brand inputs and screen instructions can shape the first generated build |
| Designers define hierarchy, interactions, and placement | Prompts describe flows, priorities, and screen behavior |
| Consistency is maintained through a design system | Reusable components and brand rules keep screens aligned |
Keep the interface boring in the best way. Users should know what to tap, what happens next, and how to get back without thinking about the design.
4. Generate the first build
The first build should not be a clickable mockup or a web page squeezed into a phone frame. It should be a real native app that you can inspect, preview, and improve.
In Bilt, treat the first prompt as a build brief: describe the users, screens, core action, data that must be saved, and the first version of the app flow.
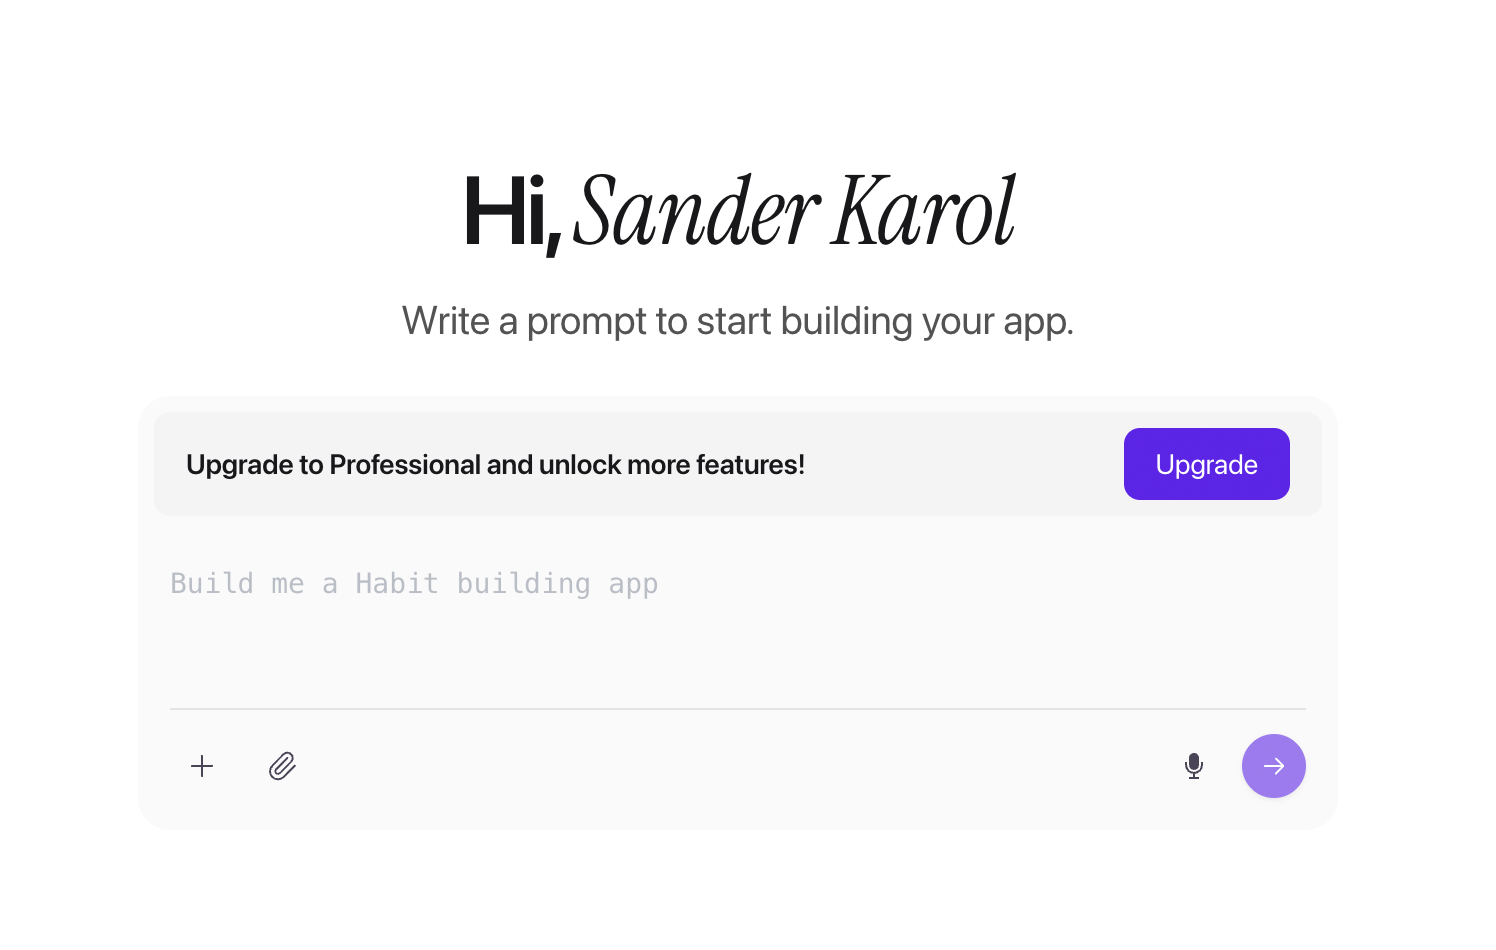
A solid first build should include:
- Native iOS and Android output: The app should compile into real mobile binaries, not run as a thin web wrapper.
- Core screens: Home, onboarding, account, main workflow, and any required detail screens should appear from the description.
- Working app logic: Buttons, forms, navigation, and saved user actions should behave like the first version of a product.
- Backend assumptions: Authentication, database needs, storage, and integrations should be identified early, even if you refine them later.
- Previewable output: You should be able to interact with the app before talking about publishing.
The traditional first-build path usually looks like this:
- Research and design are finished first.
- Developers convert the plan into code.
- Backend models and workflows are wired separately.
- The team reviews the first usable build days or weeks later.
The Bilt path is shorter. You describe the mobile app in plain English, then Bilt generates the UI, backend logic, core features, and React Native code for iOS and Android.
Describe an app and watch Bilt turn it into a native app in live preview.
For a simple app, the benchmark is hours, not months. A focused prompt sequence can take you from idea to a shippable baseline without waiting for a full design and development cycle.
| Typical first-build workflow | Bilt first-build workflow |
|---|---|
| Manual coding begins after research, planning, and design | A natural-language app description generates the first working app |
| Backend structure is usually handled as a separate technical task | Backend logic is generated from the same product brief |
| No-code builders often start from templates or visual editing | Bilt generates React Native code that compiles into native iOS and Android apps |
| The MVP is a functional artifact for testing assumptions | The first build is a native baseline you can preview and refine in hours |
Judge the first build as a baseline. It should be real enough to test, refine, and connect to the systems the app needs before launch.
5. Add backend and native systems
Once the first build works, add the systems that make it safe and useful in production. This is where app projects move from exciting demo to real product.
Start with the backend foundation:
- Authentication: Users need secure accounts, sessions, and access rules before private data is stored.
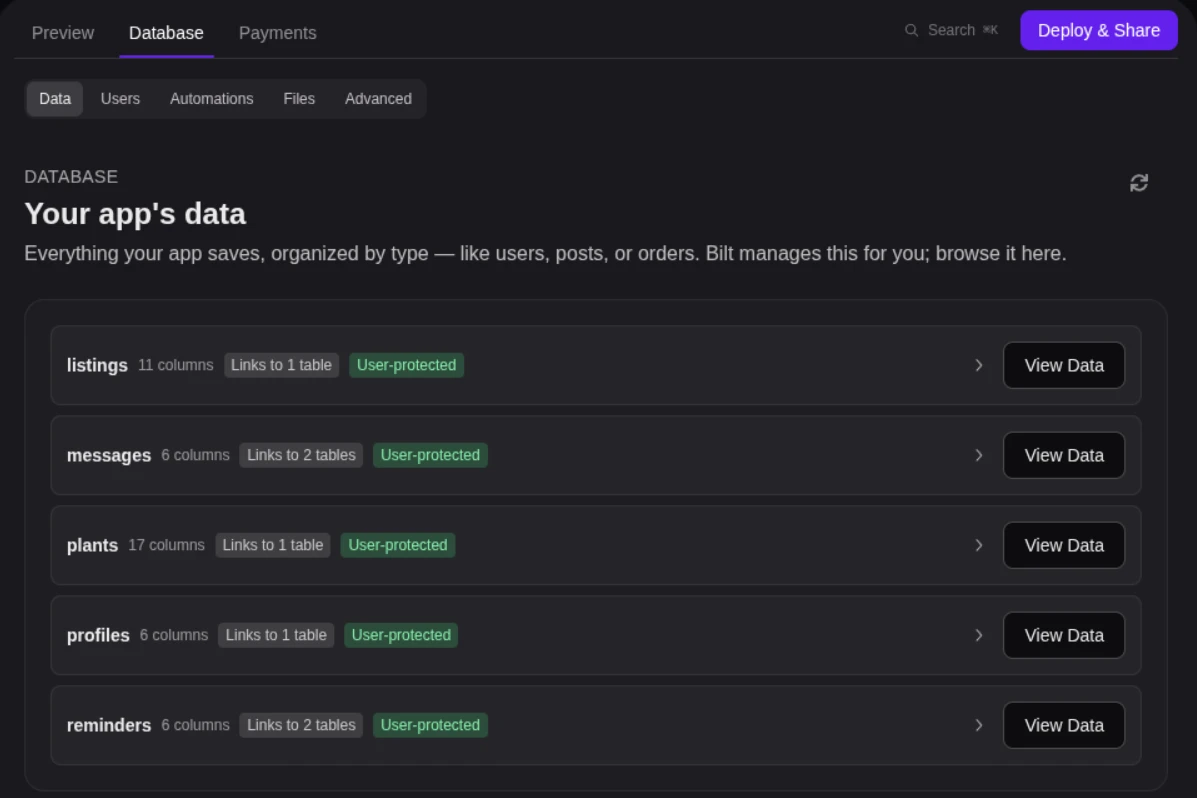
- Data model: Define what the app needs to remember. For the trainer app, that means trainer profiles, client profiles, workout plans, assigned sessions, completed exercises, progress notes, and subscription status.
- Storage: Decide where media, files, and user-generated content live.
- Real-time updates: Identify which screens need fresh data without forcing users to refresh or restart.
- What should never run on the client: Move sensitive workflows away from the client so the mobile app is not carrying secrets.
Bilt includes a built-in backend with authentication, database, and storage, so this work starts inside the same app-building workflow. You can still refine the data model as the product becomes clearer.
Native systems
- Notifications: Reminders, alerts, and scheduled messages should match the real user journey.
- Location services: Only request location when it clearly improves the app experience.
- Media uploads: Camera, image, and file flows need storage rules, upload states, and error handling.
- Offline and weak-connection behavior: Decide what still works when the connection is unstable.
- Device previews: Check the app in a mobile preview before assuming a screen or flow works.
Security deserves its own pass before launch. Authentication proves who the user is; authorization controls what that user can access.
A user should never see another account's private records.
| Core system area | What to decide before launch | What Bilt handles in this step |
|---|---|---|
| Backend foundation | Accounts, data structure, storage, privacy rules, and workflows | Authentication, database, cloud storage, data refresh workflows, media uploads, and backend logic |
| Native capabilities | Notifications, location, reminders, device-specific behavior, and preview checks | Native app generation with mobile-first preview and device-oriented workflows |
| Privacy and security | Permissions, data access, encrypted handling, and safe API usage | User-protected access rules, encrypted backend credentials, and server-side secrets |
6. Add monetization before launch
Decide how the app earns before you publish it. Monetization affects product flow, store review, support, refunds, and what users expect on day one.
Do not leave monetization for the week after launch. The first shippable version should define where value starts, place the paywall after a clear win, and support store review.
- Pricing model: Pick one default model for v1. A trainer app might start free for one client, then charge when trainers need more clients or deeper progress history.
- Subscription structure: Define the monthly or annual promise in plain language. Users should know what changes after paying before they see checkout.
- Paywall placement: Put the paywall after the first clear win. For a trainer app, that might be when the trainer wants to add more clients or view longer progress history.
- Native in-app purchases: Use Apple and Google purchase systems when users pay for digital access inside the app.
- Refund and support expectations: Explain where users manage billing and how they get help after purchase.
- Store policy readiness: Give reviewers a clean path through signup and upgrade. Include cancellation and restored-purchase states.
After connecting App Store setup, you can add subscriptions and paywalls through Apple’s native purchase system. Bilt verifies purchases and maintains entitlements across reinstalls; Google Play payment support is in progress.
Example: personal trainer app
- Free: Trainer can create one client and one workout plan.
- Paid: Trainer can add more clients, create recurring plans, and see longer progress history.
- Launch check: Test subscription purchase, cancellation, failed payment, restore purchase, and paid access after reinstall.
The paid flow should feel obvious before checkout. If users do not understand the value, the app is not ready to charge.
Start building free with Bilt and prove the core flow first. Add the paywall where the value is obvious.
7. Refine the app
Treat the first generated build as a rough working app. The next job is to make one visible improvement per prompt.
In Bilt, refinement happens in chat while the app context is still fresh. You ask for the next specific change and check whether the build now behaves correctly.
Use refinement for changes a user can feel in the next build.
- Make one screen easier to use. Example prompt: "On the client detail screen, show the next assigned workout at the top."
- Add one behavior. Example prompt: "Let trainers duplicate last week's workout plan for the same client."
- Fix saved data. Example prompt: "Save progress notes so the trainer can review them after closing and reopening the app."
- Match repeated patterns. Example prompt: "Use the same card style for workout plans and client progress."
Bilt keeps conversation context from earlier prompts. That saves you from re-explaining the app after every revision.
Refinement prompt check
A useful prompt names the screen, the change, and the success condition.
Example: "On the client progress screen, keep completed workouts visible after logout and login."
Once a change works in preview, put the app on a real phone and look for what the simulator missed.
8. Test on real devices
Test on real phones before beta. Simulators catch layout issues, but real hardware exposes touch problems, permission prompts, and small-screen friction.
With Bilt, start in browser preview or a streamed iOS simulator, then scan the Expo Go QR code to test on iPhone or Android. Use native builds for purchases and features Expo Go cannot load.
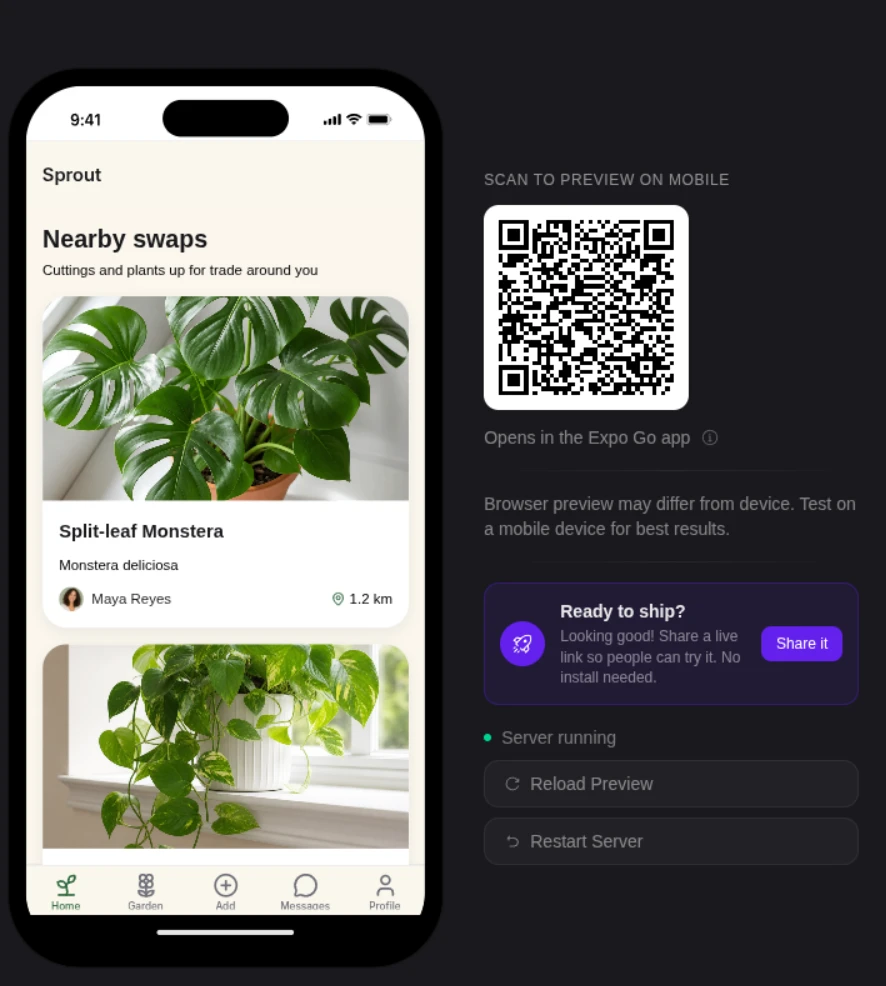
Run device testing in passes so every bug has a place to show up.
- Platform pass: Complete the main journey on a current iPhone. Repeat it on a real Android phone.
- Size pass: Check a small phone and a large phone. Add a tablet pass if the app supports tablets.
- Payment pass: If the app takes payments, test successful payment and failed payment first. Then test cancellation and post-payment confirmation.
- Permission pass: Accept push notifications once. Then deny permission and tap a delivered notification.
- Navigation pass: Open every tab and back button. Then test modals and deeper flows.
- Data pass: Test login and logout. Then check empty states and saved data on a weak connection.
- QR pass: Scan the app on hardware after meaningful changes to checkout or login.
- Early-user pass: Ask 5-10 trainers or likely users to narrate where they hesitate. Fix the first blocker you see twice.
I fix launch blockers before polish. Broken checkout kills trust faster than an ugly button, and trapped navigation or missing data can stop the beta entirely.
9. Share a beta
Beta sharing is a controlled rehearsal before launch. A small group uses the pre-release app and tells you what feels confusing, broken, or missing.
Split beta sharing into two lanes.
- Fast feedback with preview links: In Bilt, we send an interactive browser preview so stakeholders can catch confusing screens before anyone installs the app.
- iOS beta with TestFlight: Apple supports up to 100 internal App Store Connect users and up to 10,000 external testers per app.
- TestFlight constraints: Internal builds skip App Review, but the first external build needs review; TestFlight builds expire after 90 days.
- Android beta with Google Play: Internal testing supports tester access by email list, installed through an opt-in URL or shared link.
- Android closed testing: Closed testing supports larger email-list or group-based tester access, plus private feedback across separate tracks.
Use preview links for first reactions to onboarding.
Use TestFlight or Google Play testing when you need to verify:
- install behavior
- native permissions
- update behavior
Give testers a 5-task script for the trainer app instead of asking them to browse.
- Create a trainer account
- Add one client
- Assign a workout
- Complete the workout as a client
- Test the subscription access if payments exist
When those tasks pass, beta feedback becomes store-readiness evidence. The next step is preparing the build, account, and reviewer details for submission.
10. Publish to app stores
Publishing needs planning from day 1 because store review checks decisions you made before the final upload.
Many App Store submissions are reviewed quickly, but incomplete metadata, missing login access, or broken purchase flows can slow review.
Submit a native app to the Apple App Store or Google Play when possible. Review how PWAs compare with native mobile apps before packaging a website for either store.
Copy/paste pre-submission checklist:
- Apple Developer Program: $99/year.
- Google Play Console: $25 one-time.
- Store listing assets: app name, icon, screenshots, category, description, pricing, and availability.
- Privacy and support: privacy policy URL and support URL, plus content rating answers and data disclosures for your app and third-party SDK partners.
- Review access: demo account or review mode for login-gated apps.
- Build readiness: signed iOS build with a matching certificate, bundle ID, and provisioning profile, plus an Android App Bundle with no placeholders or crash-prone flows.
If the iOS upload fails before review, check the signing chain first.
- Certificate proves publisher identity
- Bundle ID identifies the app
- Provisioning profile ties the certificate, app identity, and distribution type together
| Publishing requirement | What you need | How Bilt helps |
|---|---|---|
| Apple App Store | Apple Developer account, App Store Connect listing, screenshots, privacy details, and a signed iOS build | Bilt builds, signs, and uploads the iOS build to App Store Connect. You attach that build and submit it for App Review in Apple’s tools. |
| Google Play | Google Play Console account, store listing, content rating, privacy answers, and an Android App Bundle | Bilt builds the signed .aab and, when Play publishing is ready, sends it to internal testing. The first release may require a manual Play Console upload. |
| Listing assets | Icon, screenshots, descriptions, category, pricing, and availability | You prepare the product details while Bilt keeps the native build path aligned with store submission |
| Privacy and policy readiness | Privacy policy URL, accurate data disclosures, support URL, and working backend services | Bilt reduces deployment complexity, but the app still needs honest policy and data usage decisions |
| Reviewer access | Working demo credentials, seeded test data, or review mode for private apps | Treat reviewer access as part of the app flow, not a note you add at the last minute |
| Release workflow | Final native build, signed packages, store upload, and release tracking | Bilt automates the technical path that usually sends non-technical builders into Xcode, Gradle, or certificate setup |
You create Apple Developer or Google Play Console accounts. Bilt handles signed builds and uploads to App Store Connect or Google Play internal testing; you complete store details and submit or promote the release.
Plan for review feedback by following the App Store deployment process. A rejection usually means one specific issue needs fixing, not that the whole app failed.
When review says no:
- Read the exact reason in App Store Connect.
- Fix the specific issue instead of rebuilding the whole app.
- Reply briefly in Resolution Center.
- Resubmit after the fix is verified.
11. Improve after launch
Launch starts the feedback loop. The first version proves the app can exist; real users show what needs to improve.
Start with 5 feedback inputs:
- App store reviews: In App Store Connect and Google Play Console, look for repeated complaints after each release.
- Support messages: Track bugs, confusing flows, and missing features users expected.
- In-app surveys: Ask one question after a key action, such as “What almost stopped you from finishing signup?”
- Product analytics: Use Firebase Analytics or PostHog to find the screen where users quit or repeat the same action.
- Community comments: Use Discord, social posts, or a private beta group to catch issues quickly.
Use this triage order before adding ideas to the backlog:
- Crash spikes: Check Firebase Crashlytics or Sentry first.
- Rating drops: Open App Store Connect and Google Play Console when ratings fall after a release.
- Repeated complaints: Group matching reports from reviews and support messages; Discord can confirm urgency.
- Flow drop-offs: Use Firebase Analytics or PostHog to find the screen where users quit.
- Platform requirements: Fix privacy disclosures and permission issues before adding features.
- Repeated feature requests: Build requests that show up across channels.
Some of the best updates are invisible. A backend fix that stops login failures matters more than a new settings screen.
When a release changes user behavior, communicate the change plainly:
- Mention the fix or improvement in release notes.
- Tell affected users when a bug is resolved.
- Warn users before removing or changing an existing workflow.
- Test important updates in TestFlight or Google Play beta before full release.
With Bilt, the post-launch loop stays conversational. You can describe a change like, "Fix the client progress screen so completed workouts stay visible after logout and login," then preview, beta test, and publish the next native update without rebuilding the deployment pipeline.
Source code ownership
Before choosing a builder, check whether the code comes with you. Source code ownership means you can keep building after launch, even if your needs change.
Our default recommendation is the native path with code access. Build a real mobile app you can carry forward, and use web-to-app conversion only when the project truly fits.
In Bilt, our generated codebase is React Native, not a locked visual-builder format. You can keep iterating in our platform or move the project into a standard React Native workflow later.
Source code ownership changes five practical decisions.
- Export anytime: Keep generated source code in your own files so a canceled subscription never traps your app.
- Push to GitHub: Store the project in version control so a developer can compare changes, restore a previous version, and review work.
- Hand off to a developer: Let an engineer inspect, extend, or maintain the app with normal React Native tools.
- Avoid the wrapper trap: A native codebase gives App Store reviewers and users an app that opens, navigates, and behaves like phone software.
- Support future releases: If your app grows, React Native code can carry new screens and integrations without starting from a blank project.
Run one practical test: if you stopped using the builder tomorrow, would you still have a usable codebase? In Bilt, the answer is yes.
If you want your first build to leave you with real code, own your build with Bilt from day one.
Cost breakdown
A first mobile app can usually start far below a six-figure custom build unless the product already needs custom engineering. Treat the numbers below as planning ranges, not quotes.
Store-account fees are the fixed line items here. Builder plans, services, and custom work can change with scope, currency, taxes, and promotions, so check current pricing before you budget.
| Cost category | Typical cost | What it covers |
|---|---|---|
| Store accounts | Apple $99/year; Google $25 once | Required before publishing |
| Bilt AI builder | Free; self-service €25–€250/mo; Enterprise custom quote | Build, preview, iterate |
| DIY no-code MVP | $500-$2,000 first year | Basic app launch |
| Professional no-code app | $2k-$10k first year | Higher tiers, add-ons |
| Agency MVP | $15k-$50k+ | Managed first version |
| Custom mobile app | $40k-$150k+ | Deeper product engineering |
| Advanced custom app | $150k-$500k+ | Backend, integrations, scale |
Separate one-time launch fees from costs that continue after the app is live.
- Required before launch: Apple Developer Program is $99 per year, and Google Play Console registration is $25 once.
- Recurring after launch: Budget for your builder subscription first; server usage, API tools, storage, push notifications, and support depend on the app's scope.
- Bilt pricing: Check current euro pricing and promotions at budget time.
- Monetization: If the app will charge users, decide subscriptions and in-app purchases before launch.
Custom quotes move fast because scope multiplies. Store submission is a small line item compared with complex integrations and backend logic.
Common mistakes to avoid when building a mobile app
- Building for web instead of native mobile: A wrapped web app can feel slow on a phone and may run into Apple Guideline 4.2 (Minimum Functionality) during review.
- Skipping UX research: When the first session is unclear, users tap around, abandon signup, or miss the one action your MVP needs them to take.
- Adding complex integrations too early: Add payments after the core flow works, but before final store submission. Analytics, automation, and complex integrations can wait until the first journey is stable.
- Delaying monetization decisions: Subscriptions and in-app purchases affect onboarding, App Store review, and data structure, so choose the model before the final build.
- Skipping real-device testing and launch prep: Real phones catch permission and layout issues before review, and App Store feedback is a normal hurdle handled through Step 10's read, fix, retest, resubmit loop.
The safest path is practical: validate the idea, scope the first version, test on real phones, then publish with a recovery plan.
If you want our help turning that plan into a native app, build with Bilt and keep the code when the app grows.
FAQs about building a mobile app
Can I build a mobile app without coding?
Yes, you can build a mobile app without coding if you use an AI builder that turns plain-English instructions into the first working version.
An AI builder replaces the hardest starting point: building blank screens from scratch in a coding tool. You still make the product decisions.
You still make the product calls:
- App logic: Decide what should happen when users tap, buy, sign in, or hit an edge case.
- Integrations: Choose what services the app should connect to, such as payments, auth, databases, or APIs.
- Product direction: Decide what belongs in version one and what can wait.
AI can remove the coding barrier at the start. Clear app logic still comes from you.
For iOS, compare no-code app builders by publishing support, native output, and pricing.
Can I build an app for free?
Building and testing a basic mobile app can be free. Publishing adds account fees, and scaling can add paid services or higher usage costs.
With Bilt, you can start free and use the included prompt budget to test a simple app idea before choosing a paid plan.
- The number of prompts you get depends on app complexity and current plan limits.
- Paid plans matter when you need more usage, more features, or support.
| Stage | Can it be free? | Paid trigger |
|---|---|---|
| Build first version | Yes | More usage or features |
| Test basic functionality | Yes | Advanced beta workflows |
| Publish to app stores | Usually no | Developer account fees |
| Scale the app | Sometimes | Higher usage or integrations |
You still create your Apple Developer account yourself. Apple Developer Program access costs $99 per year, and Google Play Console access is a $25 one-time fee.
How long does it take to build a mobile app?
A simple AI-assisted mobile app can take hours. Traditional development often takes months.
Use the table as planning ranges from the build paths covered in this guide. Delivery dates still depend on scope and release work.
What can extend the schedule:
- Build path: AI-assisted, no-code, and traditional builds move at different speeds.
- Scope: Backend logic or compliance work adds time after the first screens exist.
- Release work: Real-device testing and store submission still happen after the first build.
| Build path | Typical timeline |
|---|---|
| AI-assisted simple app | Hours |
| No-code simple app | 3 to 7 days |
| No-code medium app | 2 to 4 weeks |
| Traditional focused MVP | 3 to 6 months |
| Traditional full launch | 6 to 12 months |
Traditional builds add planning and development work before the first store submission. AI builders compress the early build, and real-device testing still happens before launch.
If you need an iPhone-specific tool, compare iOS app development software by coding level, App Store support, and developer handoff.
Do I need a Mac to build an iPhone app?
You only need a Mac for local Xcode development. Cloud no-code and AI-native workflows can handle the iOS build process.
- Traditional Xcode workflow: Local Swift or React Native iOS development requires Xcode, which runs on macOS.
- Browser-based testing: Bilt streams an interactive iOS simulator in the browser, so you can preview the app from Windows or ChromeOS.
- Cloud submission workflow: Bilt handles the cloud build, signing, and upload to App Store Connect; you submit for review there. You still create the Apple Developer account manually and pay Apple's $99 yearly fee.
How much does it cost to build a mobile app?
It depends on the build path. Store accounts have fixed fees, Bilt can start free, no-code tools usually add subscription costs, and custom development can move into five or six figures.
Use these mobile app development cost ranges to separate required publishing costs from builder plans, optional services, and custom engineering.
Can one app work on both iOS and Android?
Yes. Cross-platform tools can produce apps for both iOS and Android from one project.
Bilt generates React Native code for native iOS and Android apps, so one plain-English app idea can become builds for both stores.