Your working React app can become an iOS and Android app, but it will not move over unchanged. You can often reuse business logic, API clients, validation, and state while rebuilding the browser-bound interface.
Choose React Native or Bilt for a native product, Capacitor for maximum web-interface reuse, a PWA for browser distribution, or a managed wrapper for outsourced packaging. The walkthrough covers what each route changes, how to test it, and how to release it.
Bilt product demo — describe an app, get a native app in live preview
What React-to-Mobile Conversion Changes
React-to-mobile conversion keeps shared business logic but rebuilds browser-bound layers for mobile operating systems. React Native maps its components to native views and renders those views at runtime.
The reusable layer is the code that does not depend on a browser or screen layout. Move these pieces first:
- State stores and reducers
- Custom hooks with no DOM calls
- API clients and business rules
- TypeScript interfaces, helper utilities, and validation schemas
Run each shared module in isolation before connecting the mobile interface. A hook that reads window, document, or browser storage belongs in the replacement audit, even if the rest of its logic is portable.
React Native renders native views at runtime rather than HTML in a browser. The interface layer needs mobile-specific replacements:
- UI: Replace
div,span, andbuttonelements with native components. - Navigation: Map URLs and browser history to stacks, tabs, and modals.
- Storage: Replace
localStoragewith storage suited to sensitive data, offline use, and synchronization. - Browser APIs: Remove direct dependencies on
window,document, cookies, and DOM events. - Navigation: Map URLs and browser history to stacks, tabs, and modals.
- Storage: Replace
localStoragewith storage suited to sensitive data, offline use, and synchronization.
CSS layouts need the same review. Responsive breakpoints, hover states, and fixed desktop panels rarely translate cleanly to a touch interface.
Packaging the existing site inside a shell leaves the original interaction model intact. A mobile product still needs touch targets, keyboard-safe forms, back-button behavior, and layouts that work across phone sizes.
Native features need platform-specific work. Plan each feature before implementation:
- Biometric authentication needs platform permissions and secure credential handling.
- Push notifications need device registration, permission prompts, and background delivery logic.
- Offline storage needs rules for synchronization and conflicting edits.
- Camera, location, and file access need native APIs plus privacy disclosures.
- Push notifications need device registration, permission prompts, and background delivery logic.
- Offline storage needs rules for synchronization and conflicting edits.
Store submission adds release signing. It also requires app metadata and privacy declarations. Treat these store-submission tasks as part of the conversion plan rather than final packaging work.
Four routes cover the common React-to-mobile choices:
- React Native: Rebuild the interface with native components for a store-ready mobile product.
- Capacitor: Keep the web interface inside native iOS and Android projects.
- PWA: Distribute a browser-rendered app through a URL and supported installation flows.
- Managed wrapper: Let a provider package the web product in a managed mobile shell.
1. Choose a Route and Audit Readiness
Choose the delivery model first, then audit the React codebase for browser dependencies and authentication handling. The route determines how much of the interface must be rebuilt.
Choose based on the mobile experience you need, not the amount of code you hope to preserve. React Native is the default when mobile is a core product rather than another website viewport.
- Choose React Native for native navigation, direct device integrations, and standard App Store or Google Play releases.
- Use Capacitor when preserving the web interface matters more than replacing it with native components.
- Use a PWA when browser installation and URL distribution meet the product requirements.
- Consider a managed wrapper when you want a provider to handle packaging, builds, and store submission.
Write down required user flows and distribution needs. A route that misses a required capability leaves the shortlist.
Audit the web codebase before estimating the conversion. Record each finding as reuse, replace, or remove so the migration has a defined scope.
- Dependencies: Inventory packages that touch the DOM, browser history, cookies, service workers, or
localStorage. - Authentication: Trace JWT creation, secure storage, refresh, expiry, and logout from end to end.
- Input security: Confirm that the server validates and sanitizes every value received from the app.
- API access: Review CORS for the web app, but do not treat it as mobile security. Protect mobile APIs with authentication, authorization, server-side validation, rate controls, and no client-side secrets.
- Database access: Test row-level security with accounts that should see different records.
- Account protection: Confirm multi-factor authentication works across sign-in, recovery, and device changes.
- Data behavior: Define offline reads, queued writes, synchronization, and conflict handling.
Prepare a clean, reproducible repository before conversion begins:
- Merge or archive unfinished branches that should not enter the mobile project.
- Remove committed secrets and rotate any exposed credentials.
- Document environment variables, build commands, API endpoints, and required services.
- Confirm a fresh clone installs and runs without files stored only on one developer's machine.
- Tag the web baseline so later mobile changes can be compared against a fixed version.
2. Connect the Source Repository
Keep the production web repository unchanged while the mobile app gets its own workspace. The setup differs depending on whether you build React Native manually or use Bilt.
Use this connection workflow:
- Prepare the manual project. Create a separate React Native project or checkout, then inspect
package.json, entry points, routes, state stores, API clients, and environment variables. - Trace one complete user flow. Follow a route from its screen through state changes and network requests, recording the files and services involved.
- Or connect the web source to Bilt. Grant the Bilt GitHub App access only to the repository you want Bilt to inspect.
- Open Settings → Convert Website. Select the GitHub account and web repository, then click Connect repository. Bilt clones it into the sandbox as a read-only reference.
- Sync the mobile project separately. Open Settings → GitHub → Repository, click Sync to GitHub, choose the connected GitHub account, and confirm. Bilt creates a repository for the React Native project; after the first sync, changes made in Bilt or GitHub stay synchronized in both directions.
Bilt reads the web source for screens, routes, API calls, and logic, then creates the mobile implementation in a separate workspace. You can refine screens through conversation, compare feature parity, and test the result without changing the web repository.
The mobile repository can be cloned into Xcode, VS Code, or Cursor. Bilt can also preview the app, support device testing, manage cloud builds and signing, and prepare store uploads while you retain final review and release control.
3. Audit Dependencies and Architecture
The audit should identify browser-bound code, its mobile replacement, and the device behavior that needs testing before implementation.
Create a decision record for the port. Each finding needs an affected file, a mobile replacement or boundary, and a device consequence before implementation starts.
Choose the project model before selecting dependencies. Use Expo with a development build for Expo tooling plus custom native libraries, bare React Native for direct native-project control, or Bilt for a managed conversion workflow.
- DOM-bound packages: Search imports and package manifests for libraries that require
document,window, HTML elements, or browser canvas. Record the native package or custom component needed later. - Browser APIs: Find direct calls to browser events, URL globals, downloads, clipboard access, and service workers. Mark each call site because React Native uses different APIs.
- Routing: Map every React Router path, redirect, deep link, and guarded route to a planned native stack or tab destination.
- Storage: Inventory
localStorage,sessionStorage, IndexedDB, and cached server data. Decide what belongs on-device, what must sync through the backend, and what should work offline. - Authentication: Trace cookie handling, token refresh, sign-out, and session expiry. Plan to keep mobile credentials in iOS Keychain or Android Keystore rather than browser storage.
- Backend boundaries: Separate domain logic from storage, messaging, and API providers through explicit interfaces. Provider adapters prevent a backend change from spreading through screens and state code.
- New Architecture: Check native dependencies for TurboModules support and custom UI code for Fabric compatibility. Flag legacy modules before choosing replacements.
- Permissions: List every camera, location, notification, microphone, or photo-library feature with its runtime prompt and iOS or Android configuration requirement.
- Real devices: Record behavior that a browser preview cannot validate, including keyboard layout, safe areas, background transitions, weak connectivity, and hardware access.
Finish with a simple audit sheet: affected file, browser dependency, mobile replacement, and device test. For example: useSession.ts → localStorage → Keychain/Keystore-backed storage → restore a signed-in session after a cold launch.
4. Rebuild the Native Interface
React Native maps the component tree to native views at runtime, so web markup and browser styling must be rebuilt for mobile.
Rebuild each web screen with React Native components and mobile-first layout rules. React Native has no browser DOM or global CSS cascade. Hover states and fixed viewports also do not carry over.
- Layout: Replace
divandsectionwithView, then rebuild grouping and spacing. - Text: Replace paragraphs, spans, and headings with
Text; nest styled text insideText. - Images: Replace
imgwithImage, including dimensions and a resize mode. - Actions: Replace buttons and clickable cards with
Pressable, including pressed and disabled states. - Inputs: Replace
inputandtextareawithTextInput, including keyboard and return-key behavior. - Scrolling: Use
ScrollViewfor flexible content andFlatListfor repeated rows.
Move CSS into StyleSheet objects or your chosen React Native styling system. Flexbox defaults to flexDirection: "column", so web rows need an explicit "row" direction.
Pointer interactions need a touch equivalent. Replace onClick with onPress, remove hover-only controls, enlarge small targets, and expose long-press actions through visible menus when discovery matters.
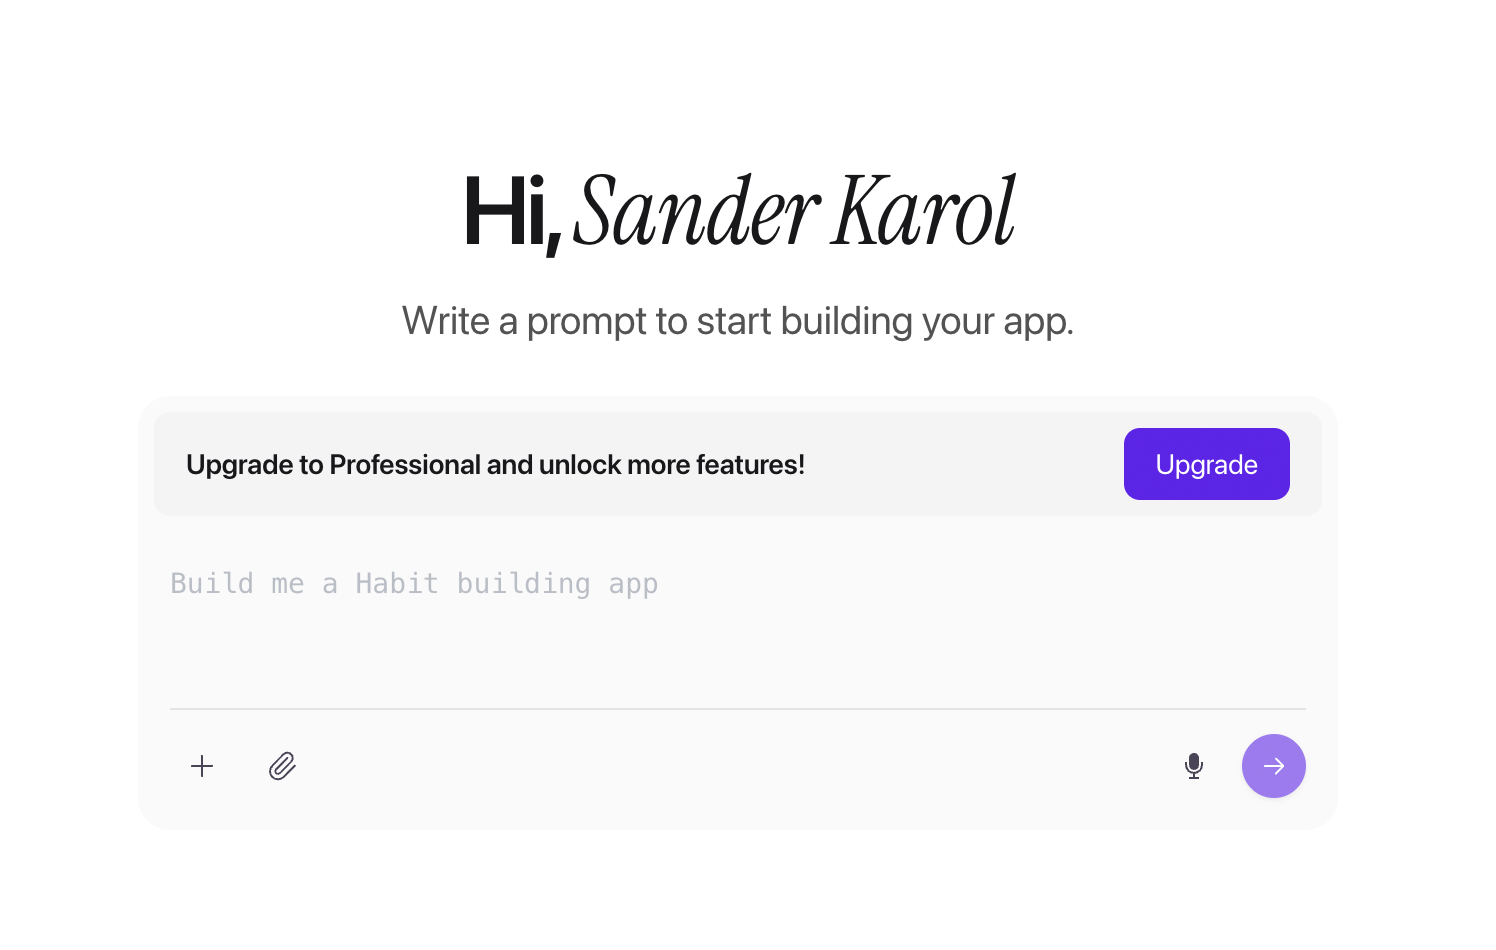
Bilt can inspect a linked web repository as a read-only reference, compare it with the mobile project, and recreate selected screens as React Native code through conversational prompts. Teams with source designs can use Bilt's Figma plugin to import a file, attach selected frames, and use them as context while rebuilding native screens.
Use one screen as a pilot before converting the full interface:
- Match the screen’s content hierarchy with
View,Text,Image, and list components. - Preserve labels, focus order, text scaling, contrast, and comfortable touch targets while rebuilding the visual hierarchy.
- Rebuild responsive breakpoints as flexible widths, spacing rules, and device-aware layout changes.
- Replace mouse gestures with tap, press, swipe, or an explicit on-screen control.
- Test loading, empty, error, and long-content states on both iOS and Android.
For example, a /reports/:id page can become a native stack screen. Move its localStorage session to secure storage, replace the hover menu with a tap action sheet, and replace the file input with a document or photo picker.
Test the converted flow from a cold launch through upload and confirmation. This same screen-by-screen loop keeps rebuilding, logic migration, mobile behavior, and parity testing connected.
Device access and store review make native apps versus web wrappers a consequential route choice.
5. Replace Navigation and Mobile Behavior
A mobile navigation tree replaces browser routes. Native navigators handle screen history, while platform code covers back actions, gestures, keyboards, and deep links.
Group screens by user flow before assigning each destination to the right navigator.
A typical route map looks like this:
- Authentication: Map
/login,/signup, and/onboardingto an auth and onboarding stack. - Primary areas: Map
/home,/search, and/profileto bottom tabs. - Detail screens: Push
/items/:idand/settings/accountonto a stack. - Temporary tasks: Present checkout, filters, and confirmations in a modal or sheet.
Keep route names and parameters typed. A detail screen should receive a stable item ID, while the screen loads the current record through the app’s existing data layer.
For example, define ReportDetail: { reportId: string } in the navigator's parameter list. A deep link can open that screen with the ID, and the screen can load the current report through the shared data layer.
Then check the mobile behaviors that browser routing previously handled:
- Android back: Let the navigator pop the current screen by default. Add
BackHandleronly for custom cases such as closing an open modal or confirming exit from an unsaved form. - iOS gestures: Preserve the edge-swipe gesture on stack screens. Avoid custom horizontal gestures that compete with the system back gesture.
- Keyboard: Put forms inside
KeyboardAvoidingViewand a scrollable container so the focused field and submit button remain visible. - Safe areas: Use
SafeAreaProviderand safe-area insets around headers, bottom controls, notches, and the home indicator. - Deep links: Map Universal Links on iOS and App Links on Android to the same nested route names used inside the app.
- Lifecycle: Track active, inactive, and background transitions with
AppState. Keep handlers narrow, such as pausing a timer or checking session freshness on return.
Test every route from a cold launch, an in-app tap, and a back action. Repeat the pass with the keyboard open and with a deep link targeting a nested detail screen.
6. Port Logic, State, and Services
Shared logic can move into platform-neutral modules, while storage and device services need mobile-specific adapters.
Start by separating browser-dependent code from code that can run on either platform. Then move storage and service calls behind mobile-aware interfaces.
- Keep pure code unchanged: Move calculation functions, validation schemas, and hooks that do not touch platform APIs into shared modules with unit tests.
- Split browser-bound hooks: Replace direct
window,document, and DOM listener calls with injected interfaces. A shared hook can callAppEvents.subscribe(), while web and mobile adapters handle the platform details. - Move sessions into secure storage: Store tokens with a maintained library backed by iOS Keychain or Android Keystore. Do not put credentials in
localStorage,sessionStorage, or an unprotected mobile key-value store. - Rebuild sign-in callbacks: Send OAuth responses through universal links, app links, deep links, or the provider's native SDK. Validate the callback before creating the mobile session.
- Centralize authenticated requests: Let one API client read the token through
SecureSession.getToken()and attach the bearer header. Keep token refresh and logout behavior out of screen components. - Wrap external services: Define interfaces such as
FileStore,PushService, andApiClient, then select each provider adapter through environment configuration.
Keep the interface small: SecureSession.getToken(), SecureSession.setToken(), and SecureSession.clear(). The web adapter can use its approved session mechanism while the mobile adapter uses secure device storage.
- Choose mobile storage by data shape: Use a key-value engine for settings and an embedded database such as SQLite for records that need queries or offline access.
- Plan offline synchronization: Queue local writes, retry after reconnecting, and define how conflicts are resolved. Keep sync status in the state store so screens can show pending, failed, or current data.
Shared code decides what should happen; adapters decide how each platform performs it. The web and mobile apps can keep the same backend when its authentication, authorization, validation, and API contracts support both clients.
Bilt Cloud is an alternative when the mobile app needs a managed backend, with authentication, a PostgreSQL database, file storage, and server-side automations within the project.
7. Add Native APIs and Permissions
Native APIs need platform declarations, device modules, and permission flows that account for every user response.
Permission requests belong when a person uses a protected feature. Platform declarations alone do not grant access.
- Declare the capability. Add required entries to
AndroidManifest.xml. For iOS, add the matchingInfo.plistkey with a usage description that tells the person why the feature needs access. - Tie access to a real feature. Camera, location, and Bluetooth declarations should match visible app behavior. Store review can fail when a build requests protected access without a functional reason.
- Ask in context. Request camera access after the person taps Scan, or location access after they enable nearby results. A launch-time bundle of prompts gives no feature context.
- Handle every status. Support granted, denied, restricted, and permanently denied states. Keep the feature usable where possible, and provide a settings link when the operating system will not show the prompt again. For a denied camera request, keep manual upload available when possible. If the user permanently denies access, explain why the feature needs it and offer a button that opens the app's system settings.
- Check background services. For push notifications, confirm authorization before registering the device token. Update or remove the subscription when the token or permission status changes.
- Hide native SDKs behind interfaces. A
CameraAdapter.capture()contract can use a browser mock during local development and the native camera bridge in the installed app. - Validate on real hardware. Verify camera handoff, sensor callbacks, deep-link returns, and push delivery on physical devices. Simulators and browser mocks cannot reproduce every operating-system prompt or hardware response.
Record the result of each permission path in your test plan. A successful grant covers only one branch; denial, recovery through Settings, and a later permission change need their own checks.
8. Optimize Mobile Rendering
Mobile performance improves when lists render incrementally and image loading fits the device. Memoization and native-thread animations prevent work that can interrupt interaction.
Choose one representative flow and measure it on physical hardware in a production-like build. Fix the largest bottleneck, then profile that same flow again.
Run this performance audit:
- Virtualize long feeds with
FlatListor Shopify'sFlashList. Use stable keys and tuneinitialNumToRenderandmaxToRenderPerBatchagainst real scroll traces. - Use the profiler to confirm unnecessary renders before adding
React.memooruseCallback. Keep input state local when a global update refreshes the whole screen, then measure the same interaction again. - Run gesture-driven and layout animations in React Native Reanimated worklets, then check that JavaScript work does not interrupt the interaction.
- Request images near their rendered dimensions and declare width and height before loading. Use a caching loader such as
expo-imageto prevent reflow and repeat downloads. - Capture the same scroll, transition, and image-heavy flow on selected lower-tier and mid-tier devices with React Native DevTools or a platform profiler.
Set budgets from those recordings instead of copying a universal frame-rate, memory, or compression target. Device refresh rate determines the frame budget, while image format, screen density, and content determine a useful transfer-size limit.
Record a baseline before changing code:
- Frame time and dropped frames
- JavaScript stalls and memory high-water mark
- Image transfer size and cache hits
Set an acceptable threshold for each metric, change one variable, and rerun the identical flow.
9. Compare and Refine Features
Compare the web and native builds by outcome: the same task must still reach the same result on mobile.
A desktop interaction may need a different mobile pattern, but the underlying task must still finish on mobile.
Use this parity checklist during the comparison:
- Hover states: Replace menus, tooltips, previews, and hover-only controls with a visible action, tap, long press, or contextual sheet.
- Complex tables: Prioritize essential fields, then use horizontal scrolling, cards, filters, or a detail screen without hiding required data.
- File uploads: Support the relevant document, photo, or camera picker with progress, cancellation, validation, and failure states.
- Authentication: Test sign-in, sign-out, recovery, session restoration, and failed authentication inside the mobile navigation model.
- Navigation: Map every destination to a stack, tab, drawer, or modal, then verify back actions and deep links.
- Offline behavior: Define readable data, queued writes, retries, and the message shown when fresh data is unavailable.
- Permissions: Ask in context, handle denial, and provide a route to device settings when access is required.
- Accessibility: Check screen-reader labels, focus order, touch spacing, text scaling, and non-color status cues.
- Core transactions: Run checkout, booking, submission, or data changes from entry to confirmation, including cancellation and retry.
- For apps selling digital subscriptions on iOS, Bilt Payments can manage in-app purchases, entitlements, and receipt verification; previews and development builds support mock purchase, restore, and entitlement testing without a real charge.
Bilt can inspect the web and mobile codebases side by side to identify parity gaps. A person still needs to run the acceptance check and decide whether the mobile outcome matches the original task.
A conversational refinement loop looks like this:
- Name one gap and its expected mobile behavior: “Replace the account-row hover menu with a tap action sheet that keeps edit and archive available.”
- Let Bilt update the relevant mobile component using the linked repository for source context.
- Inspect the change in Bilt's native simulator and run the affected flow from entry to completion.
- Prompt the next correction with a specific observed problem, then update the parity row only after the acceptance check passes.
10. Test on Mobile Devices
Begin with virtual devices for interface checks, then validate real-device behavior on physical iOS and Android phones.
Virtual devices speed up interface checks. Physical phones expose permission prompts and interruption behavior.
- Fast iOS checks: Use Bilt's iOS simulator streaming for browser-based screen and flow checks.
- Fast Android checks: Test Android quickly on a real phone through the Expo Go QR flow. Bilt's streamed native simulator is for iOS.
- Physical-device checks: Scan a QR code on a phone to test hardware, permissions, interruptions, and real input behavior.
- Native debugging: Use Xcode or Android Studio for native logs, build configuration, emulators, or a connected phone.
Bilt's instant preview reflects interface changes during iteration. Use local native tooling for deeper native debugging or build-configuration access.
Treat browser-streamed simulators and cloud emulators as the fast feedback loop. They remove local native SDK setup from routine screen testing.
For physical testing, use Bilt's QR code testing with Expo Go on an iOS or Android phone. Test on iPhone installs a real native binary with full APIs on a USB-connected iPhone and requires macOS and Xcode. Expo Go cannot load every custom native module, so use an Expo development build when the project changes native code or configuration.
Run the same core flow on every phone type you plan to support. A successful emulator run does not confirm real-device behavior during interruptions or hardware input.
Check each release candidate on physical hardware for:
- Verify touch targets and gesture handling, including nested scrolling.
- Open the keyboard and confirm that inputs remain visible, focus moves correctly, and dismissal works.
- Request camera and location access at the intended moment. Confirm that push-notification prompts and denied permissions recover cleanly.
- Background the app, return from a phone call, and reopen it. Confirm that the expected screen and data persist.
- Simulate low-power mode and poor connectivity. Check that the interface stays responsive and data is not half-saved.
Beyond this device checklist, tools for testing mobile releases include automation frameworks and real-device clouds.
11. Export and Plan Updates
Export the mobile codebase to a repository you control, then set release rules for native binaries and web-layer deployments.
Export the mobile project to a GitHub repository owned by you or your organization. Bilt pushes platform edits to that repository and pulls GitHub commits back into the project through two-way synchronization.
The repository contains the React Native project, so you can clone it and continue in your preferred native IDE or editor. Git history records review decisions and supports rollback.
Plan updates according to the layer that changed:
- Native binary: Native modules, permissions, and core runtime upgrades require a newly compiled iOS or Android build.
- Web layer: A PWA or web wrapper can publish interface and business-logic changes through its web deployment.
- Wrapper container: Plugin compatibility or container changes still require a new binary, even when the main interface loads from the web.
Service-worker caches and WebView behavior can delay or alter web-layer updates. Test a clean install and an existing installation before publishing.
Connect the exported repository to GitHub Actions or another CI/CD system for repeatable tests and builds. Choose release triggers and approvals that match the risk of each change.
Define the policy in the repository:
- Triggers: Decide whether every merge, a release branch, or a manual approval starts a build.
- Checks: Run the automated tests your project relies on, then require physical-device QA for hardware-dependent changes.
- Promotion: Separate internal builds from production candidates so a passing build does not publish by accident.
- Ownership: Name who reviews failures, approves releases, and rolls back a faulty update.
Revisit the policy after adding native modules or changing release ownership. The next step is producing release builds, which the following section covers.
12. Build and Publish Releases
A release starts with signed iOS and Android builds, then moves through each store's developer console and review process.
The manual and Bilt paths share store requirements but use different build workflows:
- Prepare the store accounts and app identity. Create the required Apple Developer and Google Play developer accounts, then choose a unique iOS bundle identifier and Android package name. Prepare store assets at the required dimensions and complete the privacy and compliance forms.
- Generate signed production builds manually.
- iOS: Build iOS with Xcode, then manage distribution certificates and provisioning profiles.
- Android: Build with Gradle, create an upload keystore, and export a signed Android App Bundle (
.aab). - Environment: Keep local settings aligned with the production build environment, since mismatches can break a release that worked locally.
- Upload the iOS build. With Bilt, the cloud workflow handles build generation and signing configuration, including identifiers, certificates, and provisioning. Connect Bilt to App Store Connect so it can upload the binary to TestFlight. After Apple processes the uploaded build, the Bilt Build tab's TestFlight button opens the app's TestFlight page to manage testers. In App Store Connect, select the release candidate before sending it to App Store review.
- Upload the Android bundle. Confirm the final package name, then generate the signed
.aabwith its upload key. Bilt sends the signed.aabto Google Play's internal testing track only when Play publishing is ready. The first release may require you to download the package and upload it manually in Play Console. - Submit the release. Complete the listing and policy answers, select the correct production build, and send it for review. The developer-account owner remains responsible for listing accuracy, reviewer communication, policy compliance, and the final release decision.
- Recover from a rejection. Use the store's review message to identify the affected build or listing, then correct it and resubmit. Bilt keeps release configuration in one workflow, so a rejection does not require rebuilding the delivery process from scratch. Bilt automatically increments iOS build numbers by checking the latest TestFlight build before numbering the next one.
Before submission, confirm:
- Developer memberships and connected store accounts are active.
- Bundle and package identifiers match the intended listings.
- Signing certificates, provisioning profiles, and the Android upload key are valid.
- The production build is selected in App Store Connect or Google Play Console.
- Store assets, privacy disclosures, and policy answers are complete.
Convert with Capacitor
Capacitor keeps the React app as the web layer while iOS and Android projects package it for each store. Configure the web asset directory, synchronize each production build, and compile with Xcode or Android Studio.
Keep the browser build runnable throughout the conversion. After each React change, rebuild the production assets and synchronize them before testing the native projects.
- Install and initialize Capacitor. Add
@capacitor/coreand@capacitor/cli, then install@capacitor/iosand@capacitor/android. Runnpx cap initand set the app name, reverse-domain app ID, and production web asset directory. - Create the native projects. Run
npx cap add iosandnpx cap add androidonce for each target platform. Capacitor creates projects that can be opened and compiled with the native toolchains. - Build and synchronize the web app. Generate the production React bundle, then run
npx cap sync. The sync command copies the bundle into each native project and updates native plugin dependencies. - Add device integrations. Install the required Capacitor plugins for capabilities such as camera access, geolocation, push notifications, or local storage. Import each plugin in React and handle unavailable, denied, and interrupted states in the interface.
- Declare permissions. Add human-readable usage descriptions to the iOS project's
Info.plistand the required declarations to Android'sAndroidManifest.xml. Request permission when the feature is needed rather than immediately on launch. - Compile the native projects. Run
npx cap open iosornpx cap open android, select the signing team and application ID, then create a release build in Xcode or Android Studio. - Test the installed release. Verify startup, navigation, offline behavior, plugin calls, permission denial, deep links, and push-token registration on physical devices. Repeat the production build and
npx cap syncafter every web-code change. - Prepare the store submission. Confirm signing, versions, icons, launch assets, privacy disclosures, screenshots, and support URLs. Review the current Apple App Review Guidelines rather than assuming every wrapped site will qualify.
Fit and trade-off: Capacitor suits teams that want to keep a React web layer while adding native projects and plugins. You still own native setup, permission files, physical-device testing, and store review.
Build the PWA Route
A React PWA needs a web app manifest and HTTPS, plus a service worker when offline caching is required.
If you build the converted project in Bilt, Publish to web can release the current Bilt app as a PWA.
Bilt adds the PWA setup, builds and uploads the app, and serves it over HTTPS at a permanent web.bilt.me address without a separate hosting account.
The linked React repository remains a read-only reference rather than the site Bilt deploys.
Treat installability and offline behavior as browser features that need separate device testing. A successful desktop audit does not confirm the same behavior on iOS and Android.
- Create the web app manifest. Define the app name, launch URL, display mode, and colors in the manifest. Include PNG icons at 192×192 and 512×512 for Chromium installability, then add a maskable icon if your supported Chromium browsers use one.
- Add the mobile metadata. Link the manifest and icons from the document head. For iOS, add
apple-touch-iconandapple-mobile-web-app-capabletags so a home-screen launch can use the supplied icon and standalone presentation. - Serve the production site over HTTPS. Deploy the React build to an HTTPS origin and keep the manifest, icon, and service-worker URLs inside the intended scope. Localhost can be used during development, but public installation needs a secure origin.
- Register a service worker. Pre-cache the application shell and use explicit runtime rules for fonts, images, API responses, and navigation requests. Workbox can implement Cache First or Stale While Revalidate behavior without hand-writing every cache operation.
- Design the offline state. Store static responses in the Cache API and structured user data in IndexedDB when it must remain available on the device. Queue offline writes, define retry behavior, and resolve conflicts before synchronizing with the server.
- Deploy and verify installation. Publish the manifest, service worker, icons, and production assets together, then test with a clean browser profile and a physical phone. Installation may appear as a browser prompt or menu action; on iOS, users add the app from Safari's Share menu.
- Control service-worker updates. A changed service-worker file installs in the background and normally waits until existing app tabs close. Show a reload prompt, or use
self.skipWaiting()only with a coordinated refresh strategy that prevents old pages from requesting incompatible new assets. - Verify browser-specific behavior. Check installation and offline launch on each supported browser. Confirm cache updates separately; on iOS 16.4 or later, Web Push requires permission for home-screen apps.
Fit and trade-off: A PWA suits products that need link-based distribution and web-hosted updates without packaging a native binary. Browser and OS support determines the installation flow and available device access, so test required capabilities before choosing this route.
Set Up a Managed Wrapper
The native shell loads your production React URL, while a bridge exposes approved device features to the web app. You still validate authentication on physical devices and distribute a cloud-built binary.
- Point the shell at production. Use the HTTPS production URL, allow only trusted origins, and map deep links back to the correct route. Set a custom user-agent string only when your server needs to identify app traffic.
- Prepare the shell assets. Generate platform-sized app icons, splash screens, and a branded loading view. Add an offline fallback with a retry action so a dropped connection never leaves a blank screen.
- Initialize the bridge. Load the wrapper's bridge library during client startup, then expose device functions through a small adapter. Check each capability before calling it so the web version can use a safe fallback.
- Preserve authentication. Return OAuth and social-login callbacks through an approved app link or custom URL scheme. Keep tokens in secure native storage and restore the session before React renders a protected route.
- Connect device features. Register push tokens with your backend, request camera access at the point of use, and place biometric checks behind the bridge adapter. Add the required permission text to each platform configuration.
- Make the app behave like mobile software. Add platform-aware navigation and useful touch feedback. Handle safe areas, keyboard overlap, pull-to-refresh, offline transitions, backgrounding, and resume events.
- Validate on physical devices. Test login redirects, cold starts, interrupted uploads, denied permissions, slow networks, and gesture conflicts on every supported operating system. Repeat the checks with a signed release build because development settings can hide production failures.
Apple reviews whether the app provides a useful experience rather than a thin repackaging of a website. Check the current App Review Guidelines and make the mobile behavior clear to both users and reviewers.
Keep the update boundary clear:
- Live web update: Hosted content may update through the web deployment only when the change follows current store rules and stays within the approved app experience. Review policy-sensitive changes before publishing them remotely.
- Binary release: Native permissions, app icons, splash screens, push certificates, bridge plugins, and wrapper SDK changes require a new signed build and store submission.
- Release check: Test every web deployment inside the current store binary so new JavaScript does not call a bridge method that existing installs lack.
Troubleshoot Conversion Problems
Use the symptom table to isolate the failing path, then test the likely cause before changing code.
- Blank screen or startup error: Find the first browser global in the stack trace. Isolate browser-only code behind a platform boundary, replace it with a native implementation, or remove it from the mobile bundle.
- Build fails after adding a package: Check whether the package expects Node APIs or unsupported native code. Replace it, isolate the web path, or pin a supported version.
- Login returns to sign-in: Trace the callback and token write. Register the app link or URL scheme, then restore the token from secure storage.
- Backend updates but the screen stays stale: Reproduce the reconnect or resume path. Revalidate on foreground and reconcile queued offline writes.
- Buttons ignore taps or content is clipped: Inspect overlapping views, fixed sizing, and safe areas. Use
Pressableor an appropriate touch component withonPress. - Release build crashes: Compare production variables, permissions, endpoints, and minification with development. Inspect device logs and source maps.
- Store review rejects the build: Read the exact review note. Add required mobile behavior, working demo access, permission explanations, or corrected disclosures.
Start with one failing path and record the last completed step. For an authentication loop, trace the path from browser return to session restore, checking the app-link handoff and token write between them.
Production-only failures appear in the signed binary. Reproduce the crash on a physical device, capture the device log, then compare release permissions and environment values with the development build.
For a store rejection, answer the review note directly. Include working demo credentials, explain each requested permission, and point reviewers to the mobile-specific behavior they can test.
Monitor Post-launch App Health
Monitor crash reports and release behavior to catch regressions before they affect more users.
Split the dashboard into urgent stability signals and slower product or store trends. Set alerts against each app's baseline; universal thresholds create false alarms.
Track a small set of signals by platform and release version:
- Stability: Crashes, handled errors, and failed launches.
- Performance: Startup time, slow screens, frozen interactions, and memory pressure.
- Critical flows: Authentication, checkout, uploads, API failures, and synchronization errors.
- Release health: Version adoption, staged-rollout changes, and regressions against the previous build.
- Store feedback: Ratings, review themes, and reviewer messages from App Store Connect and Google Play Console.
Pull store data from App Store Connect and Google Play Console, then join it with app telemetry by release version. A rating dip matters more when reviews mention the same login failure recorded after a migration.
- Log and tag. Record the app version, platform, device, endpoint, and user journey so each incident has enough context to reproduce.
- Measure against the baseline. Check the new release against normal behavior and the previous version. Page urgent failures; route slower funnel or sentiment movement into trend review.
- Contain the regression. Pause Google Play staged rollouts or iOS phased releases when the new build degrades health. Roll back where supported.
- Choose the fix path. Use an over-the-air update only for eligible JavaScript fixes. Native code changes require a new store release.
- Record the defect. Link the issue to its affected release and the signal that exposed it so the same migration bug is easier to recognize later.
Build a Native App Faster
Bilt gives you a managed path from an existing React repository to a separate React Native app. You keep the code while Bilt handles the conversion workspace, testing tools, cloud builds, signing, and store-upload workflow.
A first working build can take a few minutes, depending on the app’s complexity. Store processing and review take place separately on Apple’s and Google’s timelines.
Refine screens and behavior through conversation, then test changes in the browser preview or by scanning a QR code on an iOS or Android device.
Ready to turn your React web app into a native mobile app? Connect the repository and start building free. No credit card is required to start.
FAQs
Can I convert JSX code directly into an APK?
No. JSX must be bundled inside a React Native project or a web-wrapper project such as Capacitor; Android cannot run browser JSX or DOM elements directly as an APK.
Will React Router still work in the mobile app?
React Router can remain inside a Capacitor-style web shell. A native React Native app normally maps routes to screens and deep links with React Navigation or Expo Router.
Is a PWA enough, or do I need an app store listing?
A PWA is enough when browser installation and link-based distribution meet your needs. Choose an app-store release when store discovery, native distribution, or required device integrations matter.
Is React Native the same as React?
No. React renders web elements into the browser DOM, while React Native maps components such as View and Text to native iOS and Android views at runtime.
Do you need a Mac to build the iOS app?
You need a Mac for local Xcode compilation. A cloud build service can compile and sign iOS binaries without a local Mac, but store distribution still requires the appropriate Apple developer account and credentials.